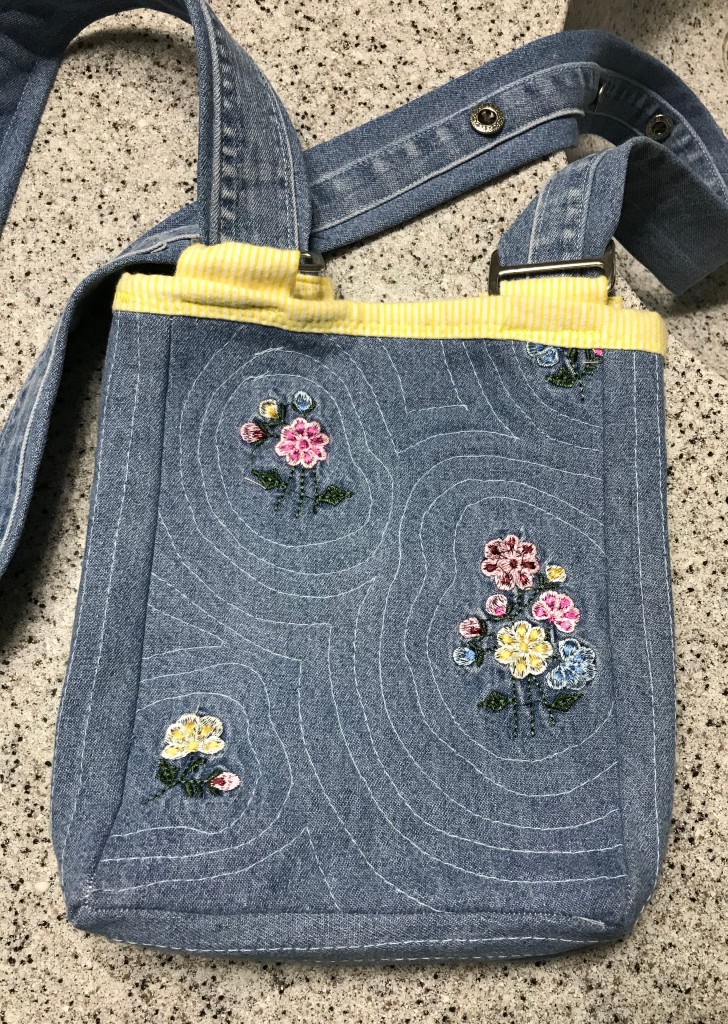
Quilted embroidered crossbody purse

I enjoy searching through a thrift store, not knowing what I will find, and what project it will be perfect for. I keep a list on my phone of certain items I’m specifically looking for, like the photo frames in 5×7 or 4×6 sizes that now hold family photos on my wall. Other things seem to jump into my arms and I take them home.

A few days ago I noticed a tub of jumbled shirts. Each one could have stains, holes, or tears, and the price was 25 cents each. The cashier saw me collecting some shirts and she said the more I buy, the better the deal she could give me. I love using scraps of shirts in my projects. One current project is to repair a quilt I had bought at a garage sale. I needed chambray fabric to add sashing between large blocks of flannel fabric, so one of the shirts I picked up was a ladies’ embroidered chambray shirt.

Now that I have looked it over better, I absolutely love the embroidery. Shortcut! I wanted to make another crossbody purse, but add some dimension so all the items I usually carry will fit. I decided to use the embroidered panels as the front and back.

I cut the embroidered panels to the size I wanted, in my case 6 1/2 by 8 1/2 inches. I wanted a thickness of about 2 inches for the sides, so I cut two, 2 1/2 by 8 1/2 inches. To keep it simple, I won’t have a fold-over flap on this one. I like quilting the body of the purse so it is soft, but keeps its shape easily. I cut corresponding lining pieces and (again) flannel as the batting.

I chose to mimic the boundaries of each embroidered section, adding lines as if seeing ripples in water. I used my serger to sew the pieces together. All that was left to do was to bind the top edge and add a strap. For crossbody, of course, the strap needs to be longer than for a shoulder bag.

Real life, in my case, means that quite often my idea is great in theory but something is lost in the translation. I thought it would be great to use the button and buttonhole plackets, sewn to a wider strip of fabric.

I used yellow flannel to bind the top edge and added the strap. The placement is wrong, the width of the strap is way too wide, and the buttons get in the way of the strap sliding through the hardware. Stay tuned. I love the purse otherwise, and I’ll be reworking a strap for it.

Just the essentials

Ready to go to the auction!

As I said, I wanted a small crossbody purse to wear to auctions. I didn’t want everything I usually carry in my purse, because it would be too heavy. Thus, the name, Essential. This worked up so well that I may sew some companion zip pouches and crossbody purses to sell.

I was glancing through my stash and this yellow/blue plaid men’s shirt caught my eye. I had thought to remake it into a blouse for me, but I couldn’t resist using it to make this purse.

A messy workspace is a sign of a creative mind…..right?

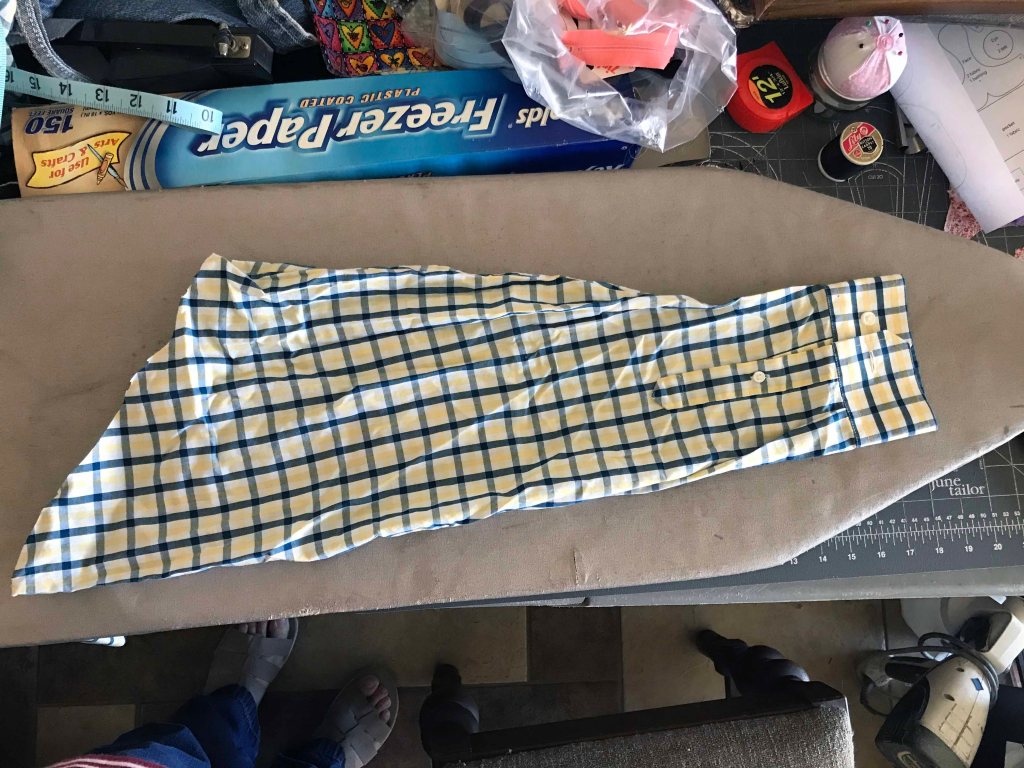
First I cut off the sleeves. I wanted to use the cuffs as the top edge of the purse. I love the shape, and it has the stabilizer inside. I cut the cuff with a little of the sleeve fabric still attached, for the seam allowance.

I didn’t want my purse as wide as the cuff originally, so I made a seam in the middle. I pressed the seam open and topstitched.

Before and after

I decided on the dimensions for my purse, and cut 2 of the shirt fabric and 2 of a muslin for the lining. I wanted it thinner than what it would be using cotton batting, so I found a scrap of flannel and cut 2 of the flannel. It has a faint floral pattern, but it won’t show through the plaid.

I layered the fabrics and pinned, then stitched some straight line quilting.

I sewed the cuff to the top of each body piece, topstitching to finish. I had trimmed the fabric and serged it for a neater seam.

I often find leftovers of binding. Either in a bag of thread and notions at a thrift store, given to me by others, or part of the treasures in a sewing basket. I pulled out some blue binding, but the color wasn’t right. I had almost the exact amount of white. You can see I need a little more practice making mitered corners.

Now for the strap. I actually have a basket of men’s ties, and I thought it would be perfect to use a blue/yellow tie with the purse. I had one, with a shape on it that looks like New Jersey! After trying it on, I didn’t like it after all, so I dug in another box of potential purse straps. I found a blue trim that is a little stretchy, just the right width, and a beautiful navy blue. I cut small pieces of the shirt fabric and made tabs at the ends so it won’t unravel.

I attached the tabs to the inside of one cuff piece, then topstitched so it was sandwiched between both cuff pieces.

I really love it! I can’t wait for the local auctioneer to have more auctions I can attend. I like to purchase the lonely sewing machines that others don’t bid on, and get them oiled, repaired, and working again. My husband realizes that if I see one, it will probably come home with us.

Sleepless on steroids

I’m back in cancer treatments, and that’s part of the reason for fewer blog posts. On Mondays I take 40mg of a steroid in the morning. By Monday night I have no ability to fall asleep. A few weeks ago I started getting up and heading to the (what else?) sewing room. I fixed buttonholes in my husband’s favorite flannel overshirt, created some Frankestein shirts, and quilt blocks.

Frankenstein shirts is what I call combining 2 or more shirts to fit the parameters I need for my upcoming stem cell transplant. I’ll have a central line (kind of like an IV in the upper chest) and I’ll need my shirts to open in the front to be able to get them on and off without disturbing the line. I’m never able to find cotton button-down shirts that don’t gap at the bust and I’m more comfortable in knits, so I’m working with what I find. I use thrift store purchases, so I don’t feel bad putting something in the rag bag if I can’t stand how it turns out.

I found this cute zip-front hooded sweatshirt in gray with sparkles. I added sleeves from a pink shirt I bought online on clearance, but can’t wear something that thin and too revealing. This way it’s cute!

I used a man’s NRA t-shirt, added a button placket by cutting from a discarded gray t-shirt of my husband’s and adding interfacing, along with green sleeves from another of his discarded shirts. I like this one too! Two of the metal buttons I found have the look of a shotgun shell with the brand name Remington.

The quilt blocks I’ve done are the “awareness ribbons”. The first is from Carol Doak, but I didn’t like the proportion of the top part of the ribbon compared to how wide the rest of the ribbon is.

I found another at Connecting Threads   that I liked better. I made one up in purple for Alzheimer’s and one in burgundy for Multiple Myeloma. These make up smaller, so I’ll use them as a basis for mug rugs.

Custom wall quilt for $

I posted a listing on my Etsy site (listed here) of a Signature wall quilt I had made for my aunt and uncle’s 50th anniversary party.

signature quiltEach block has an open space for a signature of the party attendees to sign with a permanent marker. I decided I could make them in custom designs for customers, and I’m pleased to say I have 2 on order to make.

The first customer is giving this to her daughter for college graduation. Her favorite colors are teal and blue, and the customer wanted input into the fabric choices. This meant visiting fabric stores (Not a problem!) and photographing fabrics I thought she would like. With each message containing feedback, I understood her style more and more.

Finally, choices are made, fabric is purchased, and the fun begins! Each block is 3×3 inches finished, and each corner of color starts as a 2×2 inch cut square. I place a color square in a corner and start sewing on the diagonal across that square. Then I simply feed the next one through without breaking the thread. This is called chain piecing or assembly-line sewing, and it is easy and mindless work. I sometimes solve world problems while chain piecing, and sometimes just sing along to the radio.

041718 a

After every square has one color corner, I sew a second color block to the opposite corner. More mindless sewing. I am careful not to have the same fabric design on both corners.

041718 bBecause I hate waste, I then sew a second seam 1/4 inch from the first, toward the outside. If I’m going to cut off the corner, and it results in 2 triangle pieces, they may as well be already sewn into a tiny half-square triangle.

041718 cSew…I mean so, with a little less than 2 hours of work, I have cut 42 white squares, more than 90 color squares (always have extra!), and sewn everything I mentioned already. I only needed 39 squares for the wall quilt, but it’s a good idea to have extra. I will try not to have any one fabric repeated close together, and I can grab one of the extras if needed. I already said I hate waste – the extra blocks will become mug rugs, or a hotpad, or a phone case, or an eyeglass case…or a future project I haven’t thought of yet.

I’ve heard this design called a Wonky Star. The first time I used this block design was in a full-size quilt for my son, using grey and blue. The layout was different, and made an interesting quilt.

dsc06306.jpg
2004 – Full-size bed quilt for Chad

The anniversary quilt was the 2nd time, and these custom quilts are numbers 3 and 4. I plan to regularly show my progress on the custom quilts.


More Quick and Simple Quilts

I have decided, since two of our grandchildren are a bit older, that they will receive the drag-around, kid-friendly quick quilts that I made a few years ago for the oldest ones.  I showed the quilts and the steps here  when I made the frog and the monkey quilts, and here when I made the pink and rainbows quilt. Time to brush up on my fleece quilting, and I have to admit that I referred back to my original postings to see details of what I did.

topstitching
topstitching

Hearts for Lilly
Hearts for Lilly

Monsters for Aidan
Monsters for Aidan

I didn’t get a photo, but with some of the leftover fabrics I made a doll quilt for Lilly’s doll that matches her quilt.

For Lea

Our 7th grandchild was born early, and I was caught unprepared. I finally have the quilt done for baby Lea. I started it soon after I finished Callan’s in June, and I even had a shortcut. I already had a lot of small patches cut, and several were joined in various formations that I could use in this one. I had found a photo on the internet, which is how many of my ideas happen, and knew I wanted to try my own version of it. It didn’t matter what sizes the original poster had made hers, I was using what I already had. I can’t find the person’s blog where I found the design, so I can’t give credit. If you recognize this, please comment and let me refer to your post.

A couple of things slowed me down – I have arthritis in my hands and it is getting worse. The patchwork didn’t bother me, but even machine quilting isn’t comfortable for very long. I even gave up finishing the binding by hand, using the machine only. I also fell and sprained a wrist and the opposite hand’s thumb, so it really hurt to quilt by machine!

So, enjoy the photos, and the baby will soon be enjoying the quilt.
lea quilt1

lea quilt2

lea quilt3

Finish – the Plus Sign Quilt

I’ve been unable to find much time for quilting or patchwork in the past month. My husband and I took a 10-day trip to our future home in Michigan, and that required a couple of days of loading the trailer beforehand. We moved more furniture and belongings (even some fabric and sewing machines!) and had plenty of work to do.

Once we returned home, I knew I had to get the plus sign quilt finished. This is intended for the granddaughter due at the end of the month. I started, then started over a couple of times. I tried to stitch in the ditch, and finally I decided to do something I hadn’t seen before. I call it a stitch in the meandering ditch.

You can see the stitches in this dark patch. I could not accurately quilt a straight line and wanted to follow the color outlines. I think it worked out well.

This photo shows a floral fabric that I used for the baby’s mother’s custom pillow to use in her toe-ring business. Something for the customer’s foot to rest on while trying on rings. I love putting significant fabrics into quilts.

Now I’m on the final 7 weeks of school. I hope to find time to work on the maze quilt, though I still have the second denim circle quilt to finish. Lots on my plate!

More thoughts on making a maze

I am delving deeper into designing a baby quilt with a maze. I found the website Here and Above with a handy rectangular maze generator. I input different numbers until I came up with a maze that I thought I could duplicate in fabric.

I wanted the walls and paths to be equal widths, so I can use a postage stamp-like piecing method. In fact, the more I thought about it, I’ll even use strips of white for the paths, so there isn’t quite as much cutting and sewing to do. I’ll make the walls from brightly colored scraps from my stash, which I’m still trying to whittle down.

Here are some mazes generated:

left entrance, right exit

I think I like this one best. Each time I hit the “back” button I could generate a different random maze, so I did several more.

top entrance, left exit

left entrance and exit

I think that one will not feel balanced. I like the chevron effect in the lower left portion, though.

top entrance, exit

All I could think was, why go through the maze when the goal is next to you? Again, I see a bit of design in it, this time a Grecian key effect.

I’ll have a wide border of a single fabric around the maze, and at the entrance point will be the “thing” and the exit point will have the “goal”. What should they be? Frog and a lily pad? Princess and a castle? Race car and checkered flag? Puppy and a ball? I’m thinking baby quilt, so I’ll take any suggestions you may have. I may like yours better than any of mine!


A maze quilt

It’s not often I think of my own designs for a quilt. I do tried-and-true traditional designs, or I find a photo of a quilt someone has done, figure out the dimensions for myself, and recreate it the way I want to.

I was wandering through Pinterest posts today and the thought hit me – I want to do a child’s quilt that ends up looking like a maze. A real one that the child can trace with her finger and find the prize at the end.

I started my Google image search for the maze design I will use, and found a few possibilities. What I love about the internet is that I can usually find what I’m looking for. These will be good places to begin to design from.

Stay tuned! At some point I’ll be posting photos of the one I have completed!

(more posts about the maze quilt HERE and HERE)

Time to finish a few

The trip out of state was a success! We worked on remodeling the house we will be moving into next summer and arranged for several workmen to do certain jobs there. The problem with travel is that I don’t get any time for sewing.

Now that we’re back, I have projects to start and finish. I’m hoping I’ll finish more than I start!

paper-pieced star quilt

Here is one finish for the next couple of weeks: a baby quilt for my third grandson. I completed the quilt top last fall, but it’s one that I started several years ago. I choose challenging designs so that I can grow and learn, and possibly use it again when I want to. This is a paper-pieced star. I used all star fabrics, in different scales. Last night I pressed and laid out the layers, and pinned them for machine quilting. I received a baby shower invitation in the mail, so that’s my new deadline for completion.