It seems there is no booth available for me at the flea market, at least not for a while. I decided to list what I have made on Etsy. I reopened my shop, Quiltinprogress, just like the blog. So far I have only listed some of the zip pouches, but more pouches and more items will be coming soon.
I have plans to make zipper pulls with beads and charms, coasters and coaster sets, and even tote bags. I will have them priced with free first-class shipping, with the option to pay for Priority to receive your goods faster.
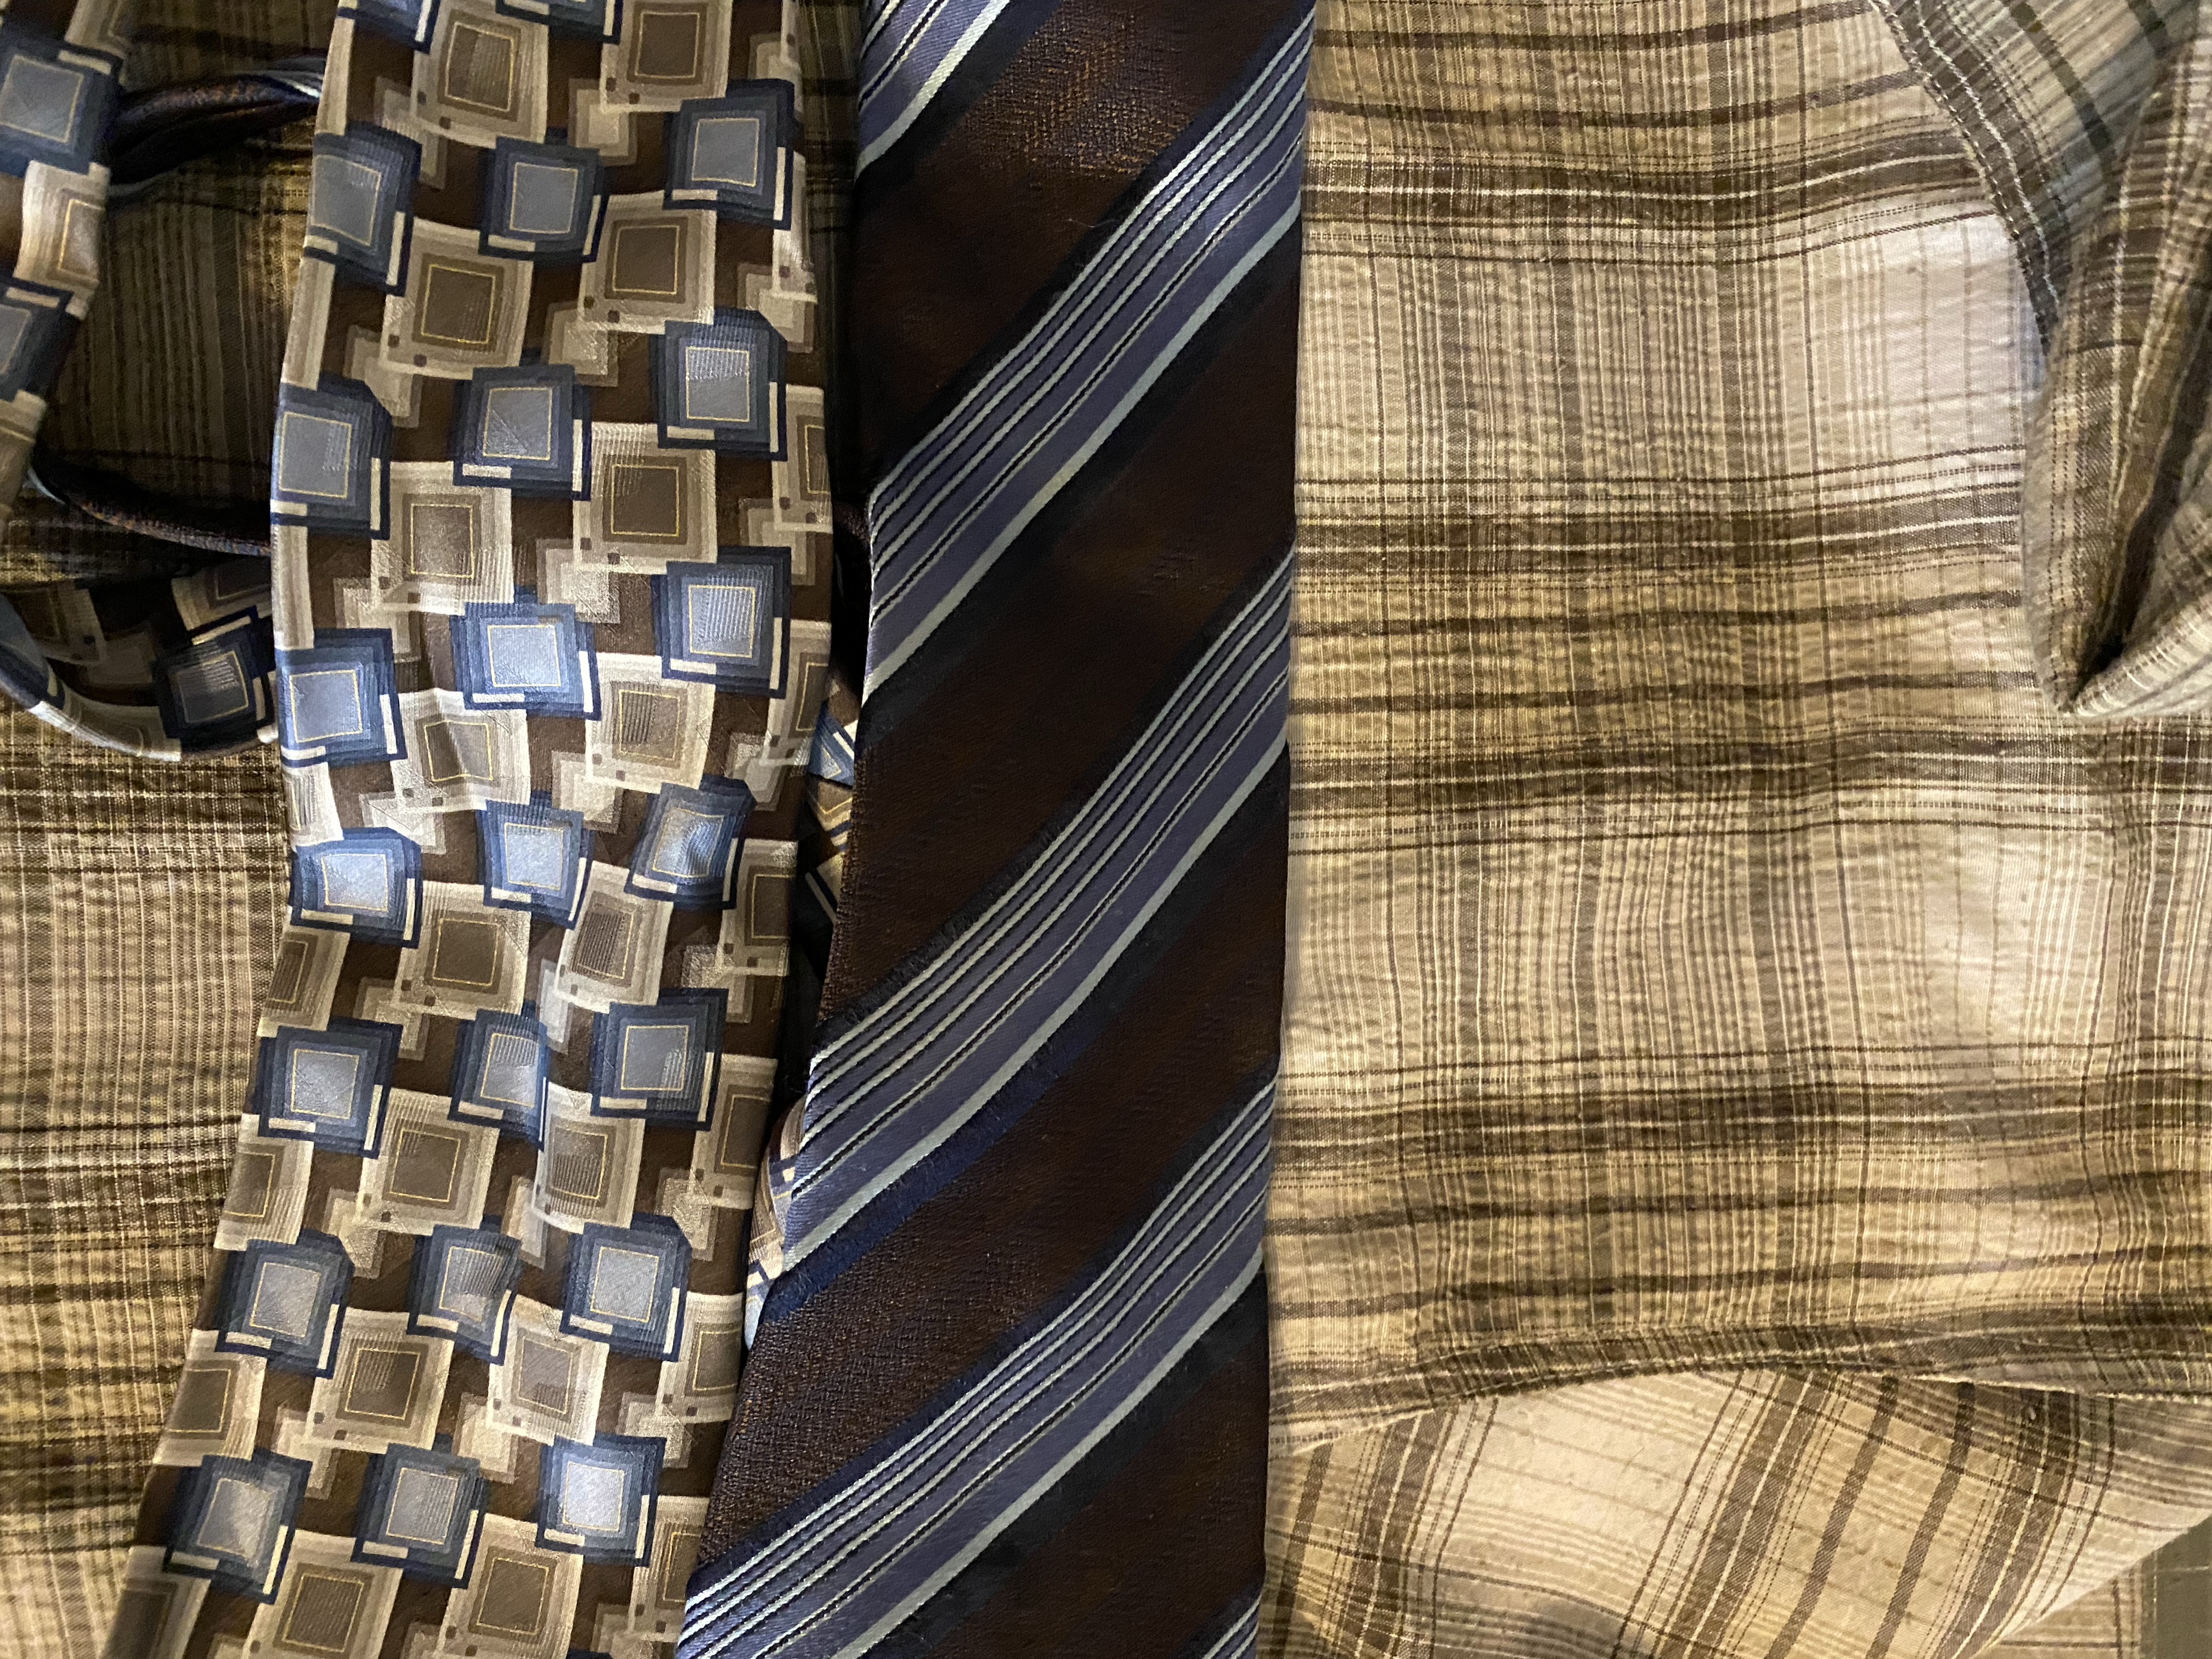
I had seen photos online of tote bags people had made from fabric, using men’s ties for the handles. I decided to go a little further and use one of my late husband’s shirts for the body of the bag.
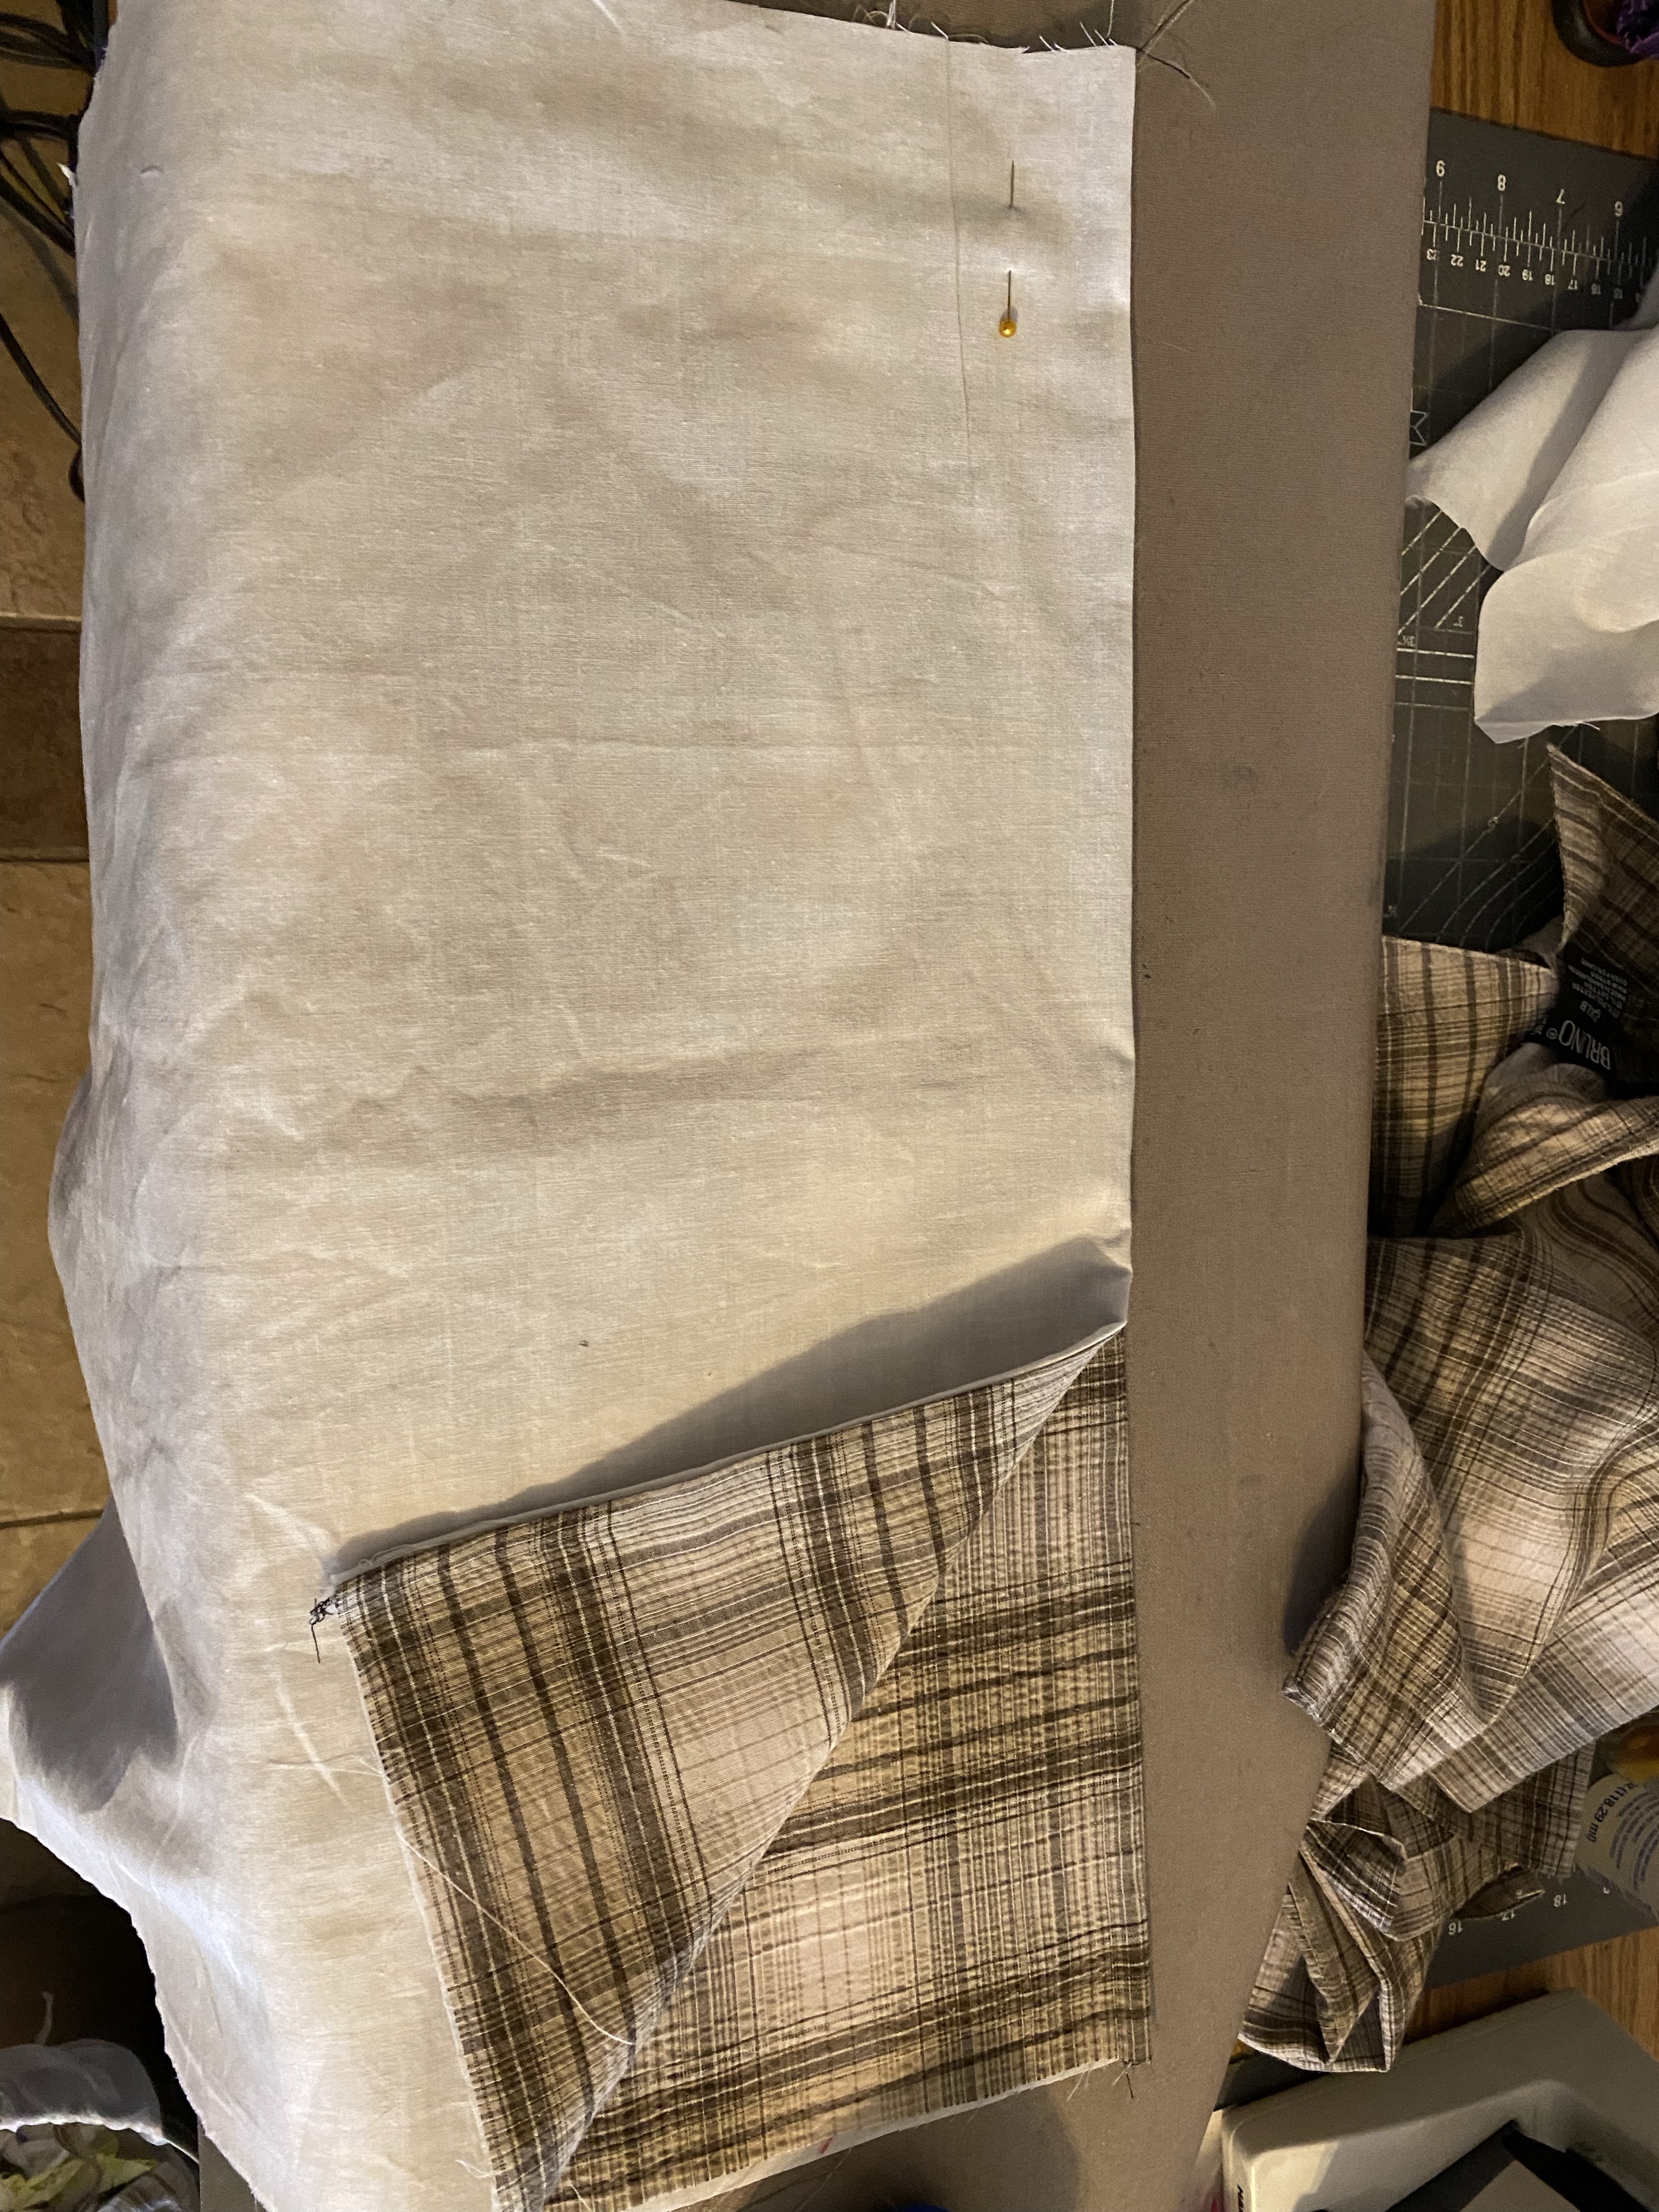
Decide the approximate dimensions of the tote bag. I cut the shirt so that the front pocket was included, but in the end it became decorative only. I may adjust the tutorial in the future so that it would be a functional pocket. I now had two pieces of fabric of the same measurements.
Keeping the button placket in place, flatten the front of the shirt and stitch it closed so it is no longer functional. Cut two pieces of fabric for the lining. Stitch one to each of the front and back pieces. I stitched it so that I had to turn it right side out, making a finished edge at the top.
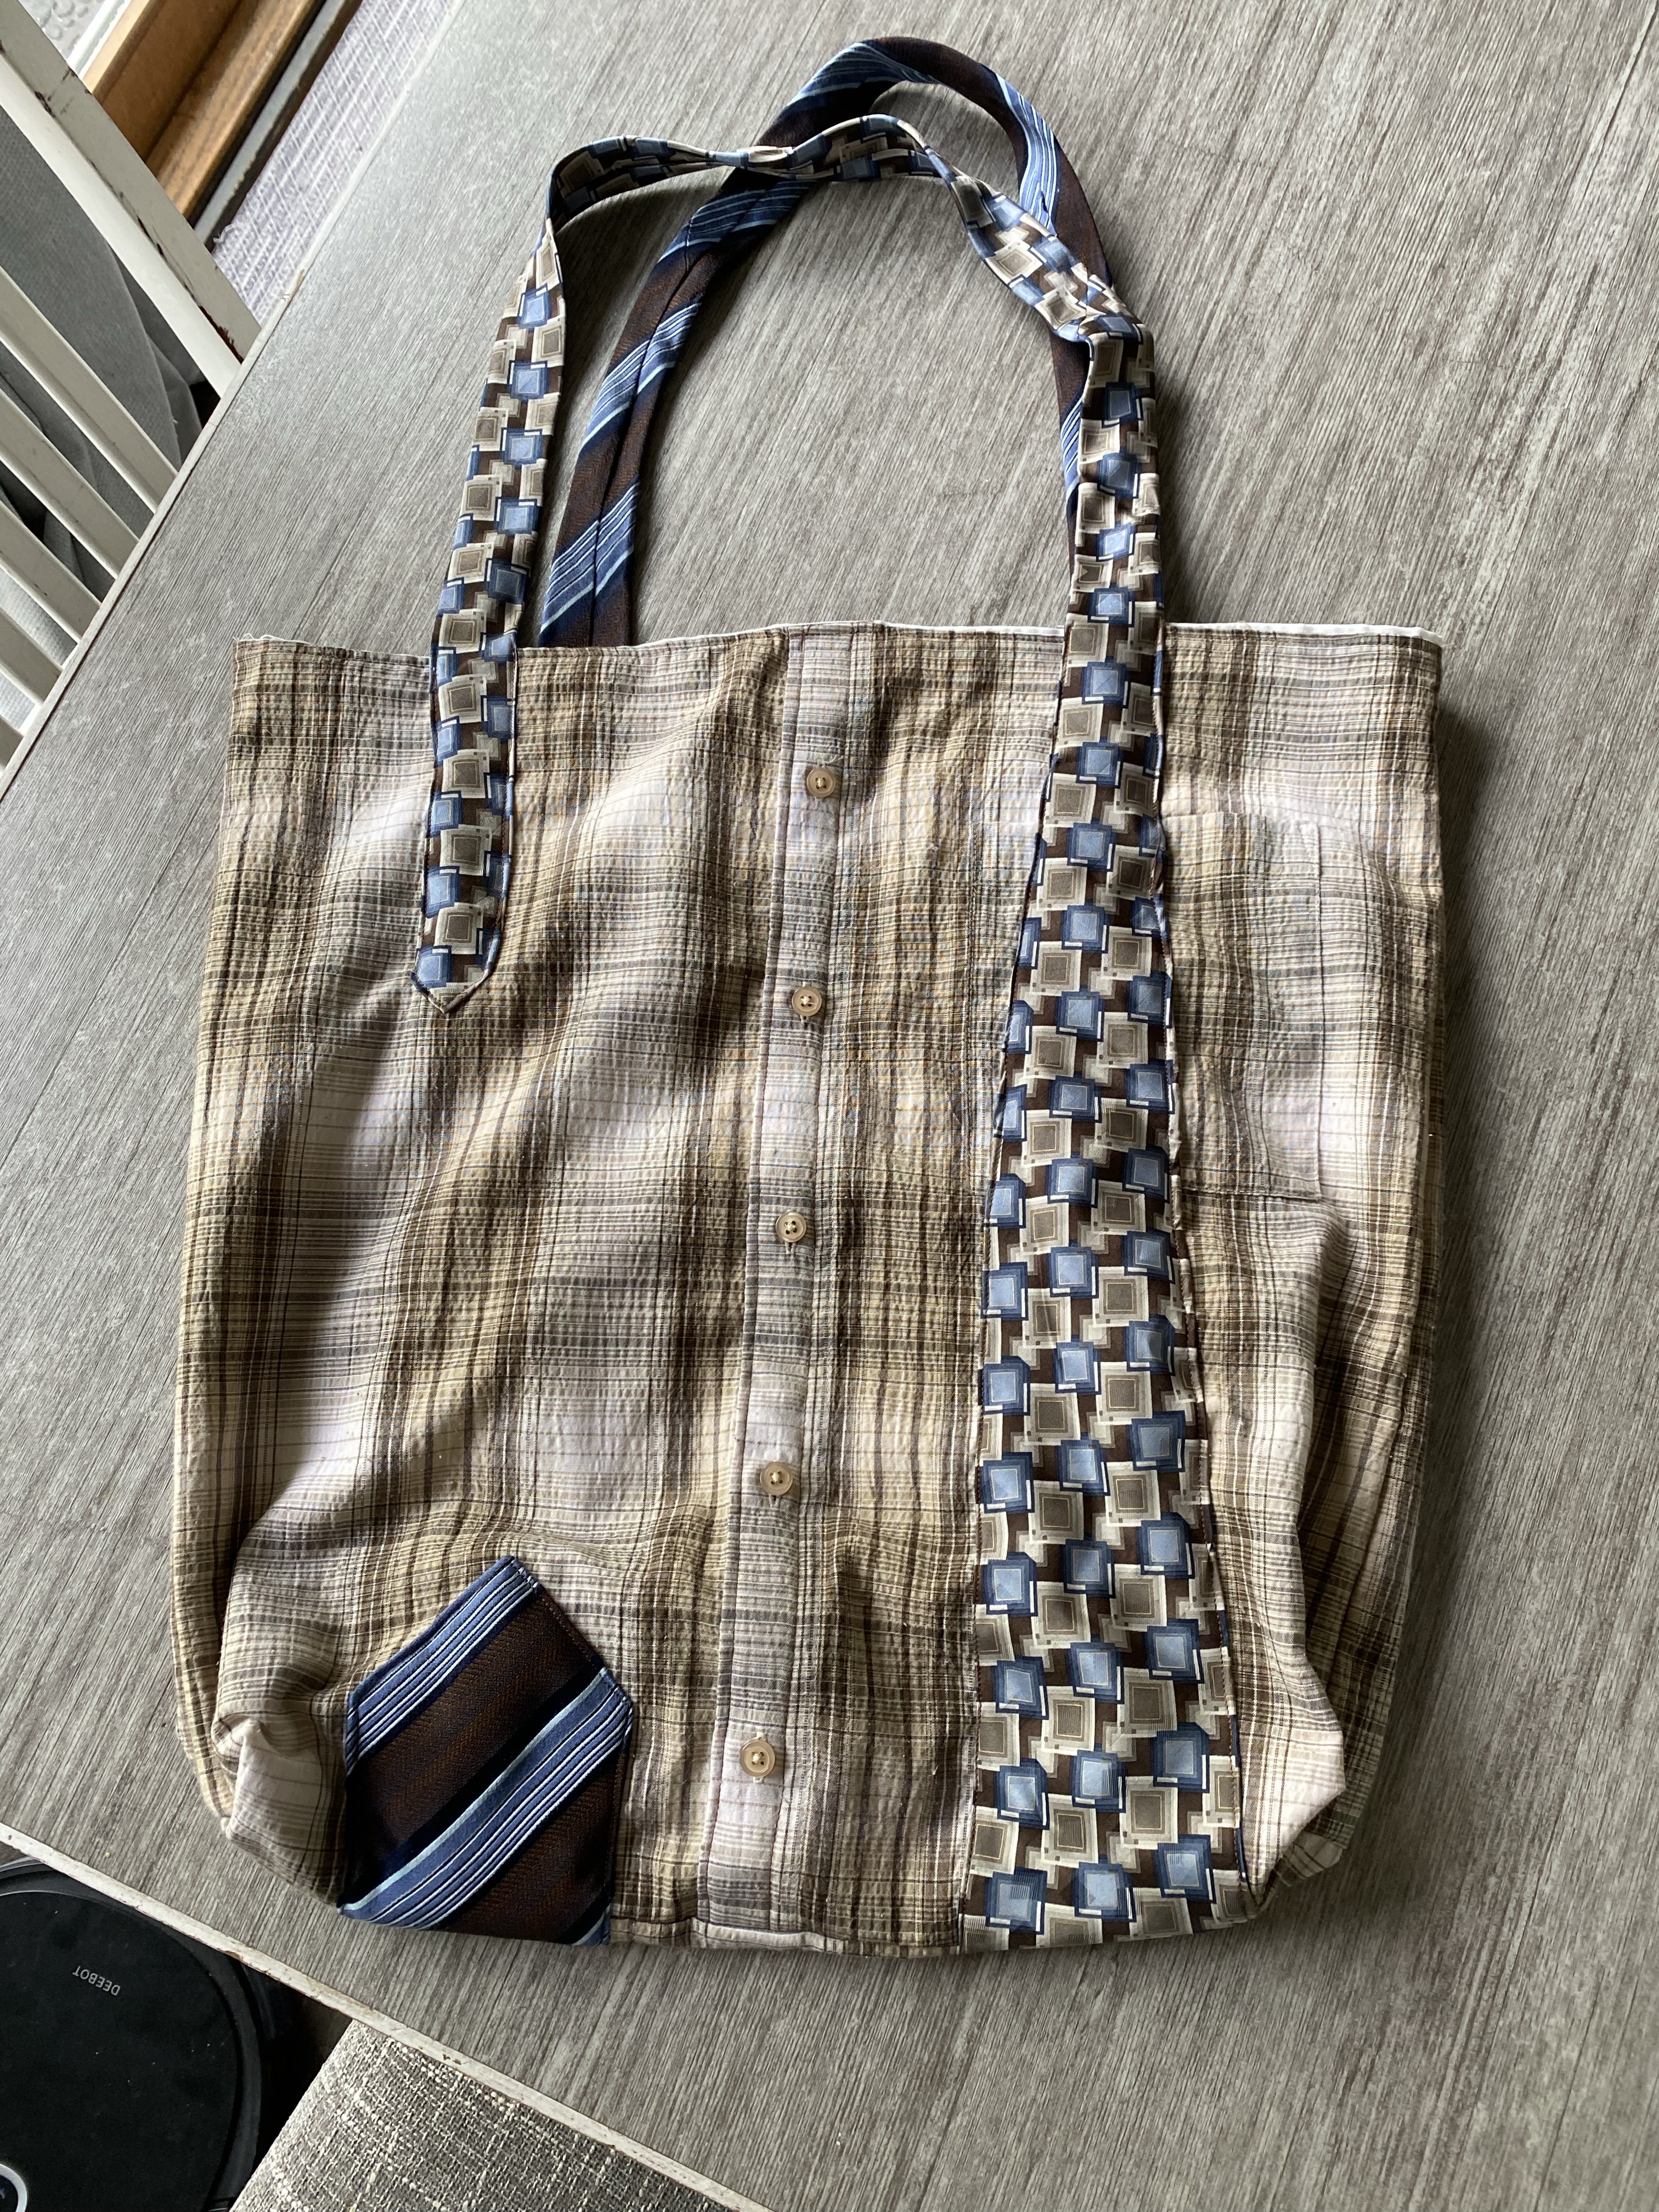
With shirt fabric right sides together, stitch the sides and bottom of the tote bag. I wanted depth to my tote bag. I’ve seen calculations on other blogs for how to square the corners. Here is my simplified version: 1) Decide the depth – I used 4 inches. 2) Make a point at one lower corner, aligning the seam of one side to the seam of the bottom. 3) Use your ruler to measure where 4 inches is edge to edge, with 2 inches at the seam. Mark the line and stitch. Do the same for the other corner.
Start pinning your ties so that the narrow end comes down from the top edge about halfway. Try the bag on your shoulder and pin where the strap becomes the length you want it to be, coming down on the same side of the bag. You may want to adjust how much of each end of the tie is sewn to the bag. Flip the bag over, do the same with the other tie. The wide end of the tie can end before the bottom of the bag or it can wrap under the bottom seam and end on the other side. Topstitch all around the ties.
I am very pleased with how it turned out, except that I think my bag is a bit too big. That is what prototypes are for!
I love sewing. I remember being fascinated when my mom would (rarely) get out her sewing machine to repair something or to make a Halloween costume. When it came time for me to learn, she sent me to 4-H and I had the most wonderful teacher. When my granddaughter said she was interested in sewing, I knew I’d be giving her some lessons.
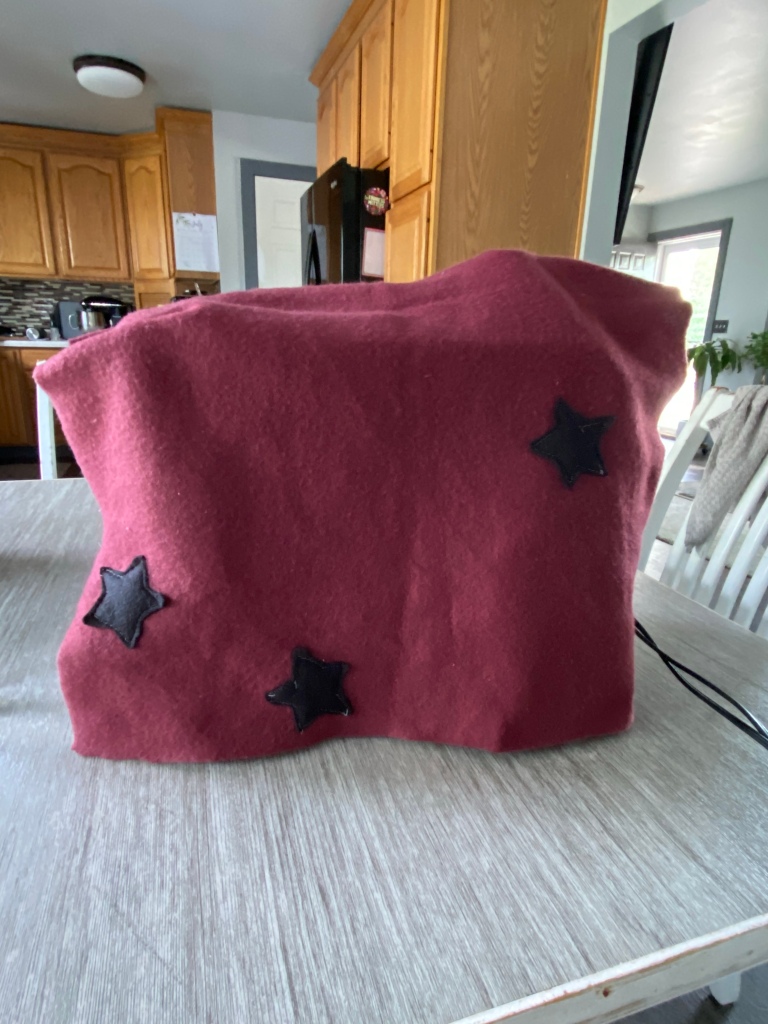
We began a few years ago but didn’t see each other often enough. This summer I’ll be staying overnight at her house once a week, so it’s the perfect opportunity. When I borrowed her machine, it had settings all wrong. I noticed a strong dusty smell also, so the first project we tackled was a dust cover.
I chose fleece so there would be no need to hem or hide raw edges. She chose two colors of my scraps and we set out to make her free-form dust cover. She wanted to decorate it with stars. We found a cookie cutter to trace for her pattern, and she decided on 3 stars per side. The first one was a little awkward for her to stitch on, but by the sixth star she was confident.
Next she wanted the foot pedal to stop sliding away. I found a tutorial for a mat made from drawer liner with a stop buffer at the front end. She requested the fabric design and did a great job. I explained each step and taught what she needed along the way.
Next will be our third lesson. She said she remembered we had begun a doll dress and she wanted to finish it. All that is left to do is a hem and snap fasteners.
Each lesson is taking less than 2 hours, which is a great span of time for an 11-year-old. Each is simple enough she can do the steps herself, and she can be proud of the result.
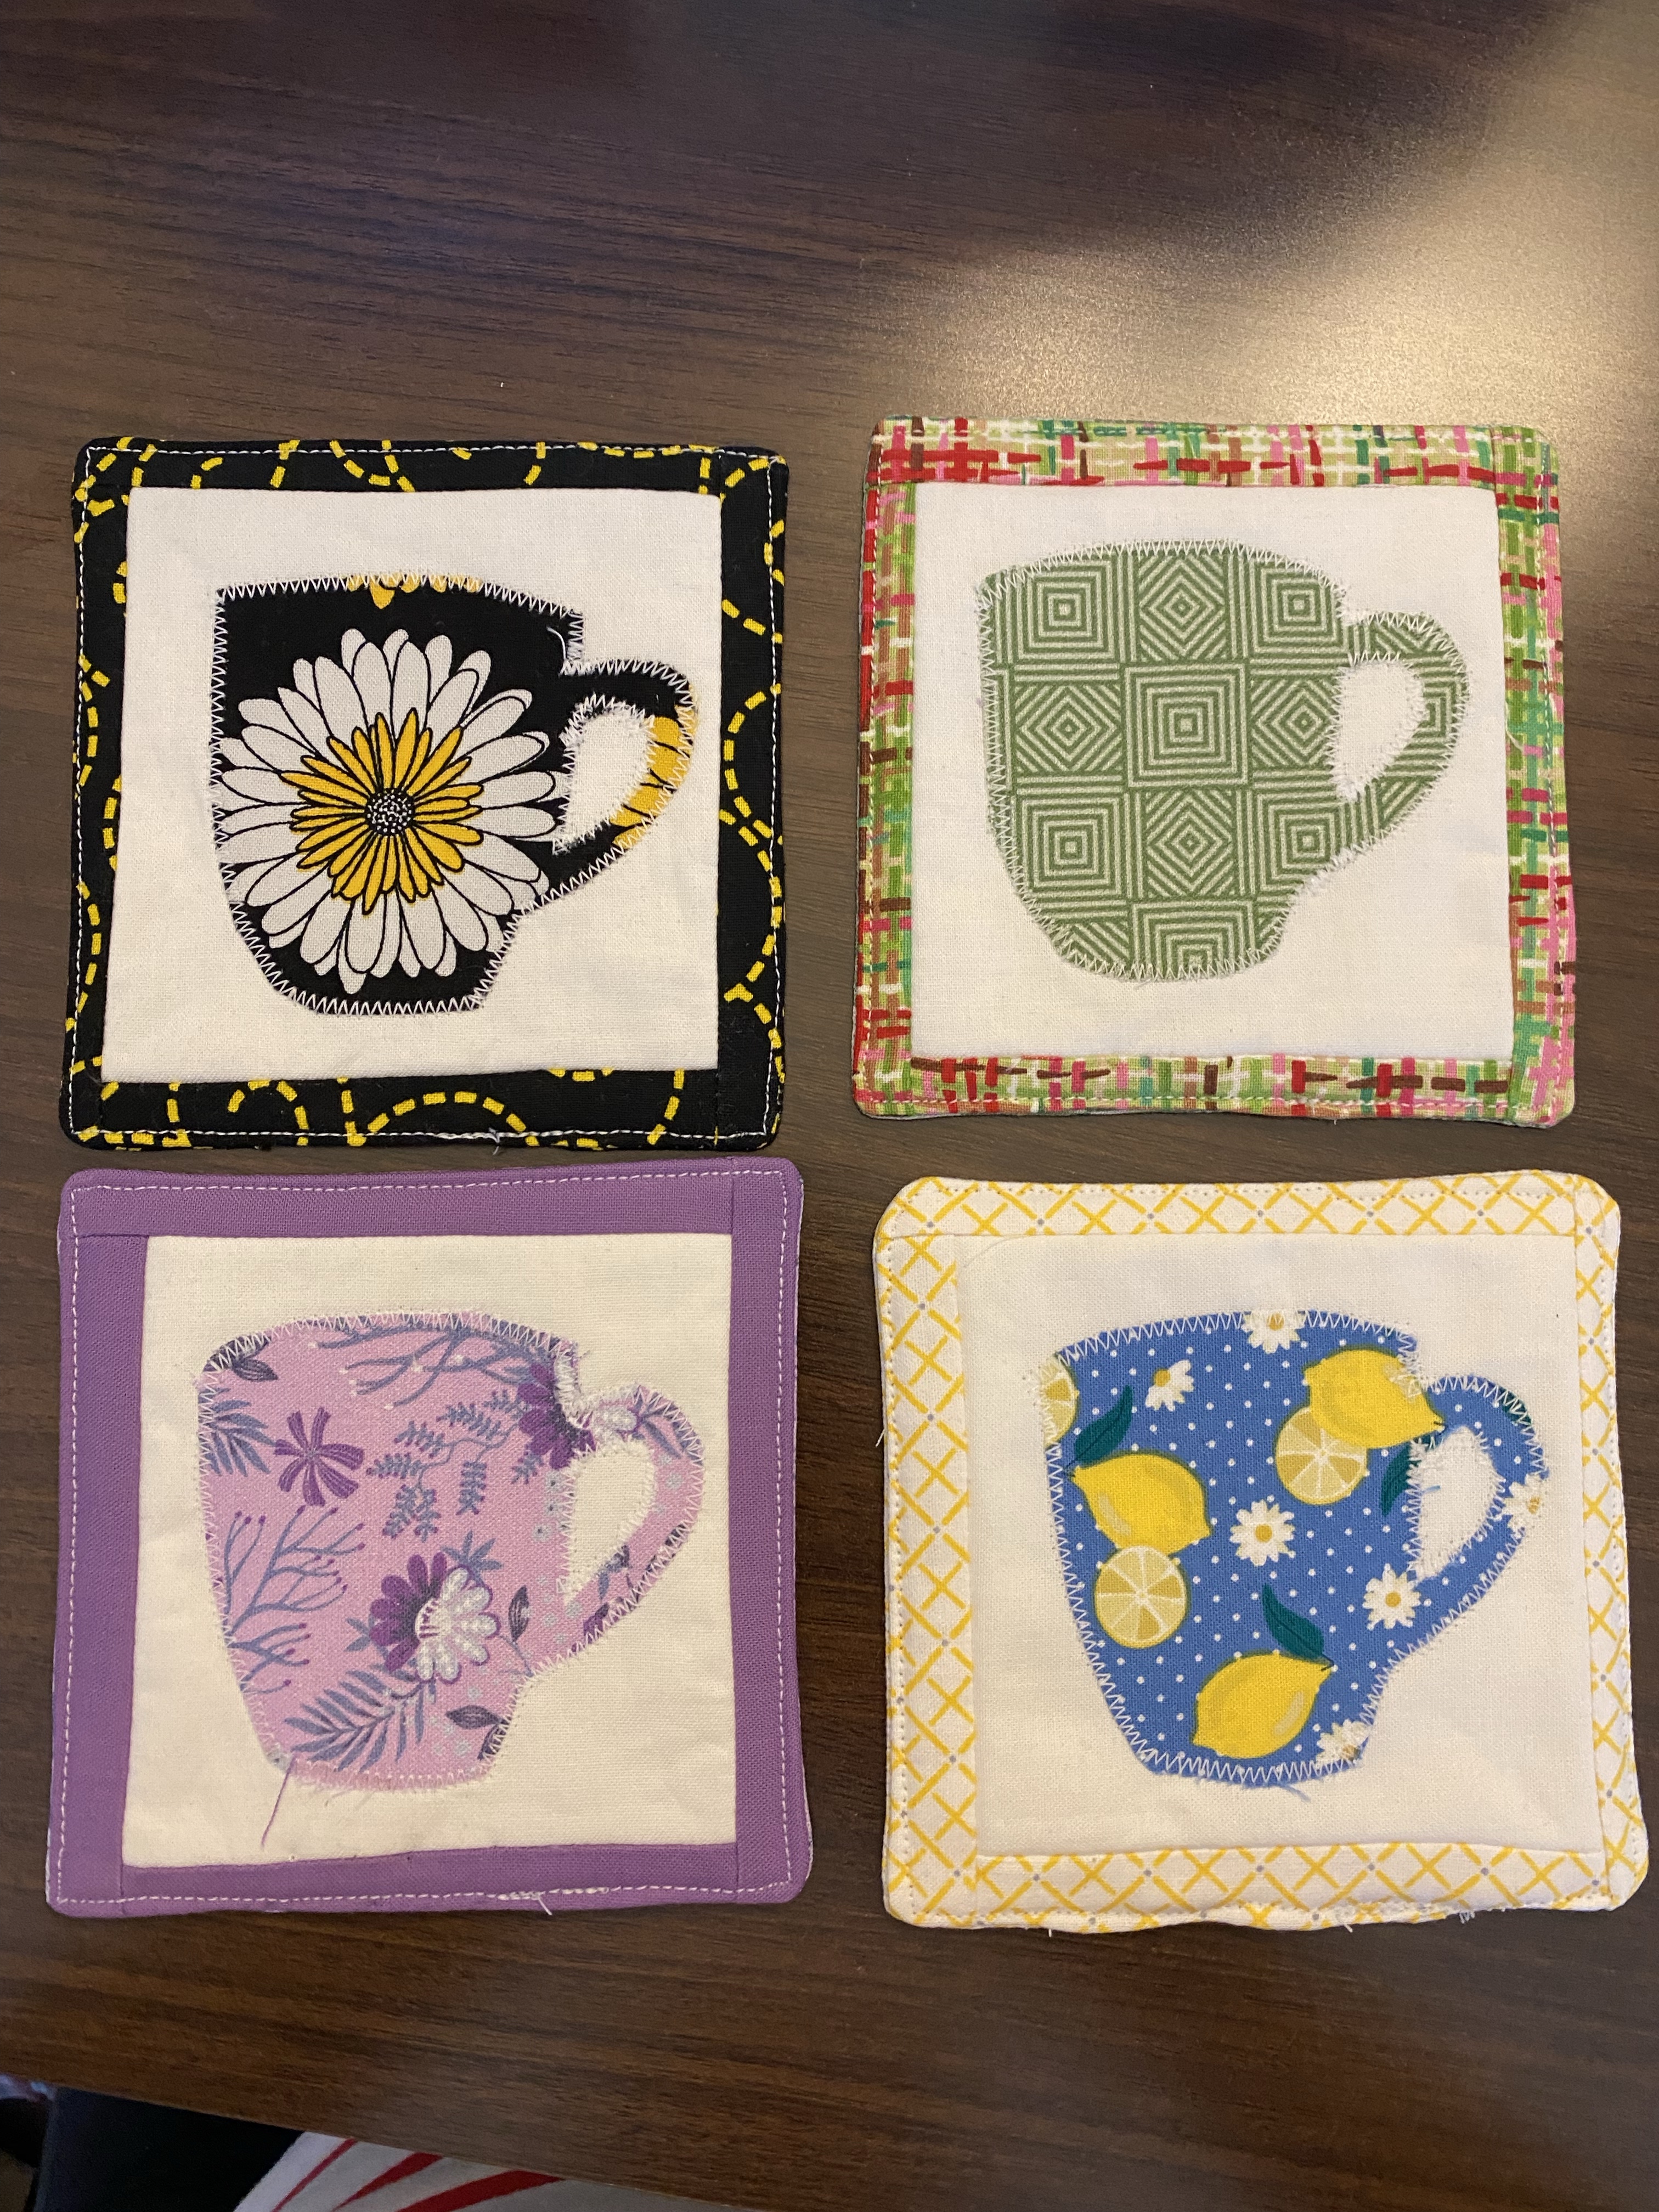
I think everyone who makes a coaster has her/his own way of doing it. I have decided on this method because for me it’s a bit faster and a little more fun in the fabric choice.
I made a set of 4 coasters for my sister, different fabrics, but all with the same applique. Here it is broken down into steps.
Cut a central fabric 4×4 inches. I used white.
Cut cotton batting and a backing fabric 4 3/4 x 4 3/4 inches. My backings match either the border or the applique.
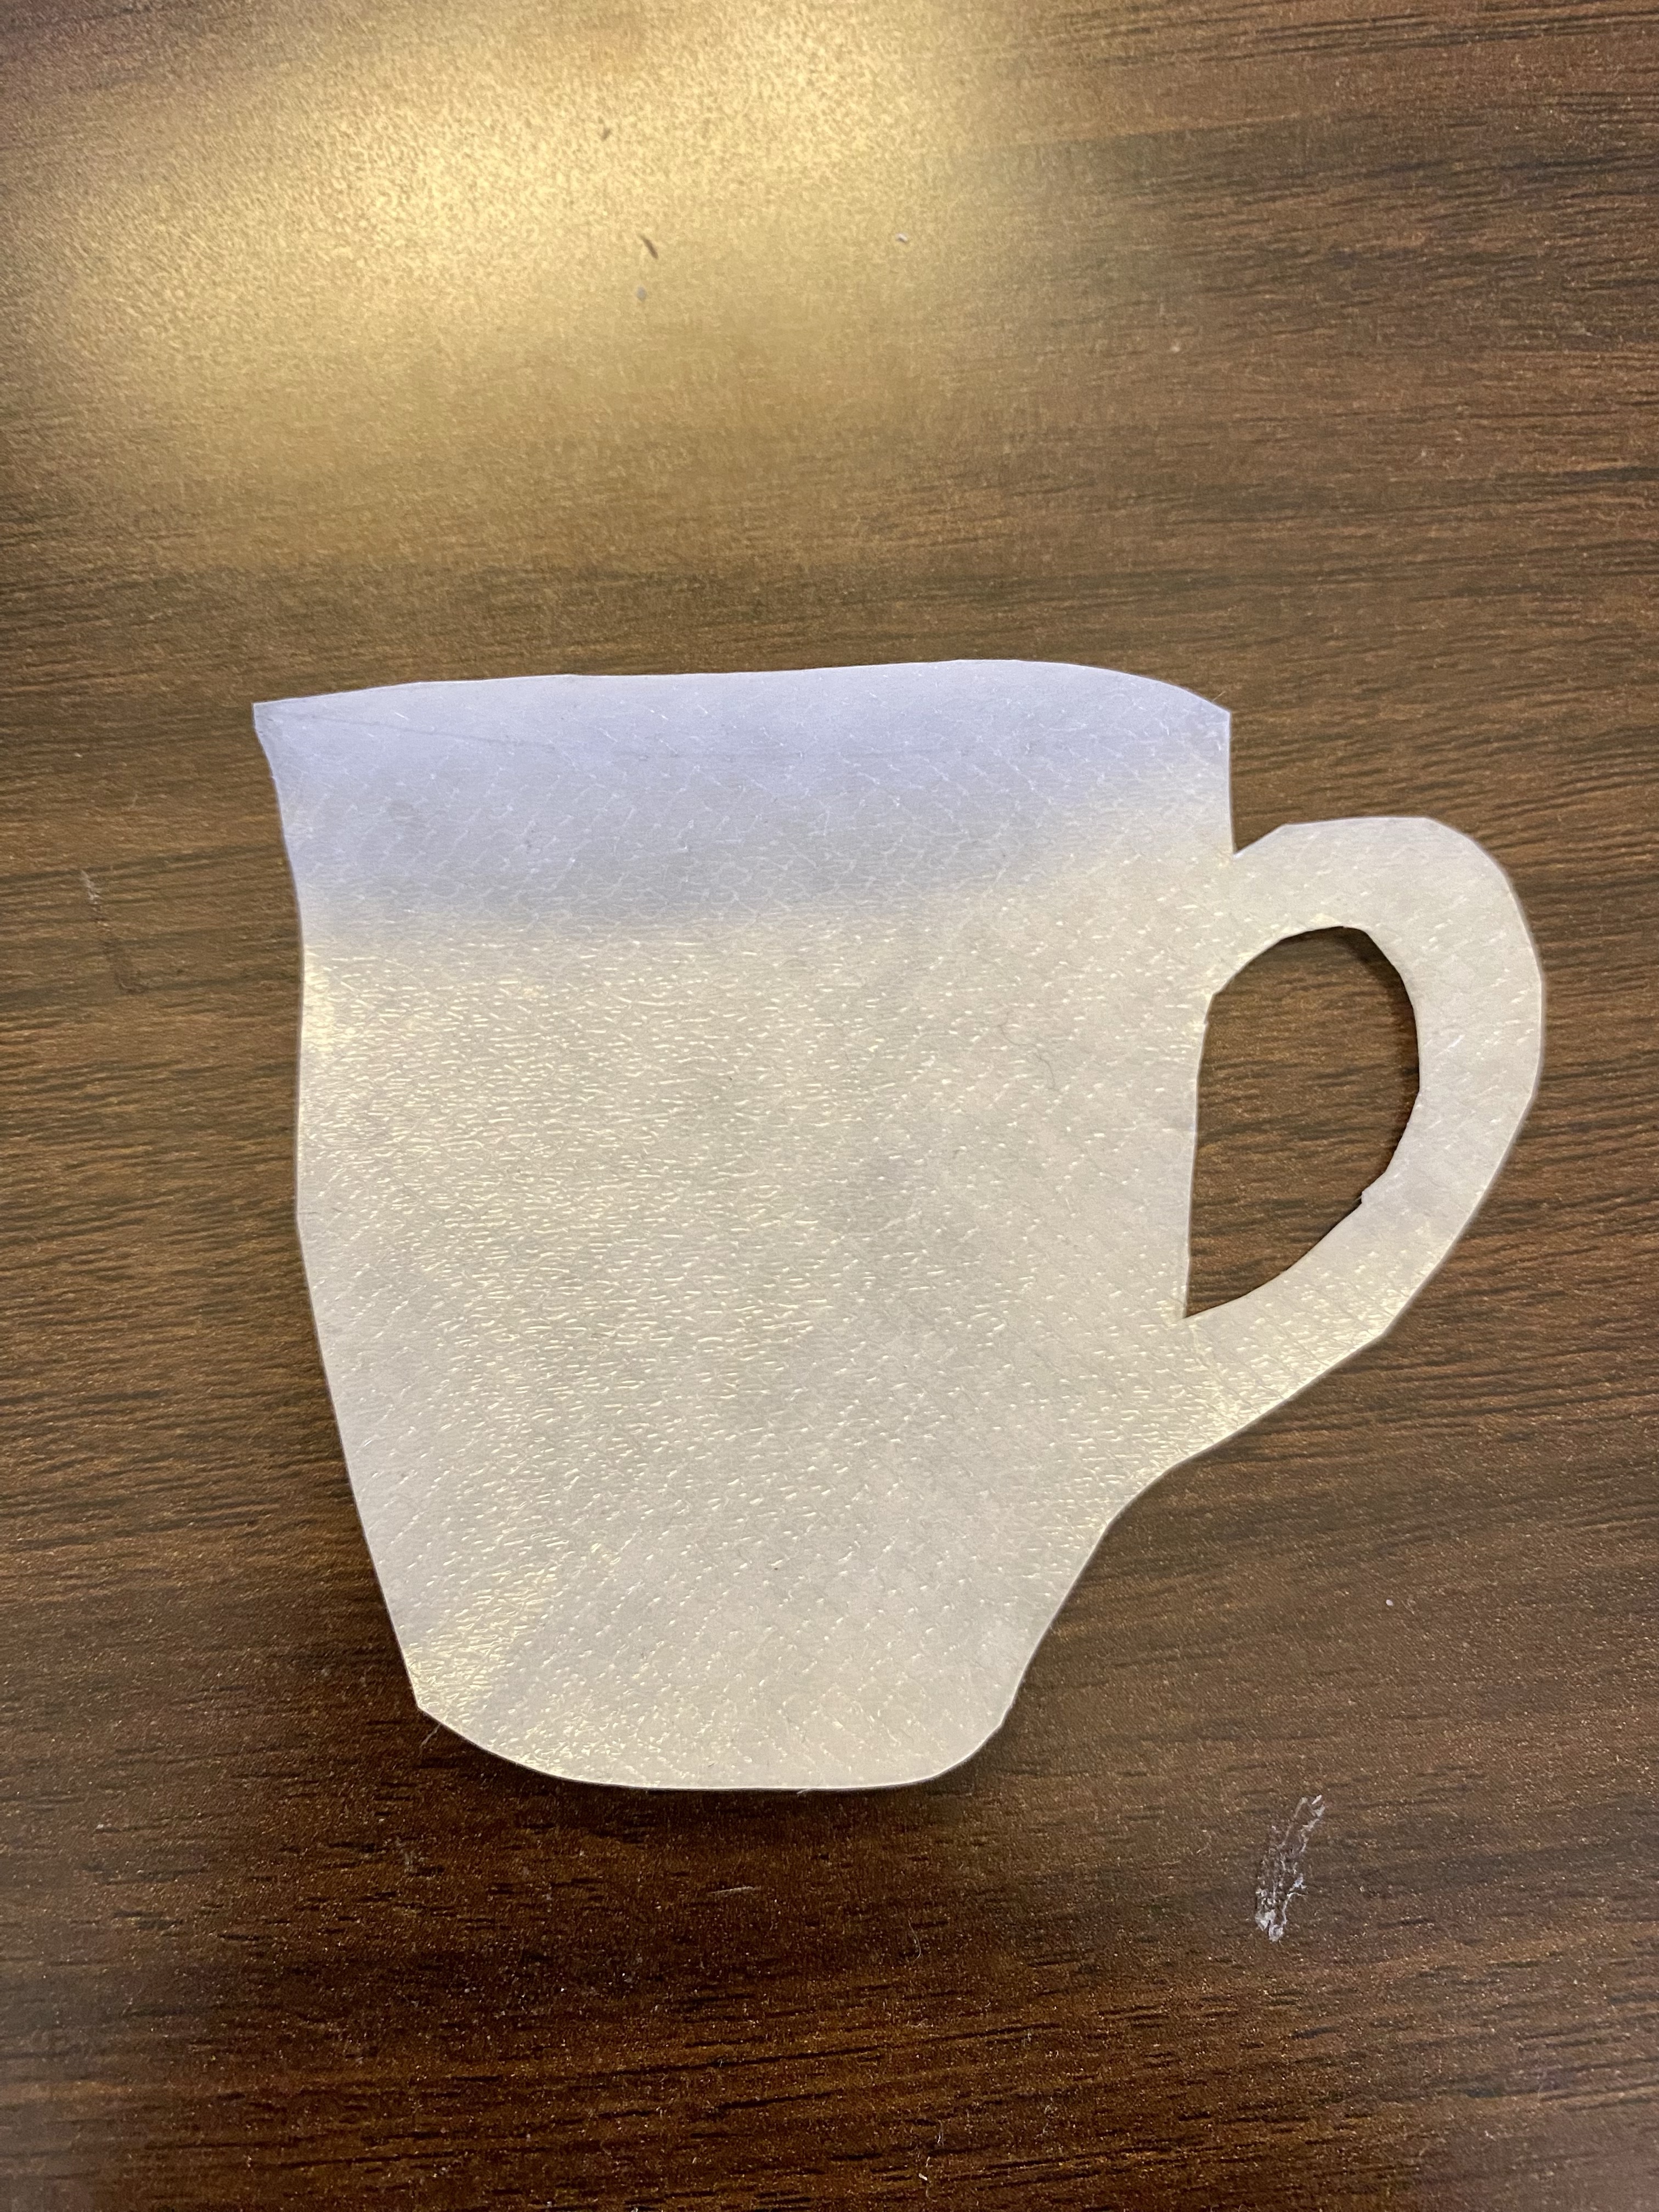
Trace your applique design onto Heat N Bond or other double-sided adhesive. If it matters, trace the design as if backwards to how the fabric should look. Cut out, including waste pieces within the design.
Press it to the back side of the fabric and cut out as above. Use a pin to score the paper on the back of the applique, revealing the other adhesive. Place it on the central fabric and press into place.
Using a narrow zigzag, or other decorative stitch, stitch all around your applique. Edges may shred without this step. I’ve used a blanket stitch and a hem stitch on other coasters.
Center the design on the batting, leaving the backing off and pin in place. I had cut 1 inch strips of a coordinating fabric for a border. (I used the method I learned for making a precise hem in a skirt, 50 years ago.) Pin at the edge of the white fabric, stitch, turn, press, and flip it over. You’ll see some overlap to trim even with the batting.
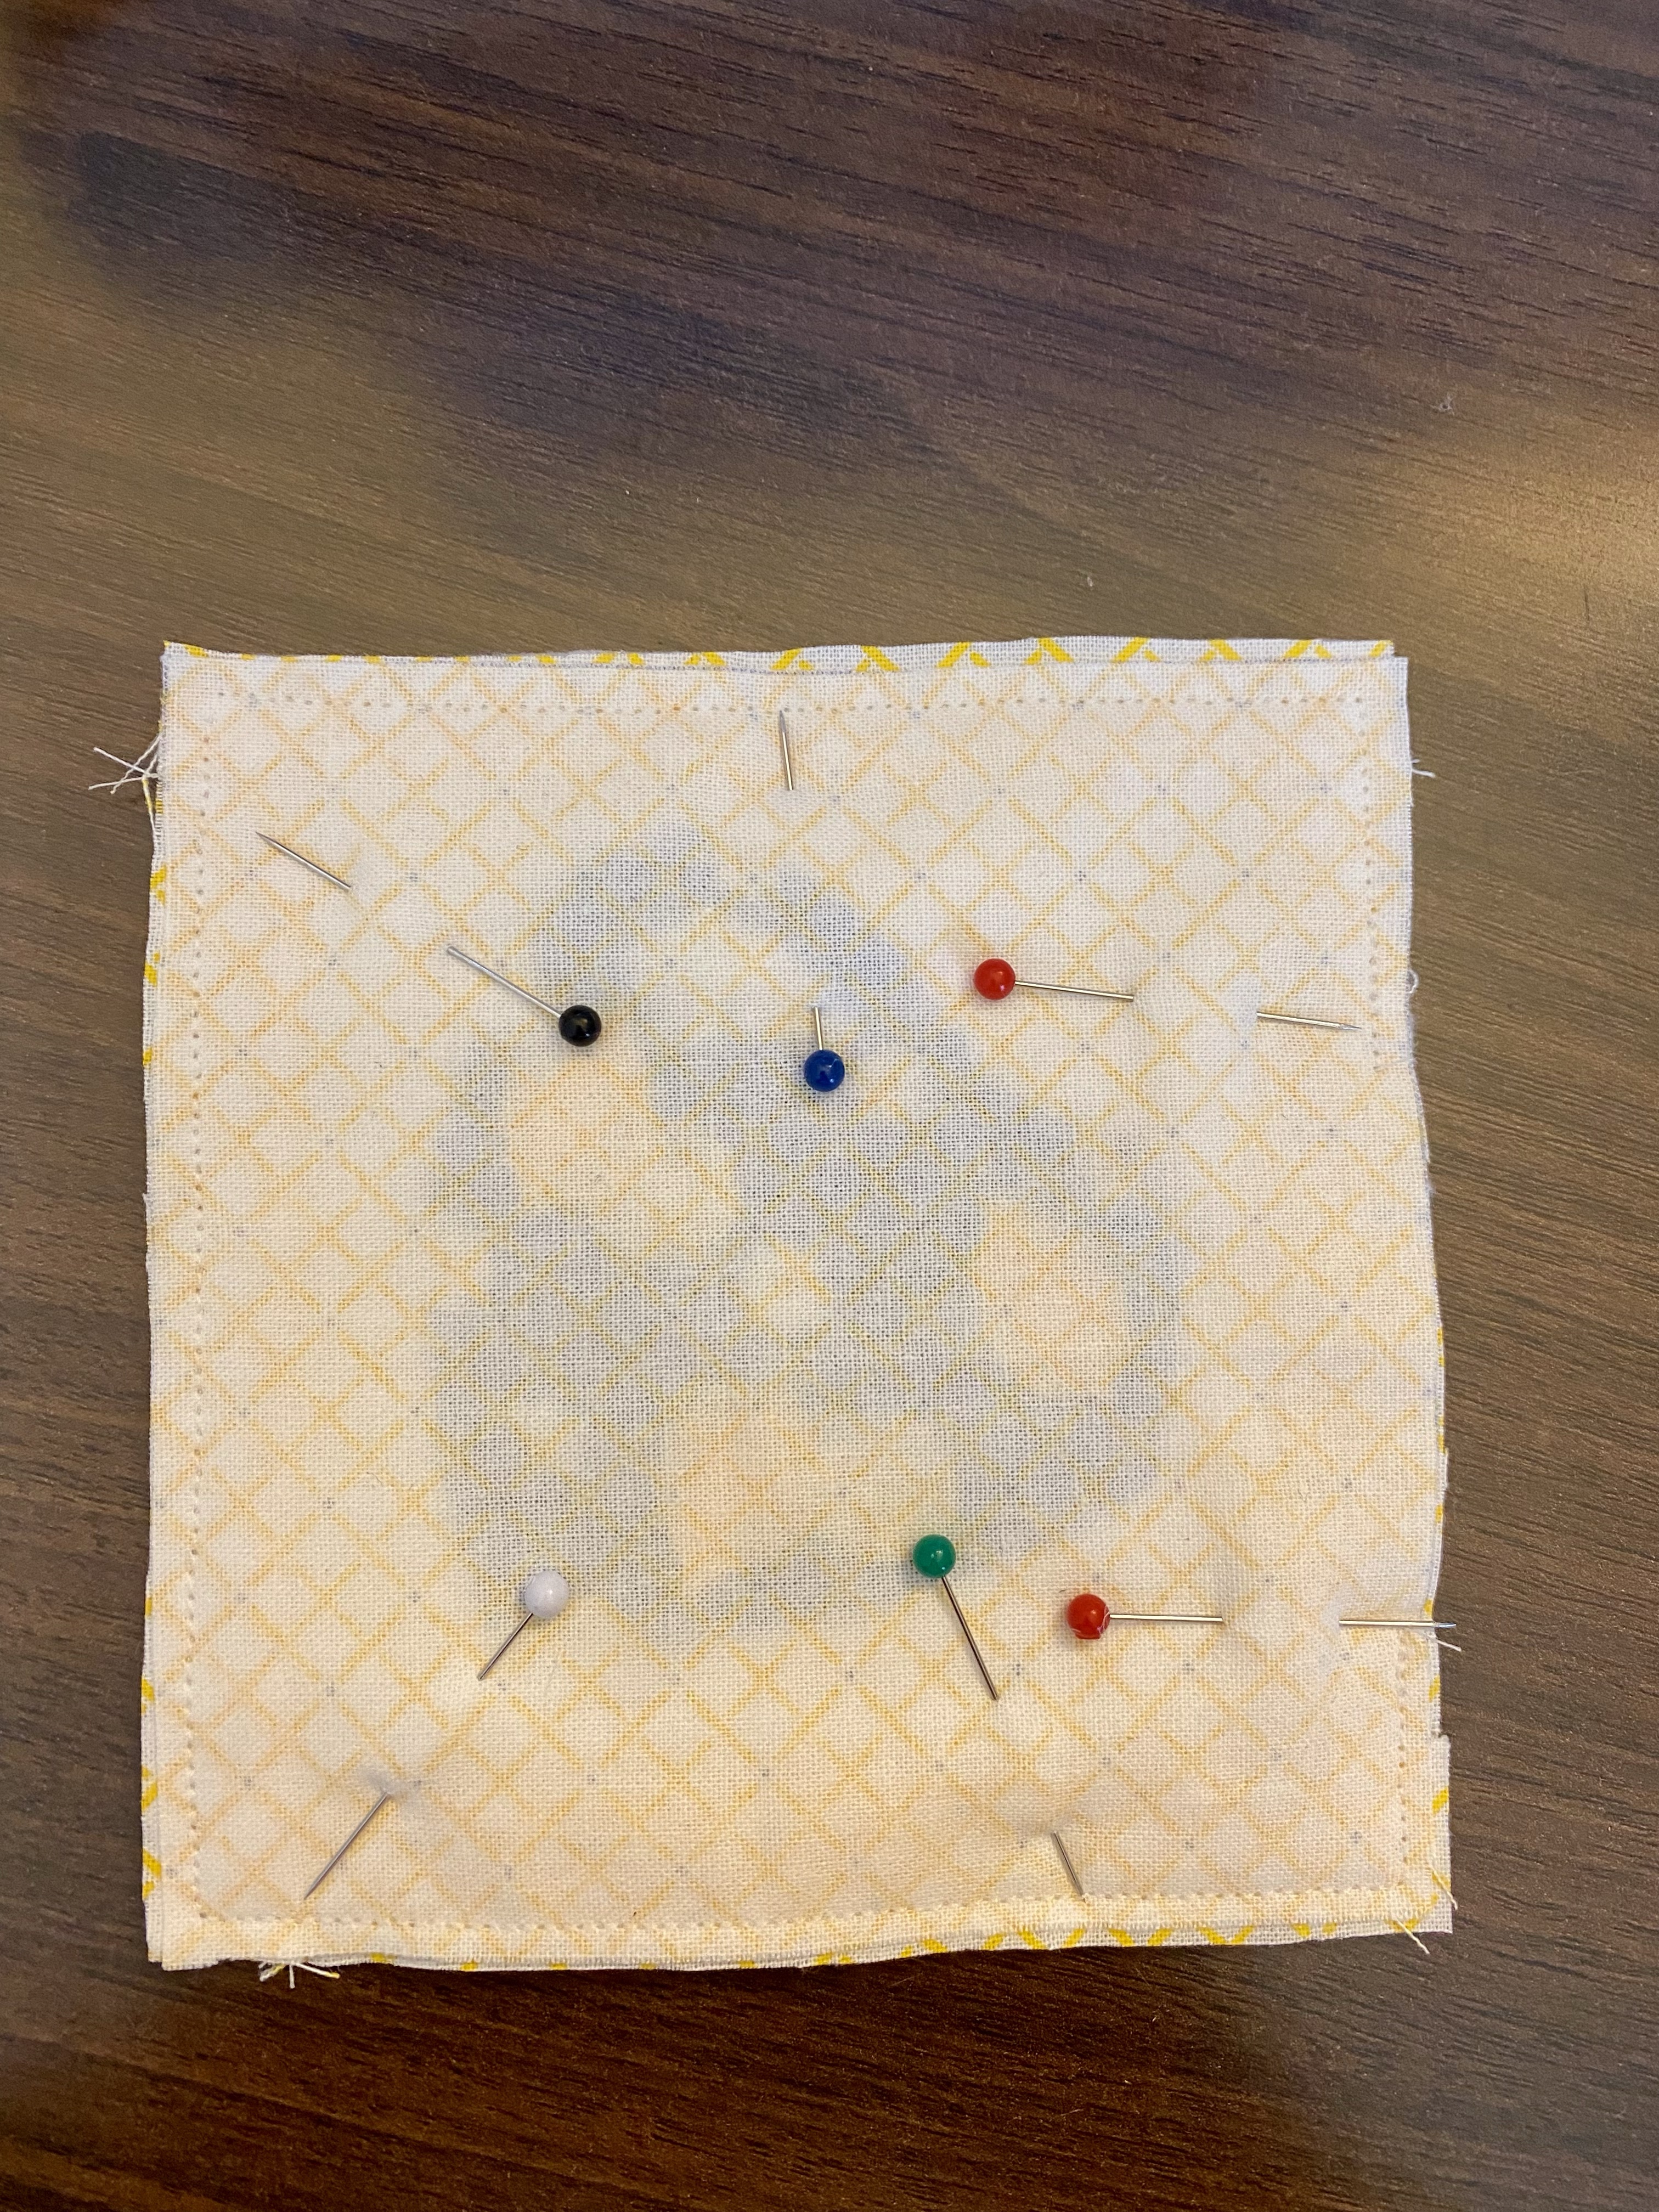
When you have done 4 edges the same way, lay the coaster with the design facing up, and layer the backing with right side facing down. Stitch along the edges and leave open about 2 inches for turning. I give myself a visual cue of a red pin where the edges of the turning gap is.
Turn right side out, pushing out the corners and straightening the edges. You may want to trim across the corners first, which I had neglected to do to have them sharp instead of rounded. Turn the raw edges to the inside and press, pin (or both) in place. Topstitch close to all edges. Give it a final press.
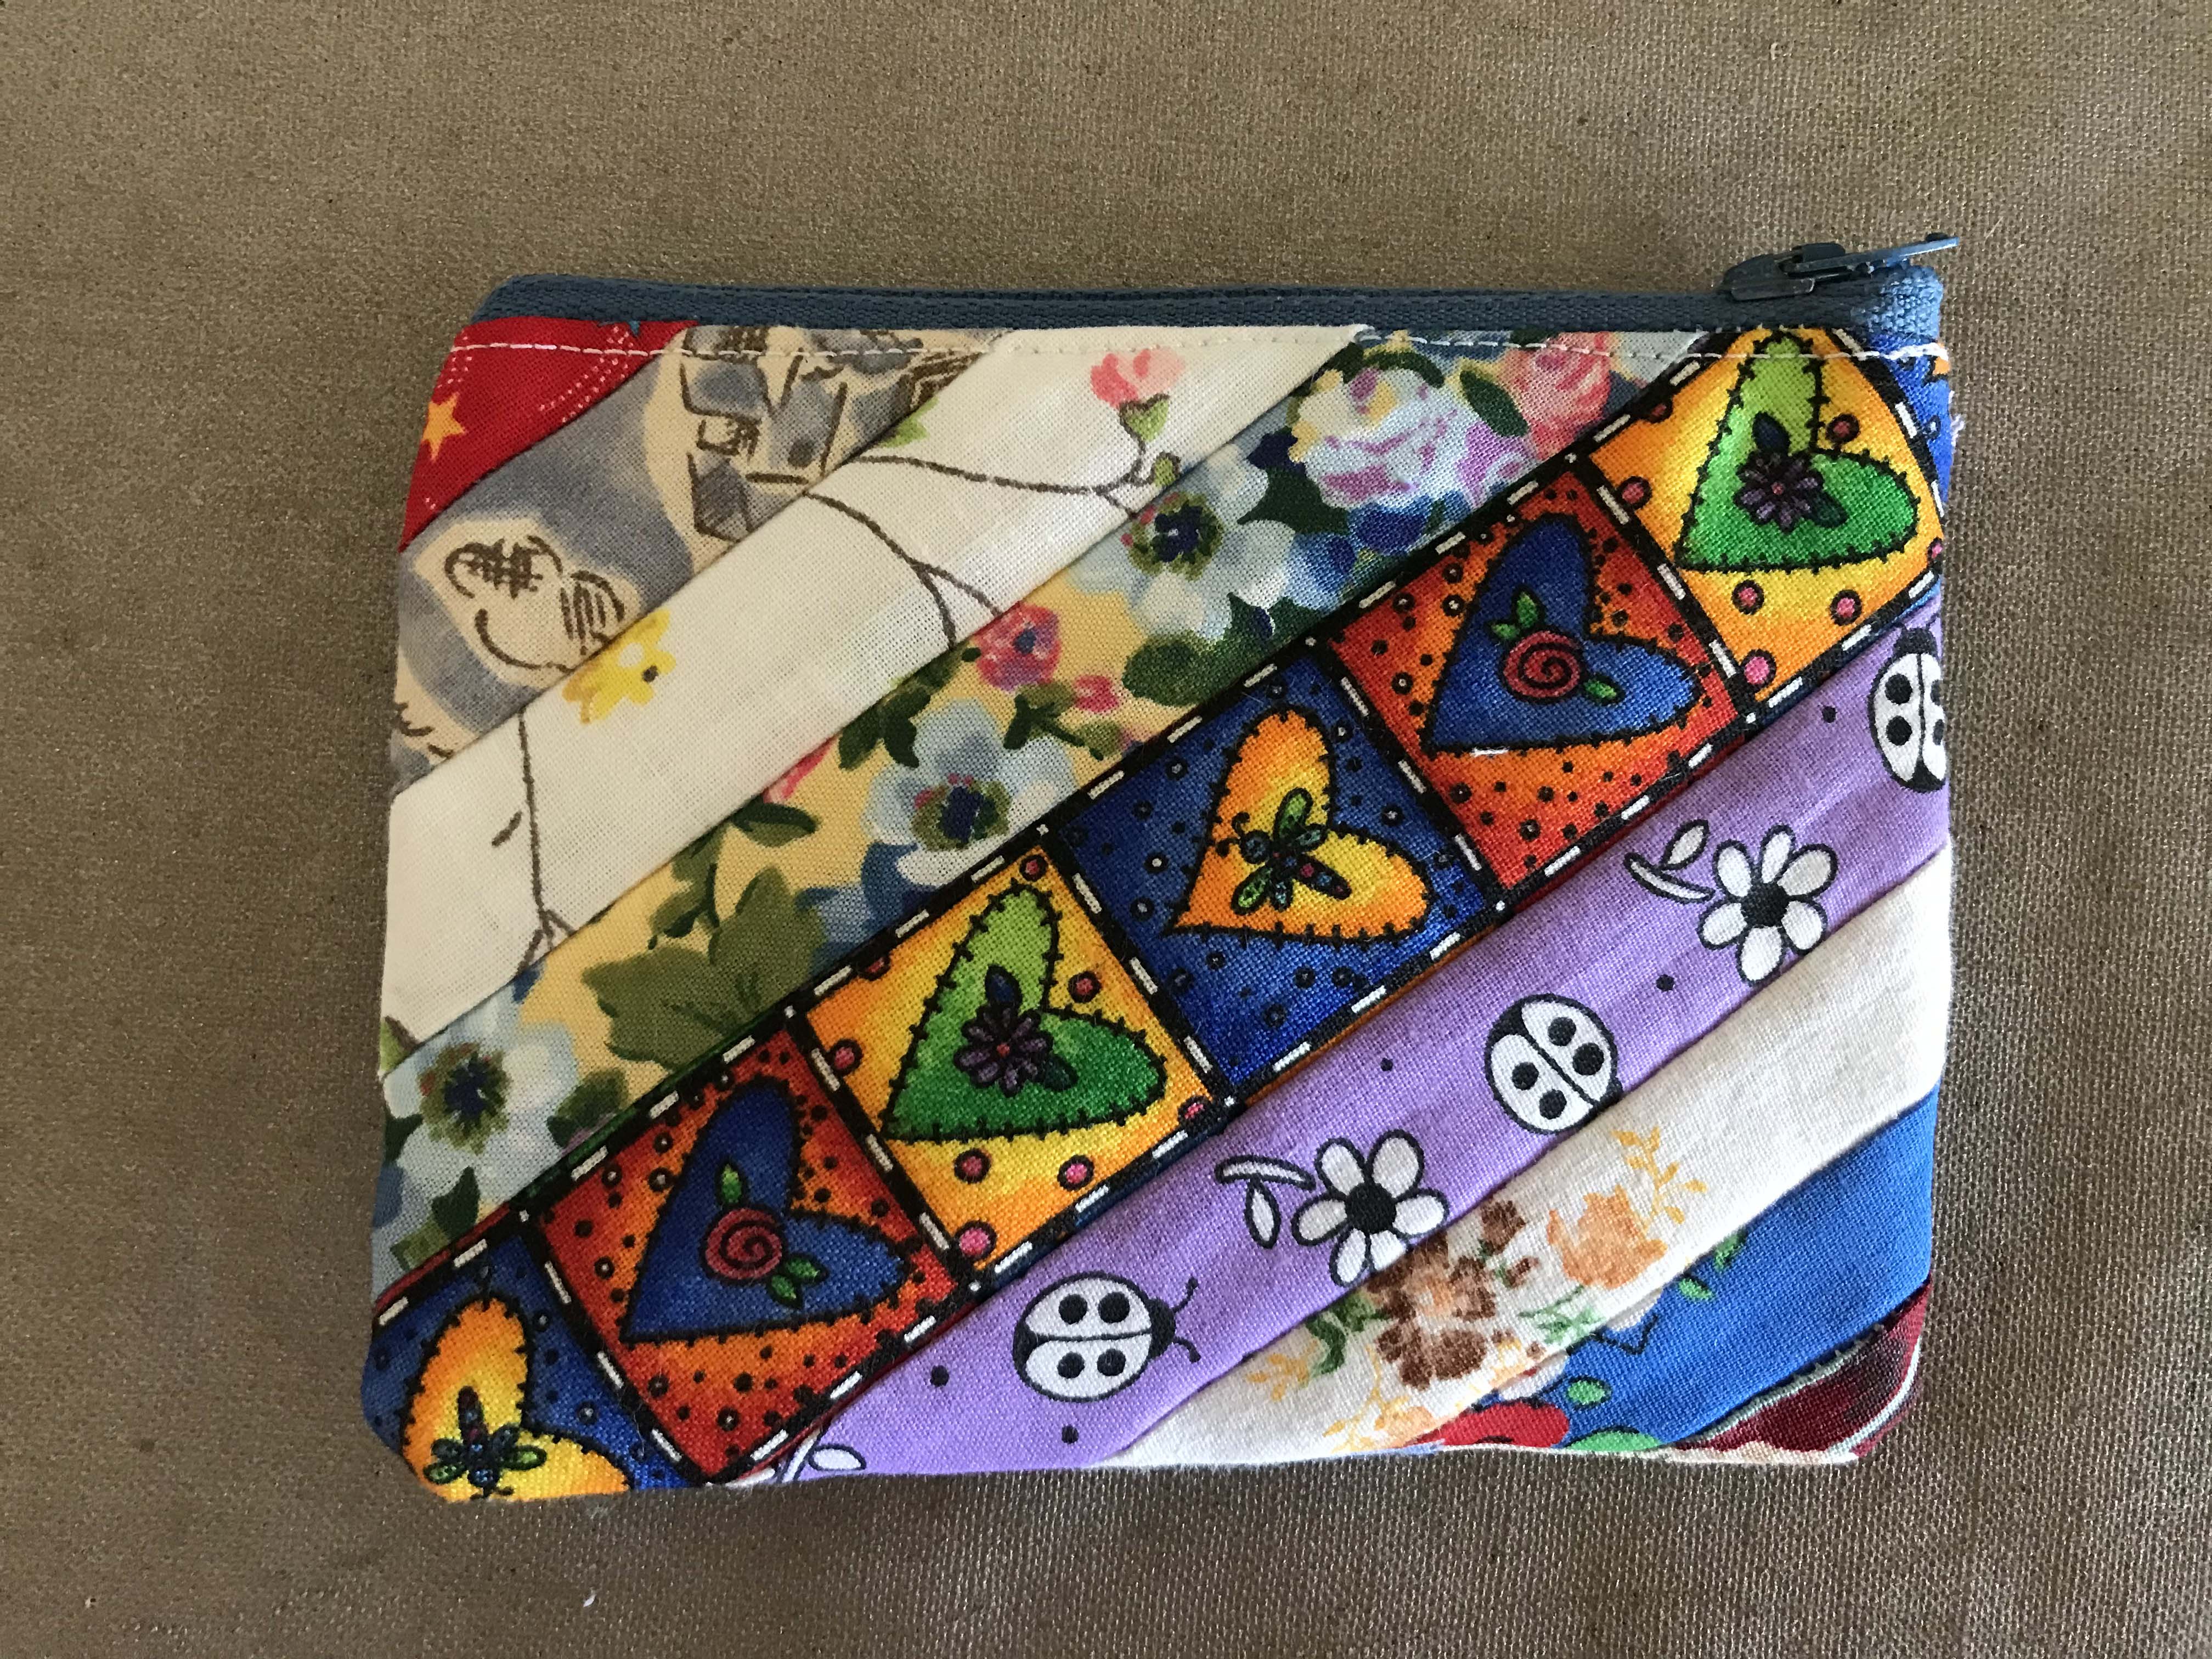
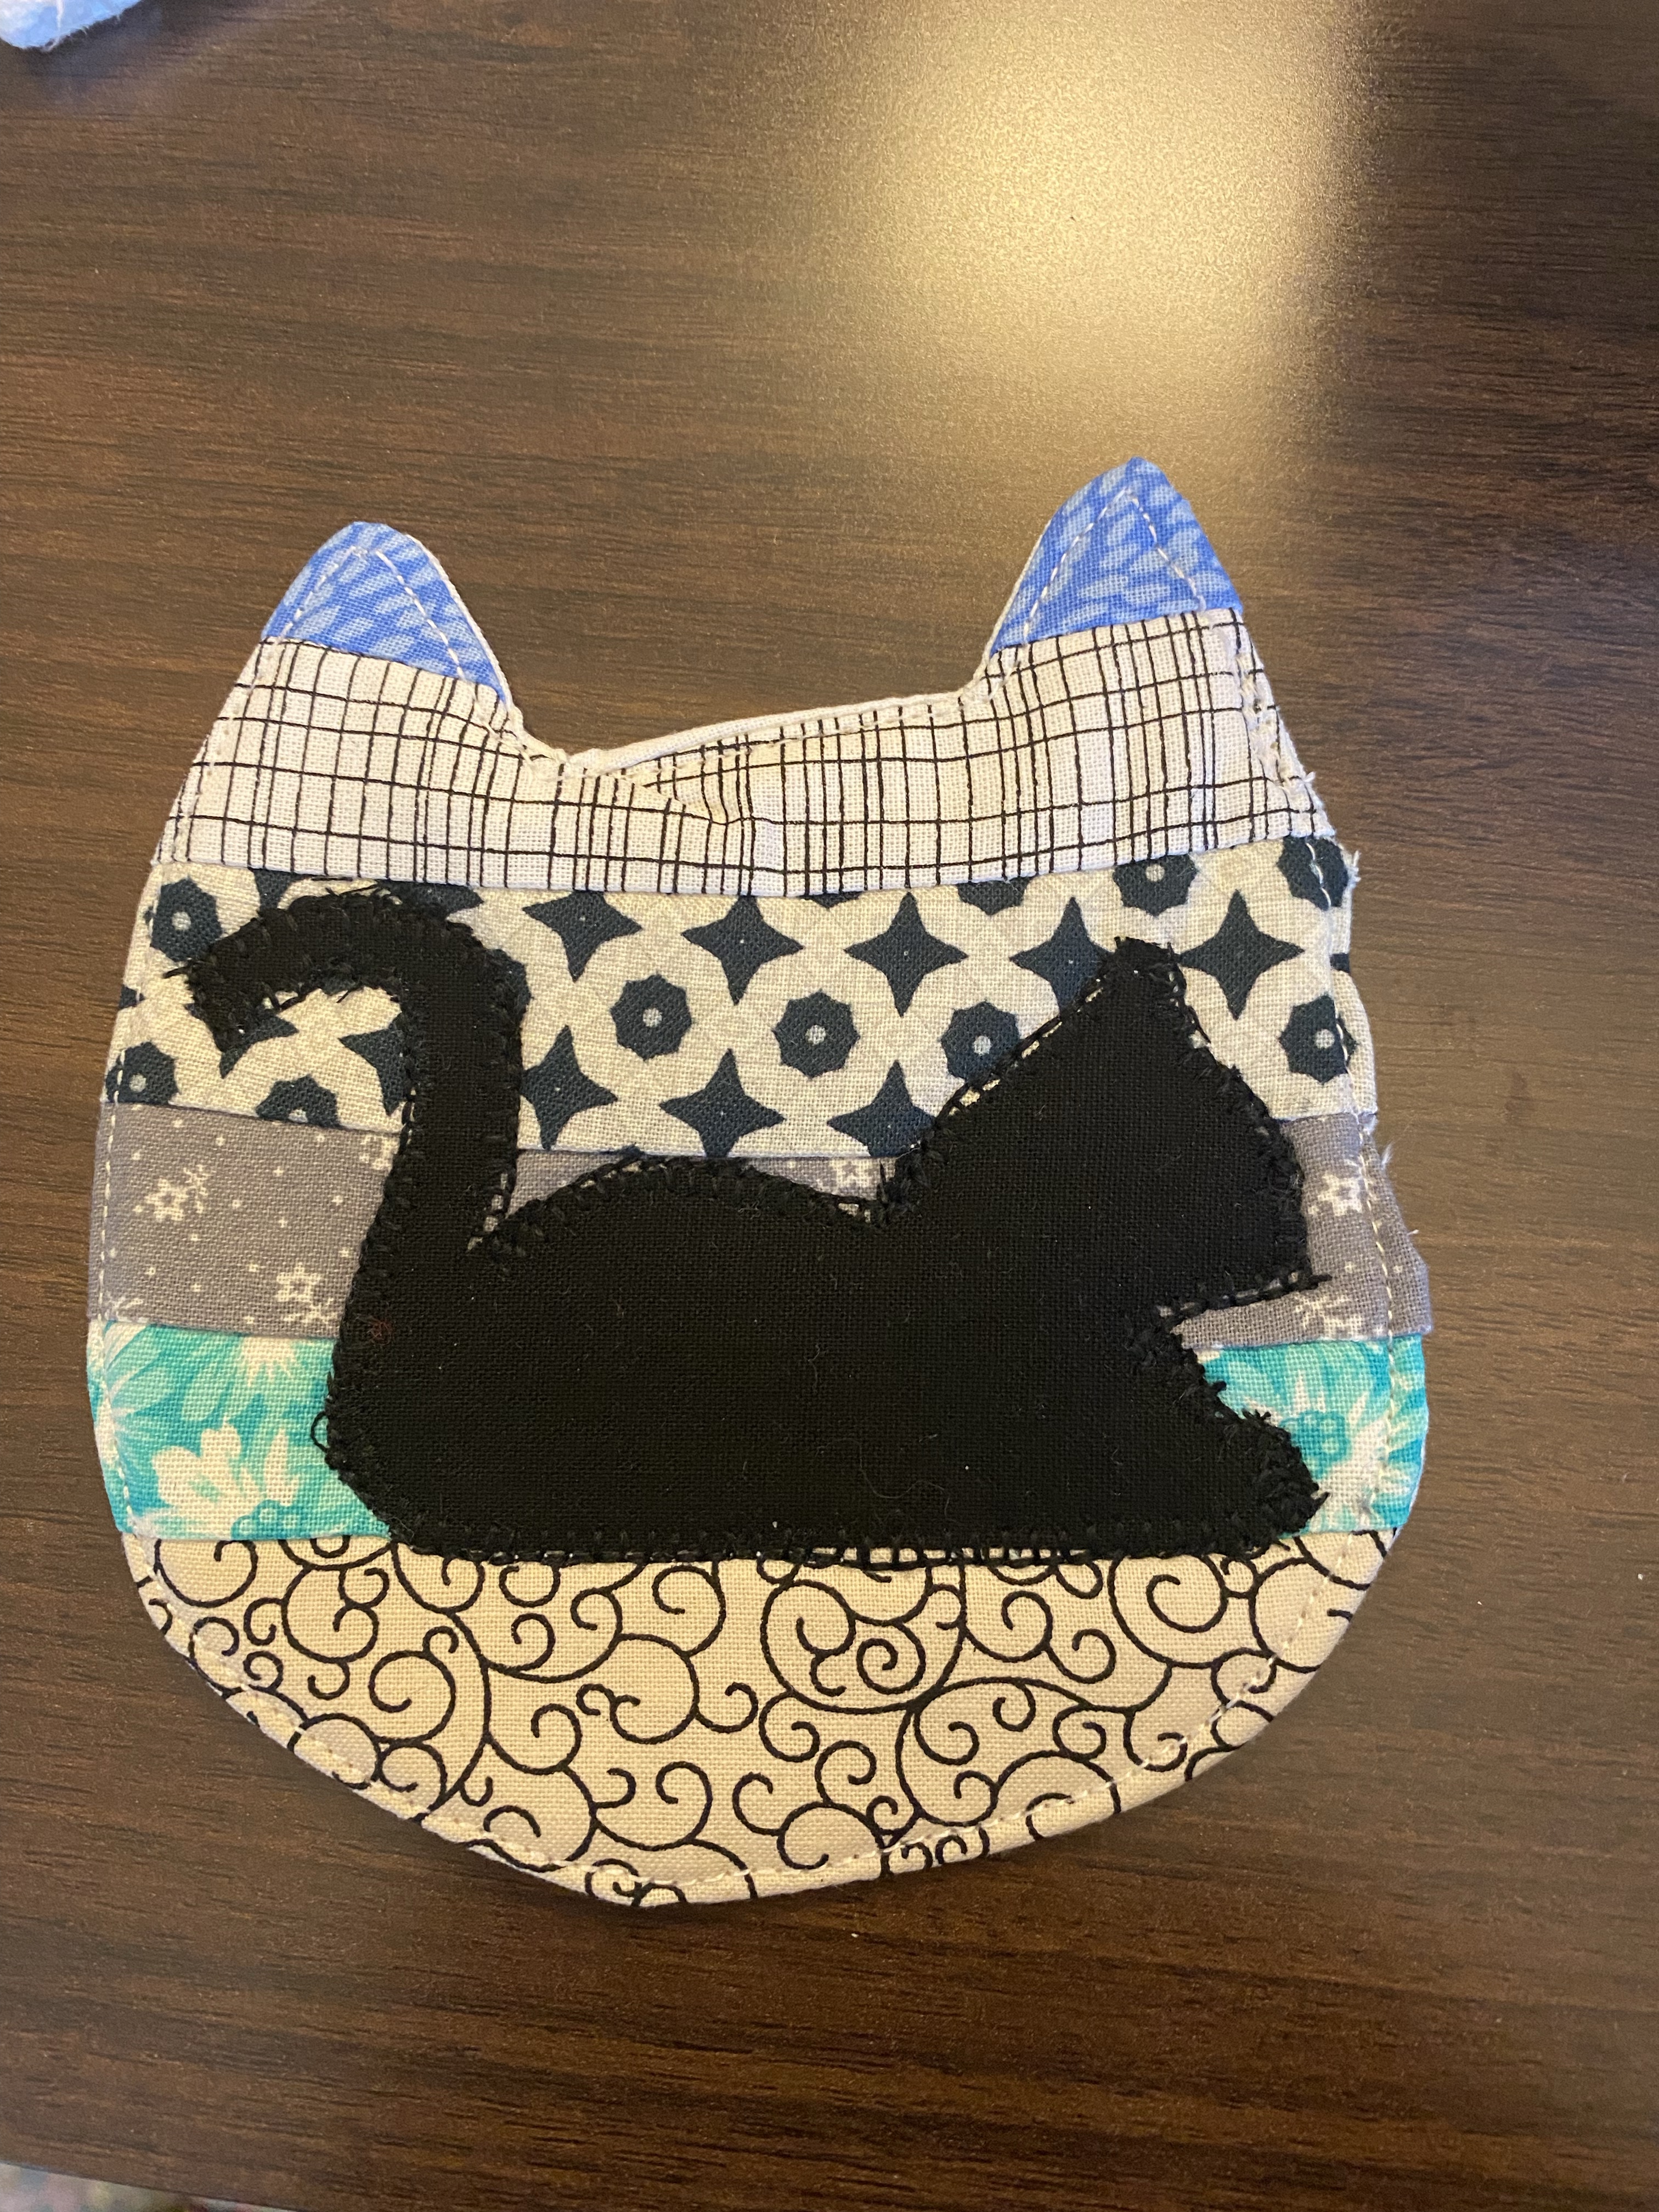
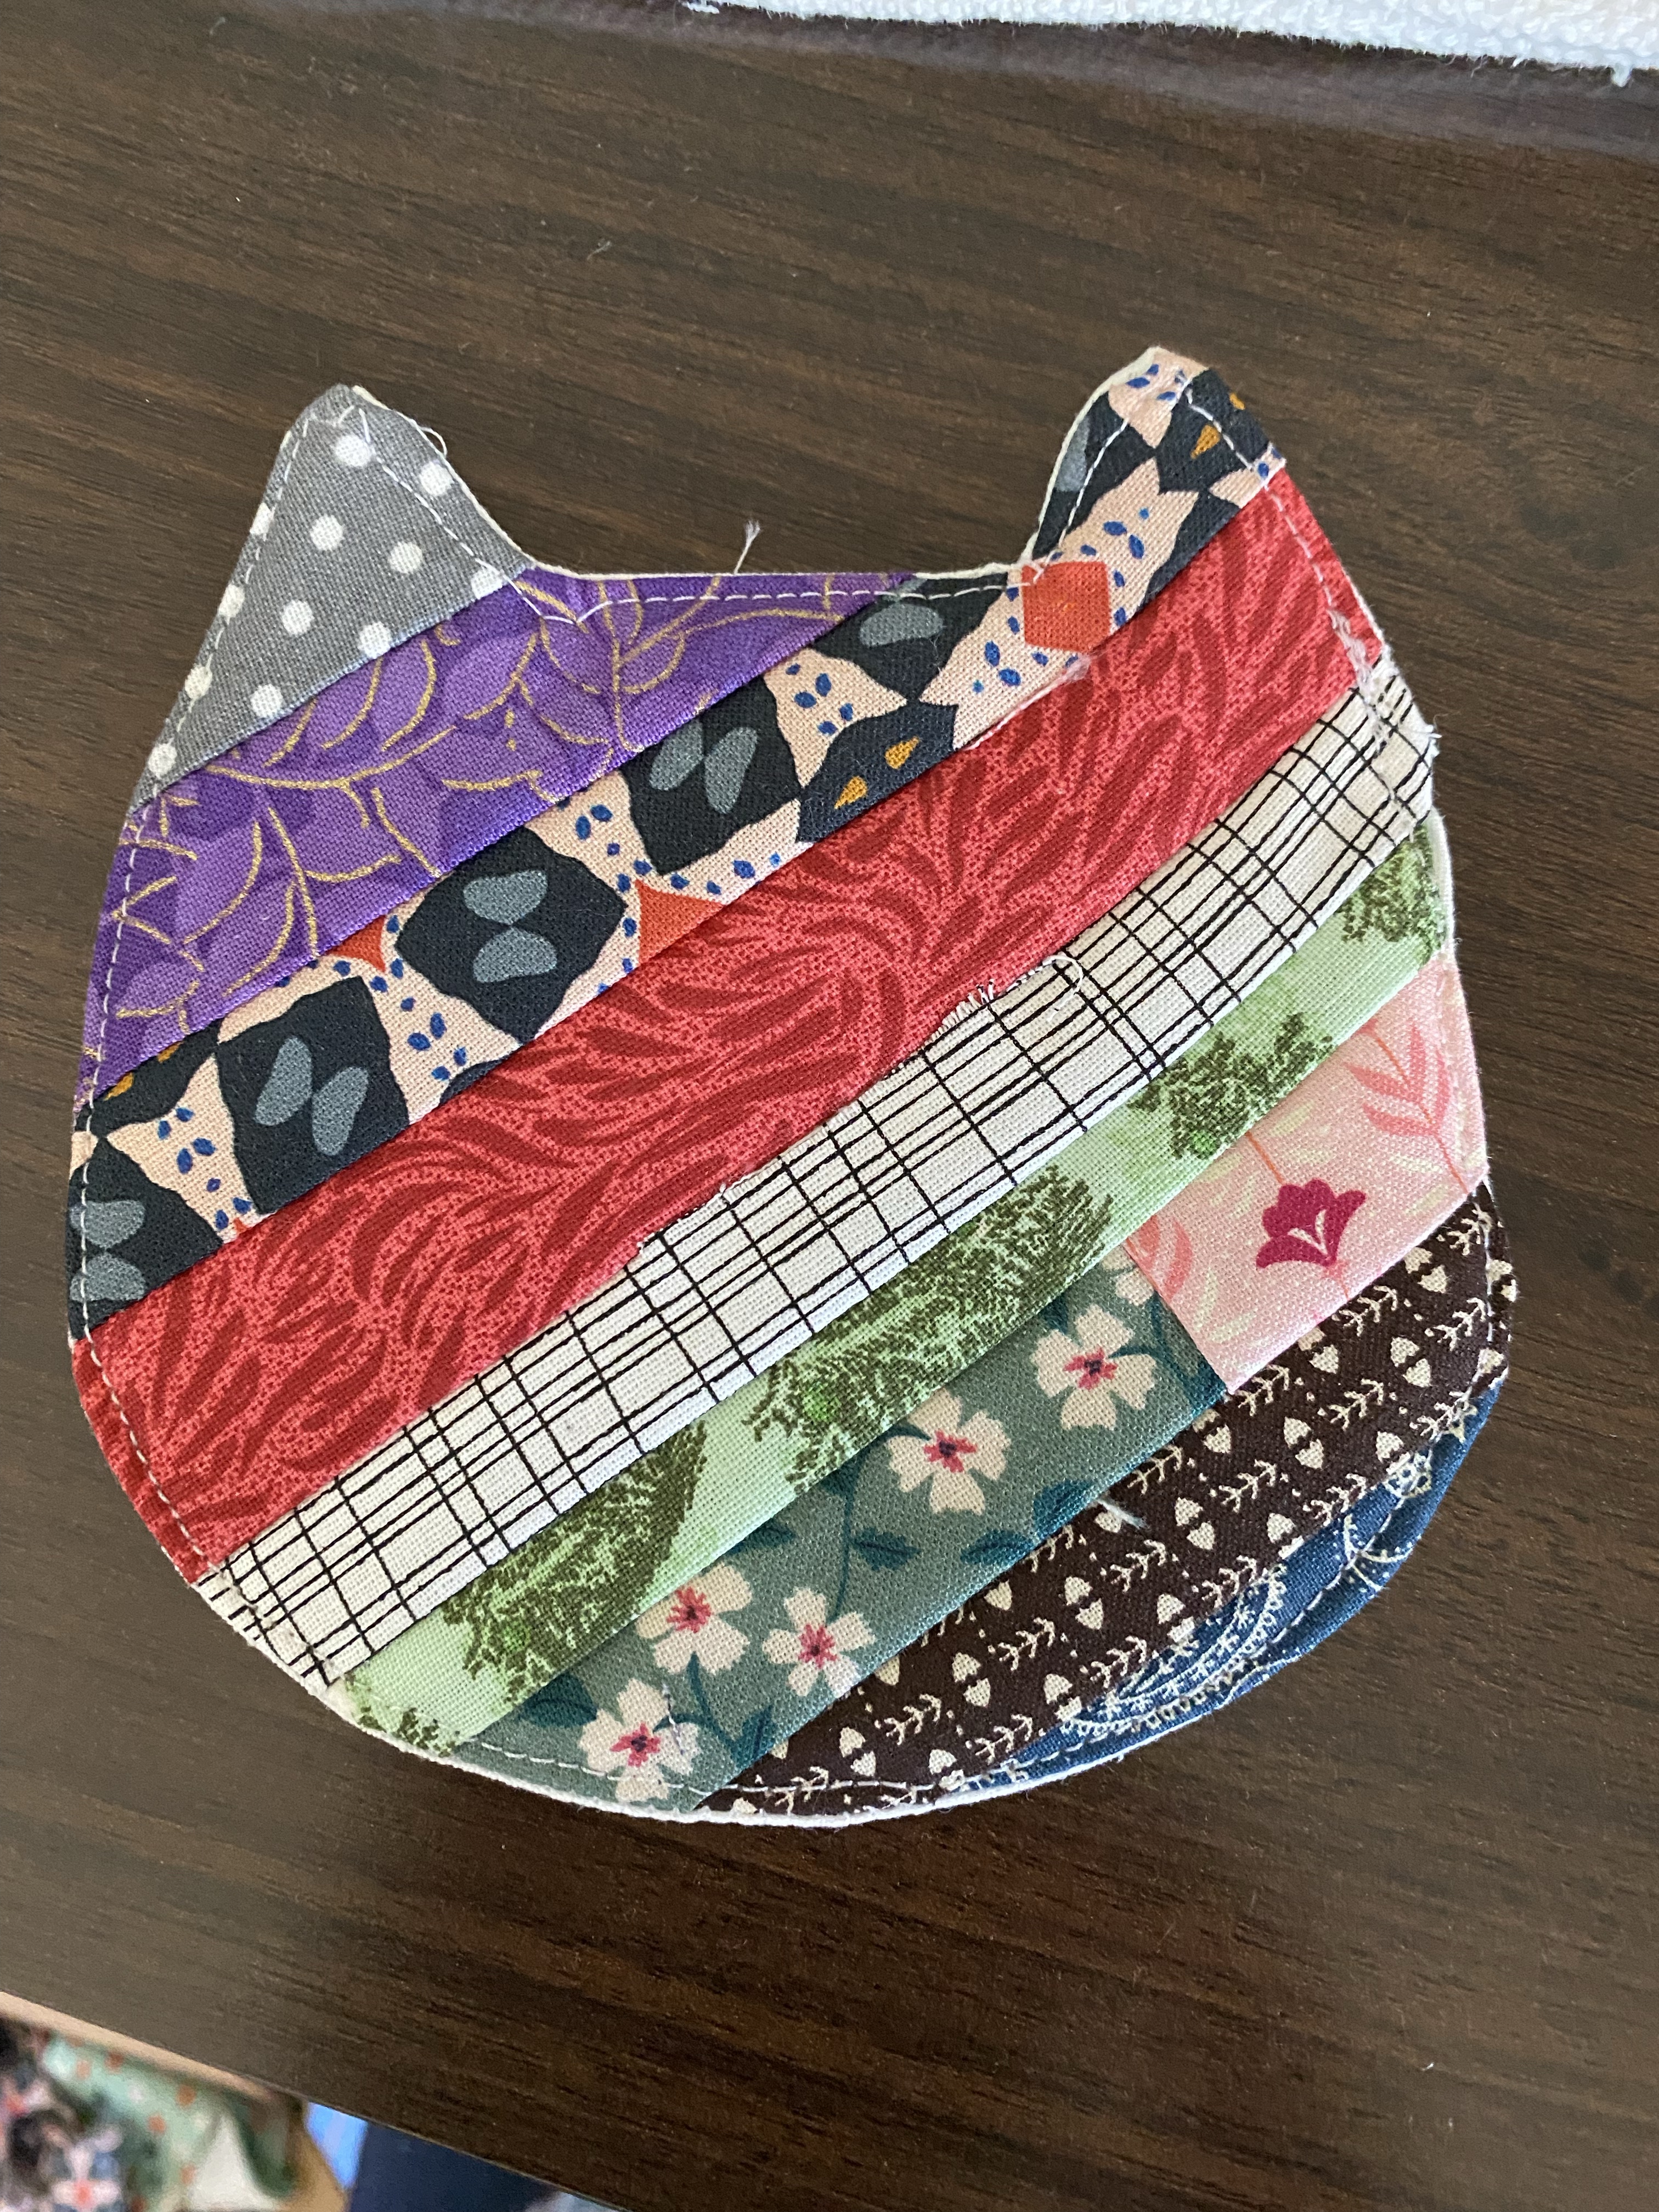
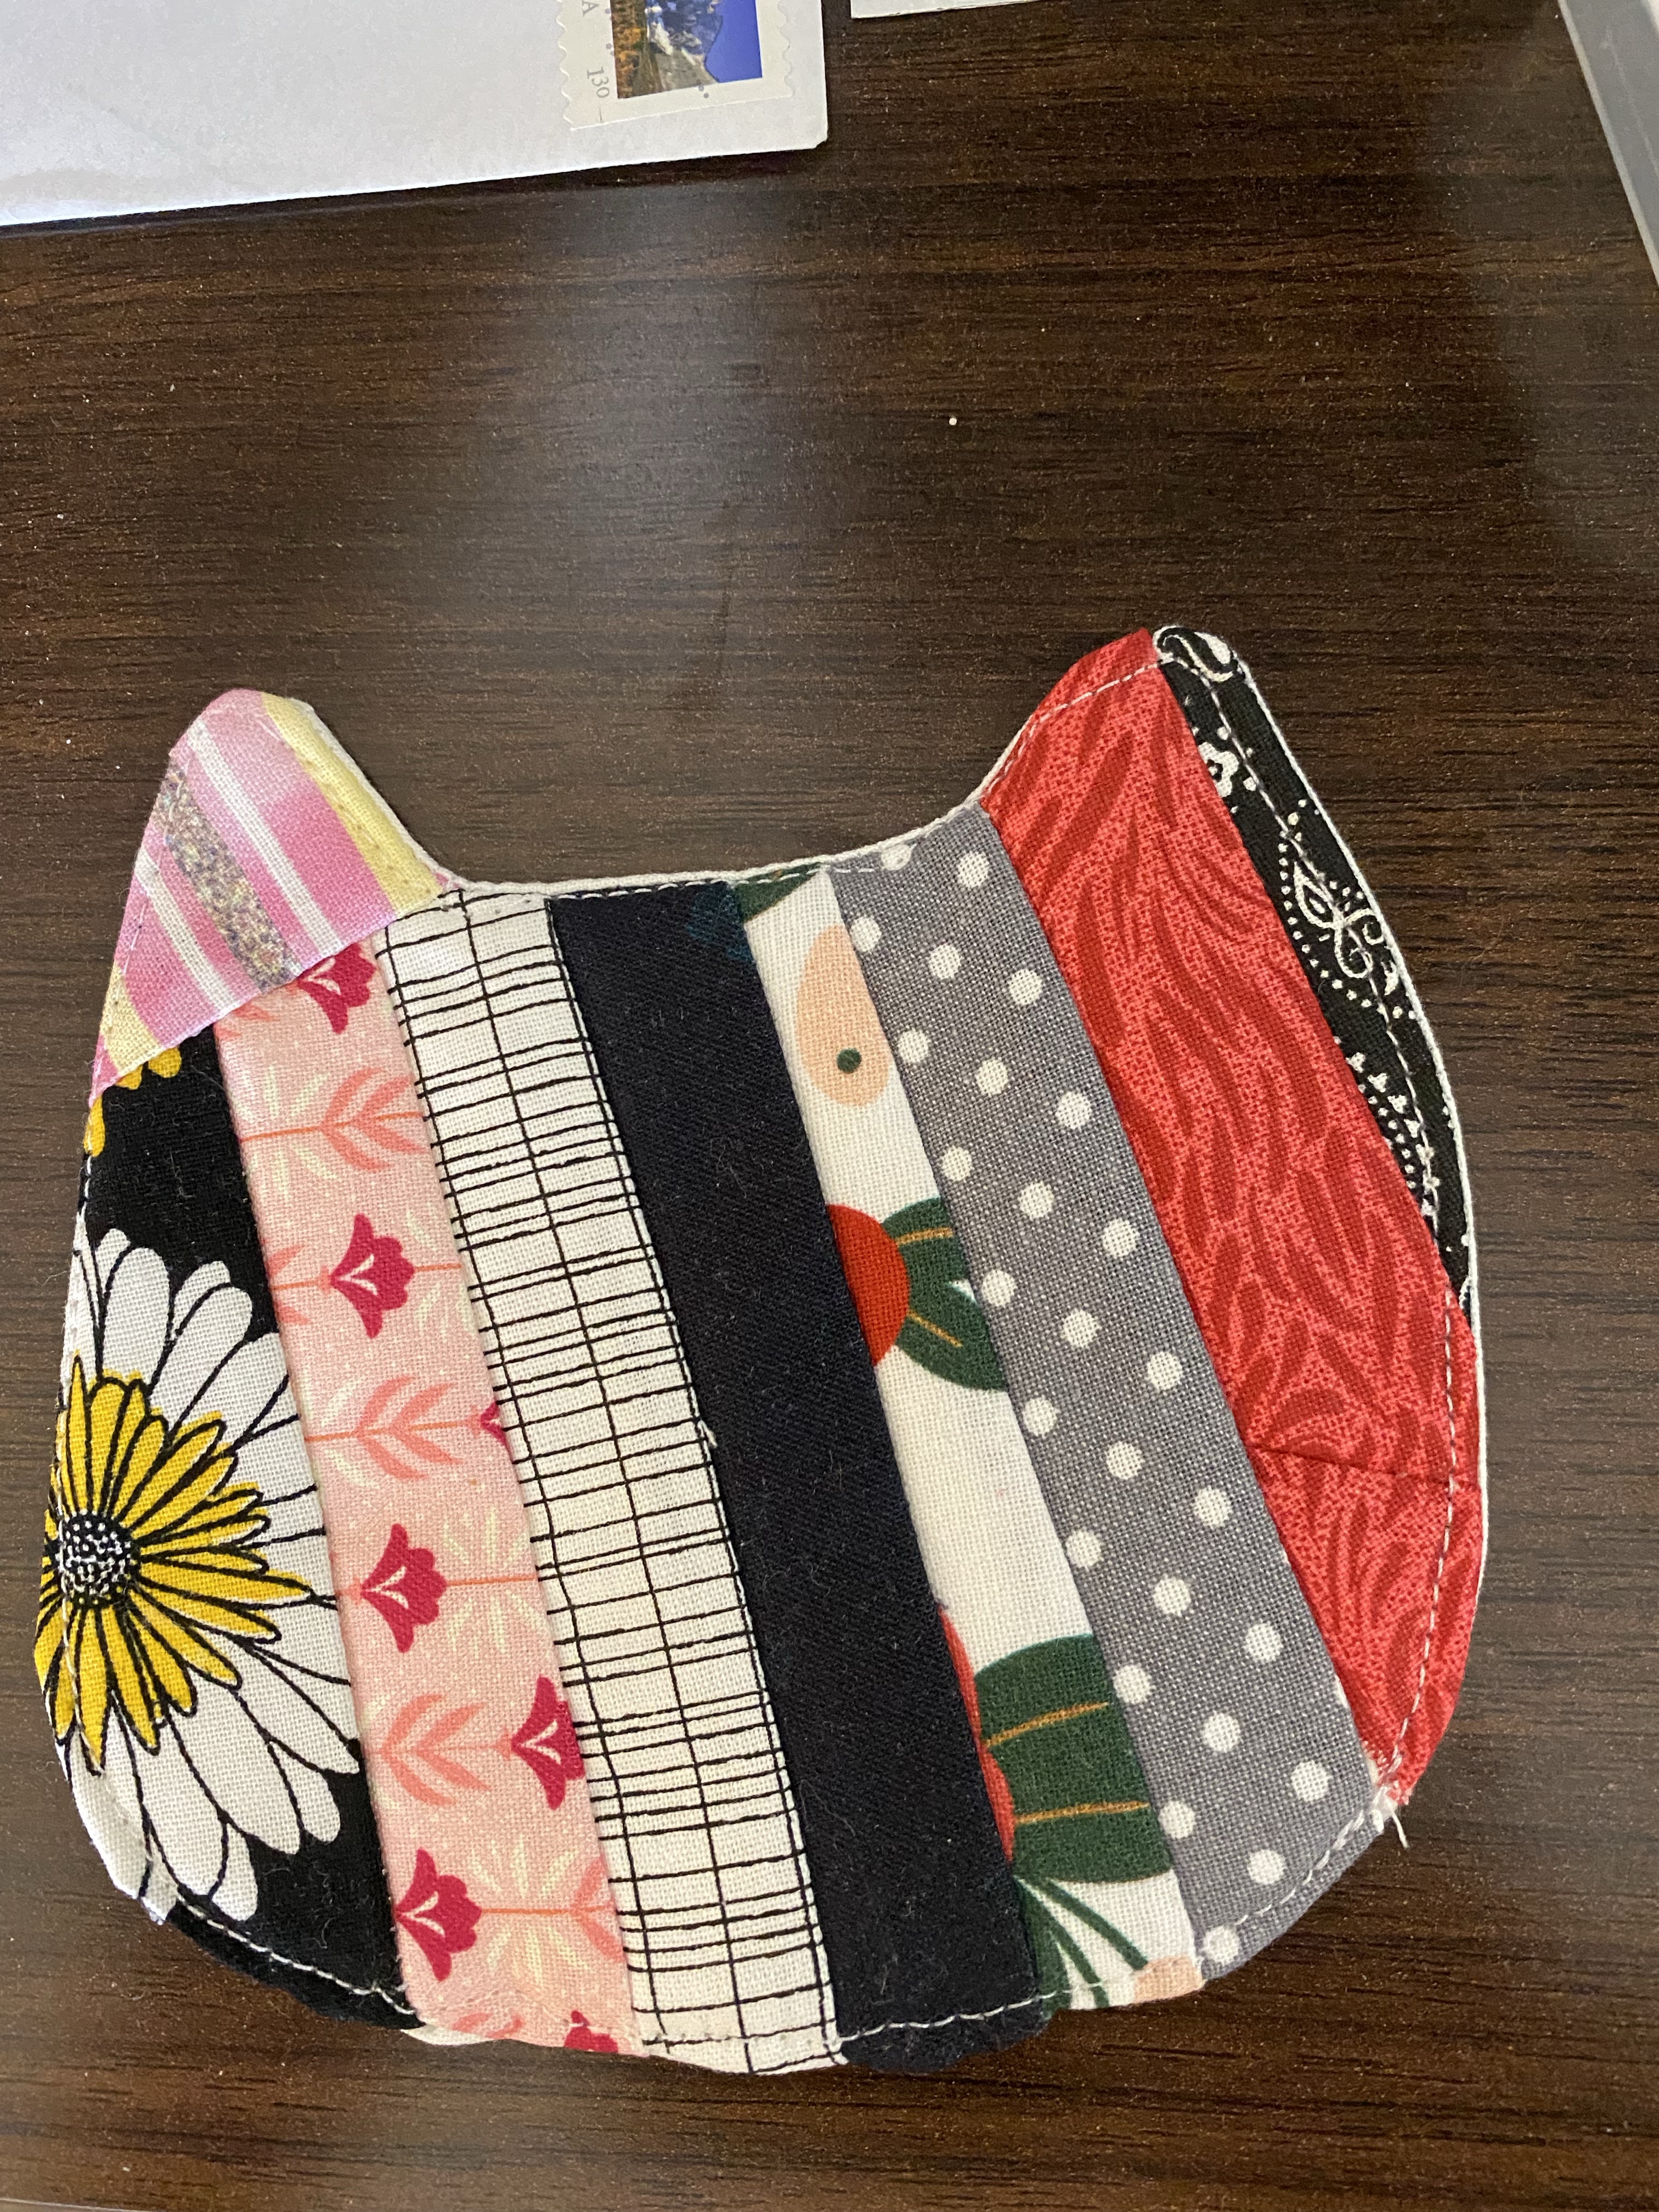
I decided to explain how I’m coping without a rotary cutter and mat. Yes, it’s like the days when I first started quilting. I don’t always want to measure, and luckily with the pouches I’m making I really don’t have to.
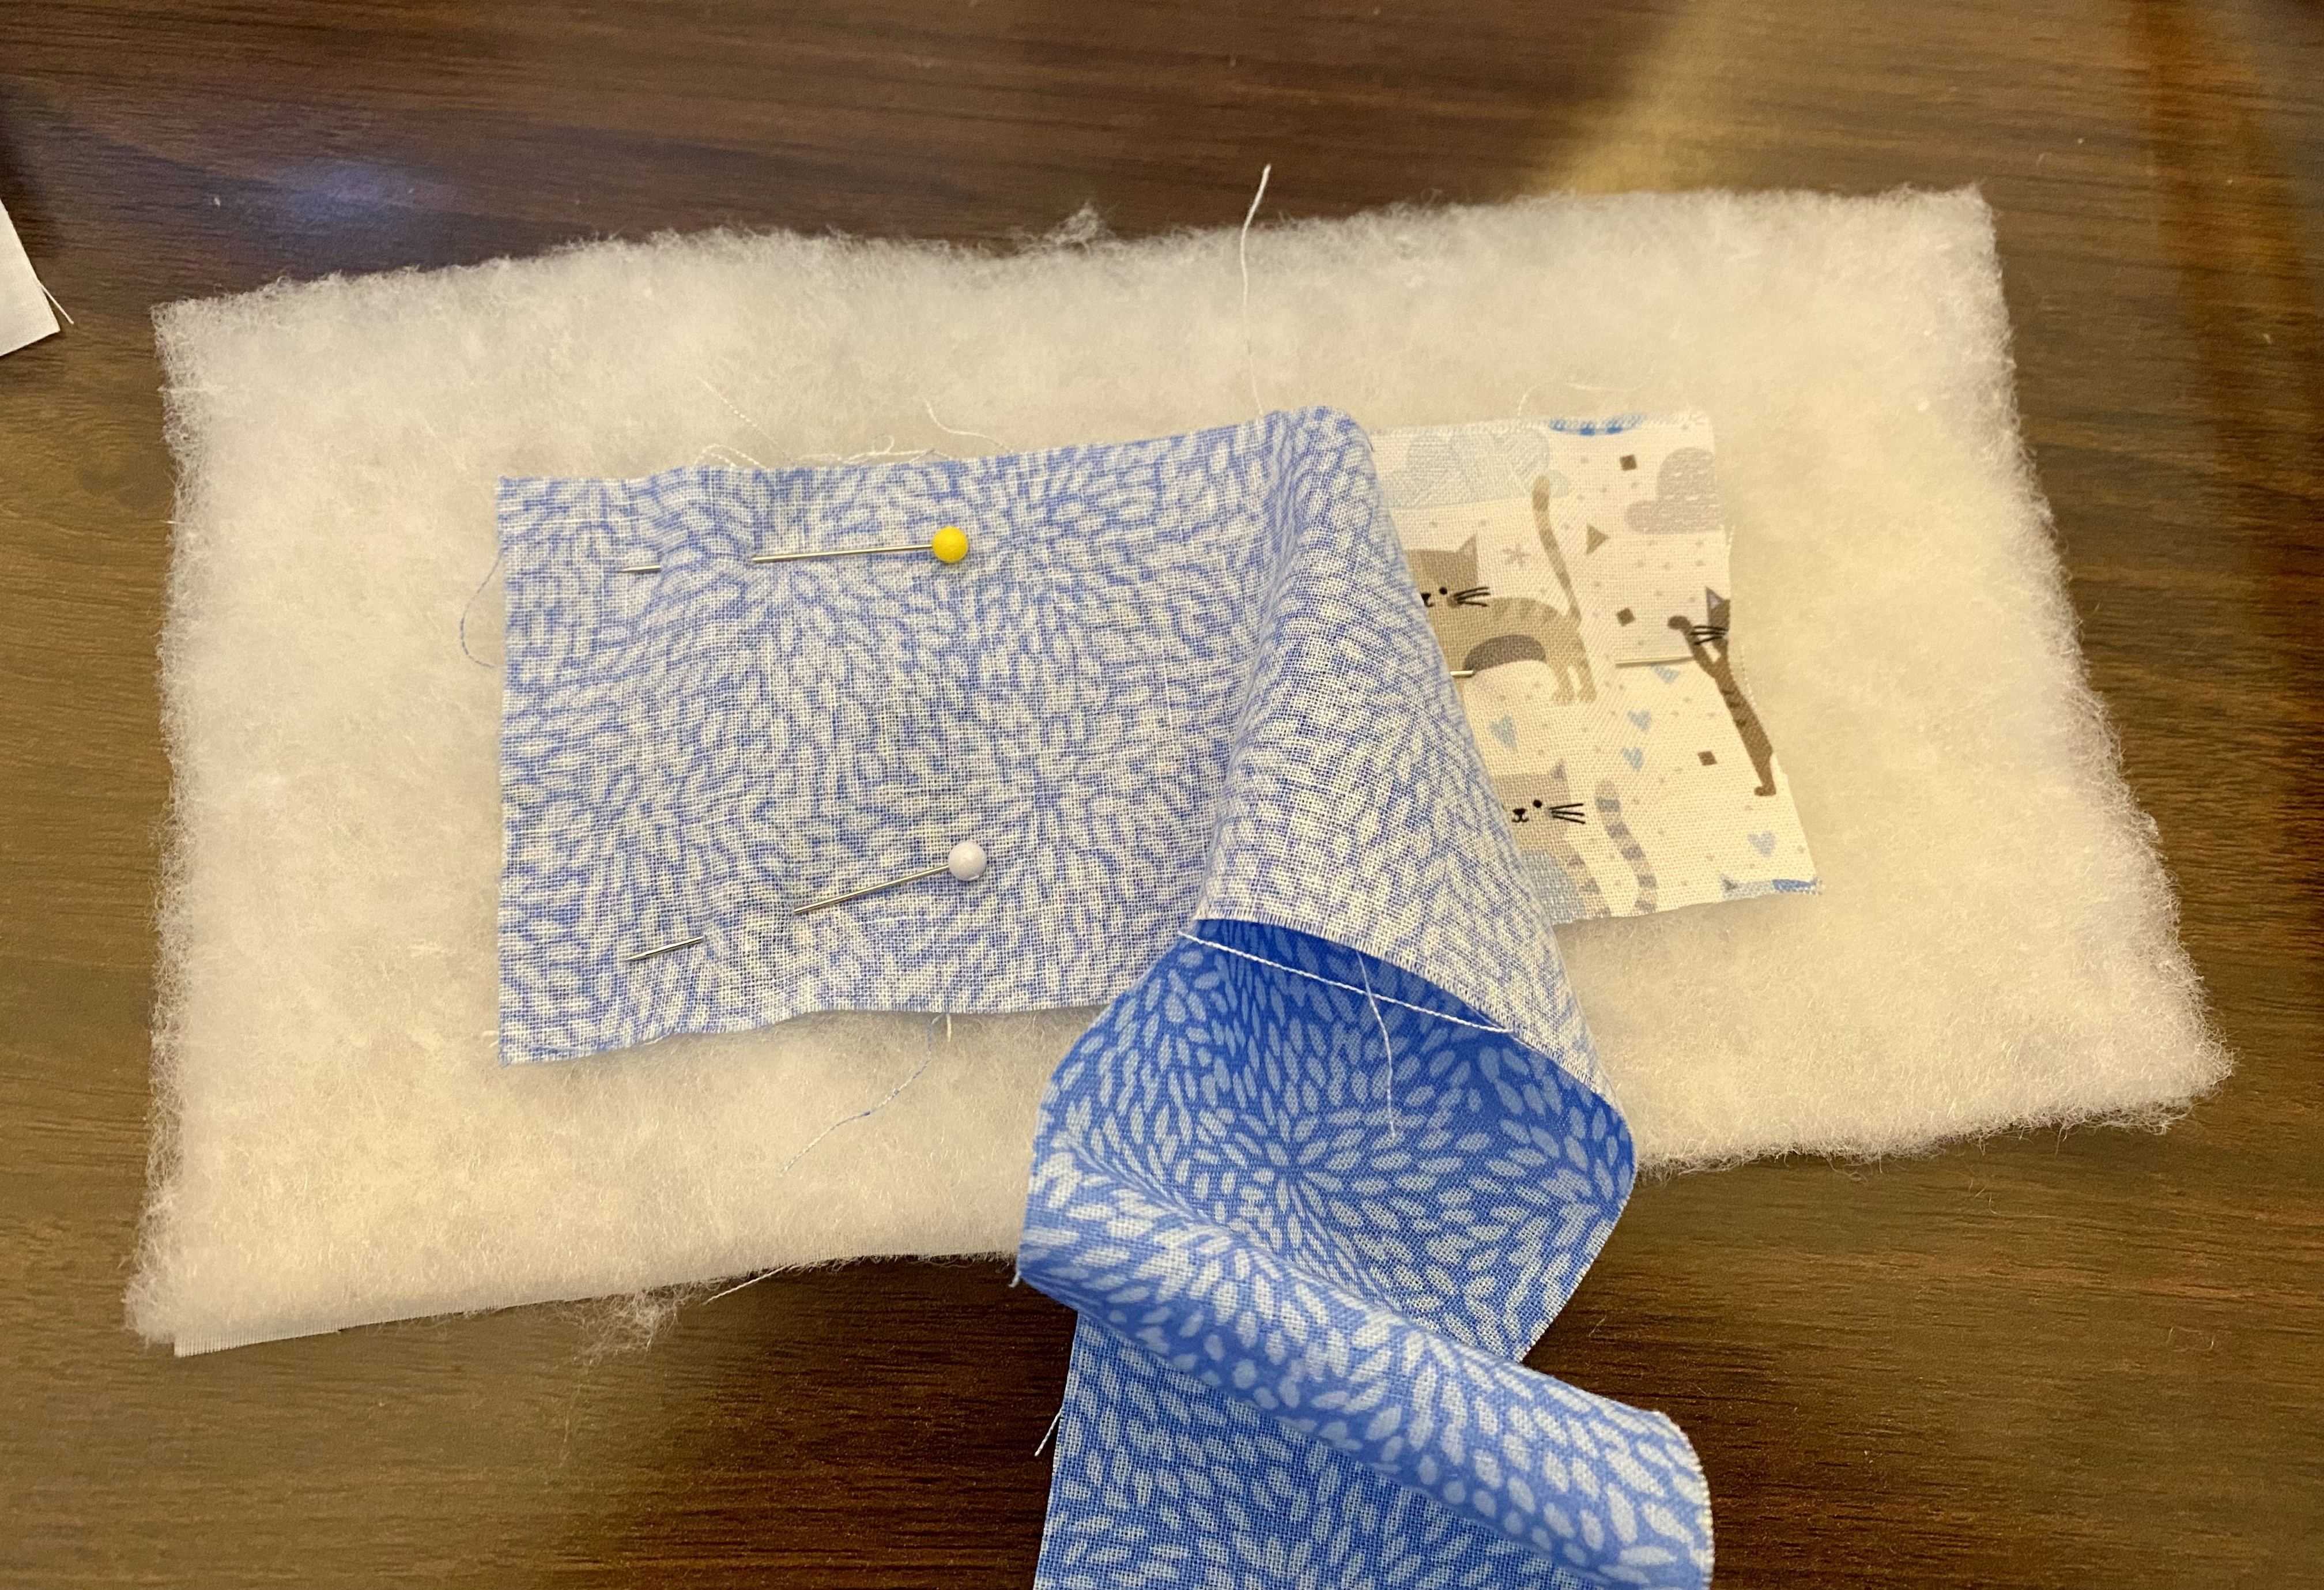
For this cat pouch I eyeballed the size of the cat fabric I wanted, then cut to the size I felt looked good. I centered the fabric by finding and marking the center of the batting/backing and the cat fabric, then pinning in place.
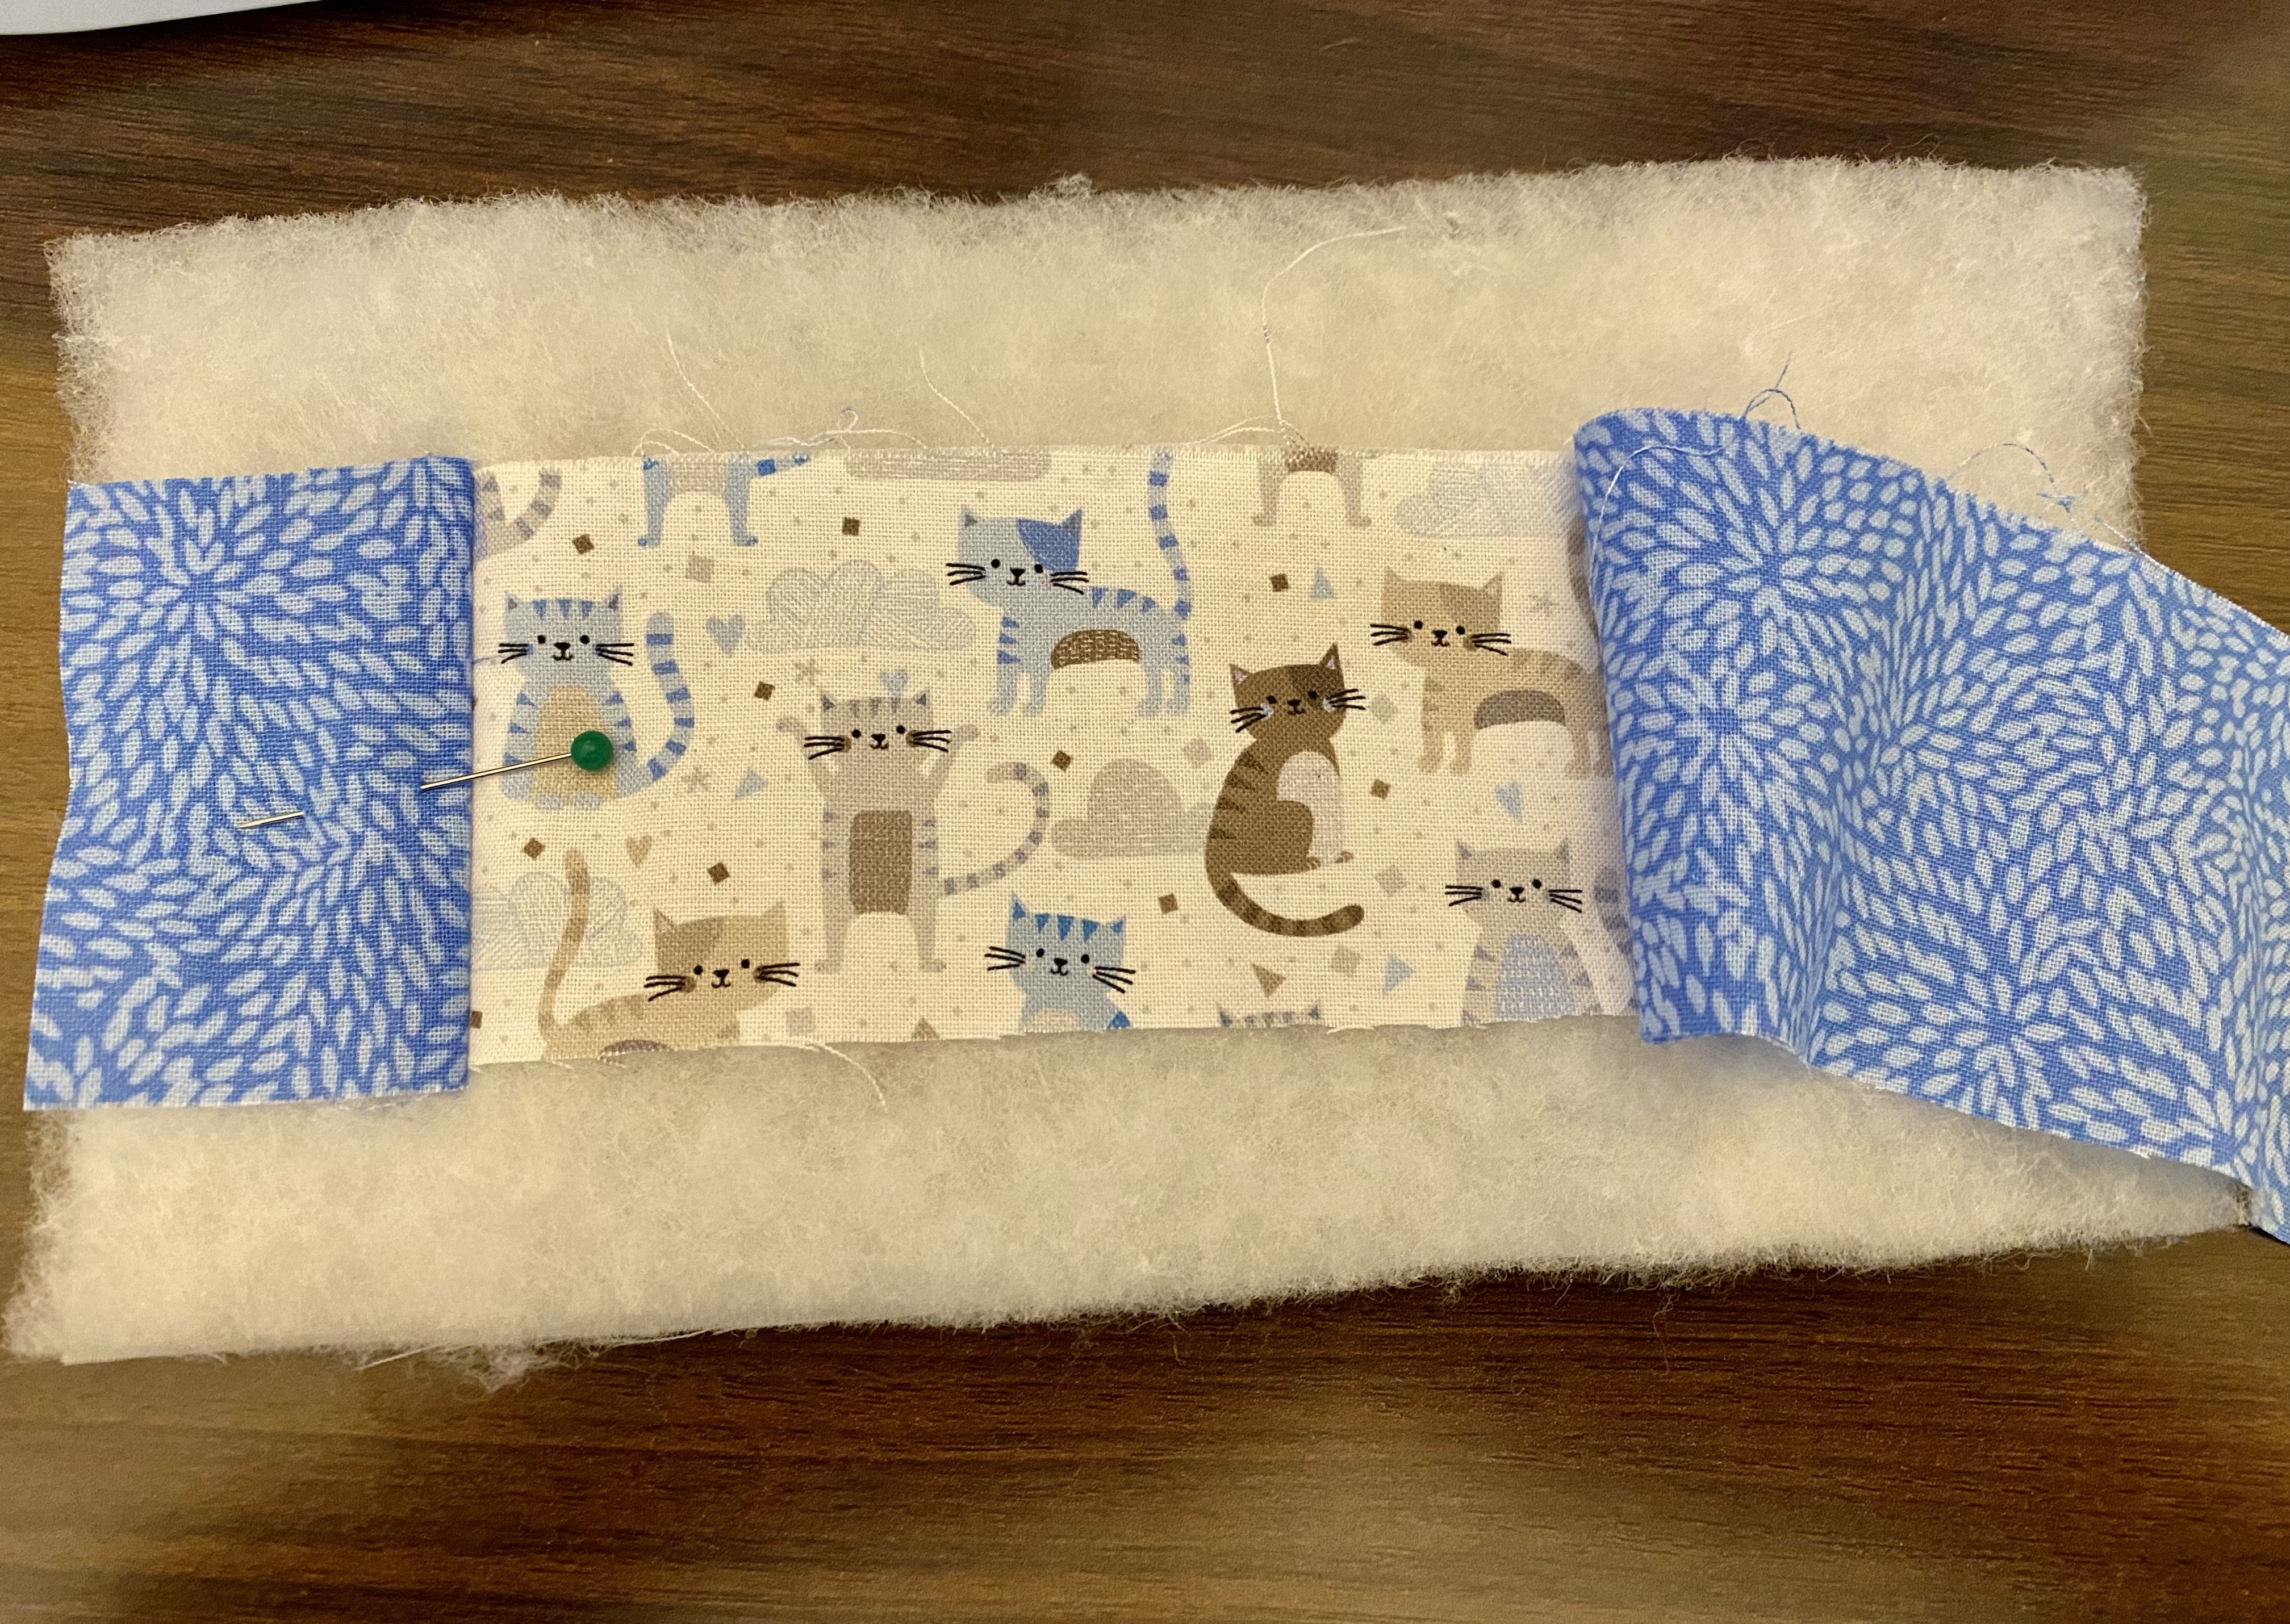
The blue accents to the side were just cut as a long strip of the matching height. I sewed it to one side of the cat fabric and trimmed, then did the second side the same. Flip, trim, press.
Again, just like before, the grey strips were cut to the appropriate height and stitched down. When the fabrics were all stitched, I trimmed the edges, making sure the two sides were identical. Last steps were to add the zipper and sew the edges.
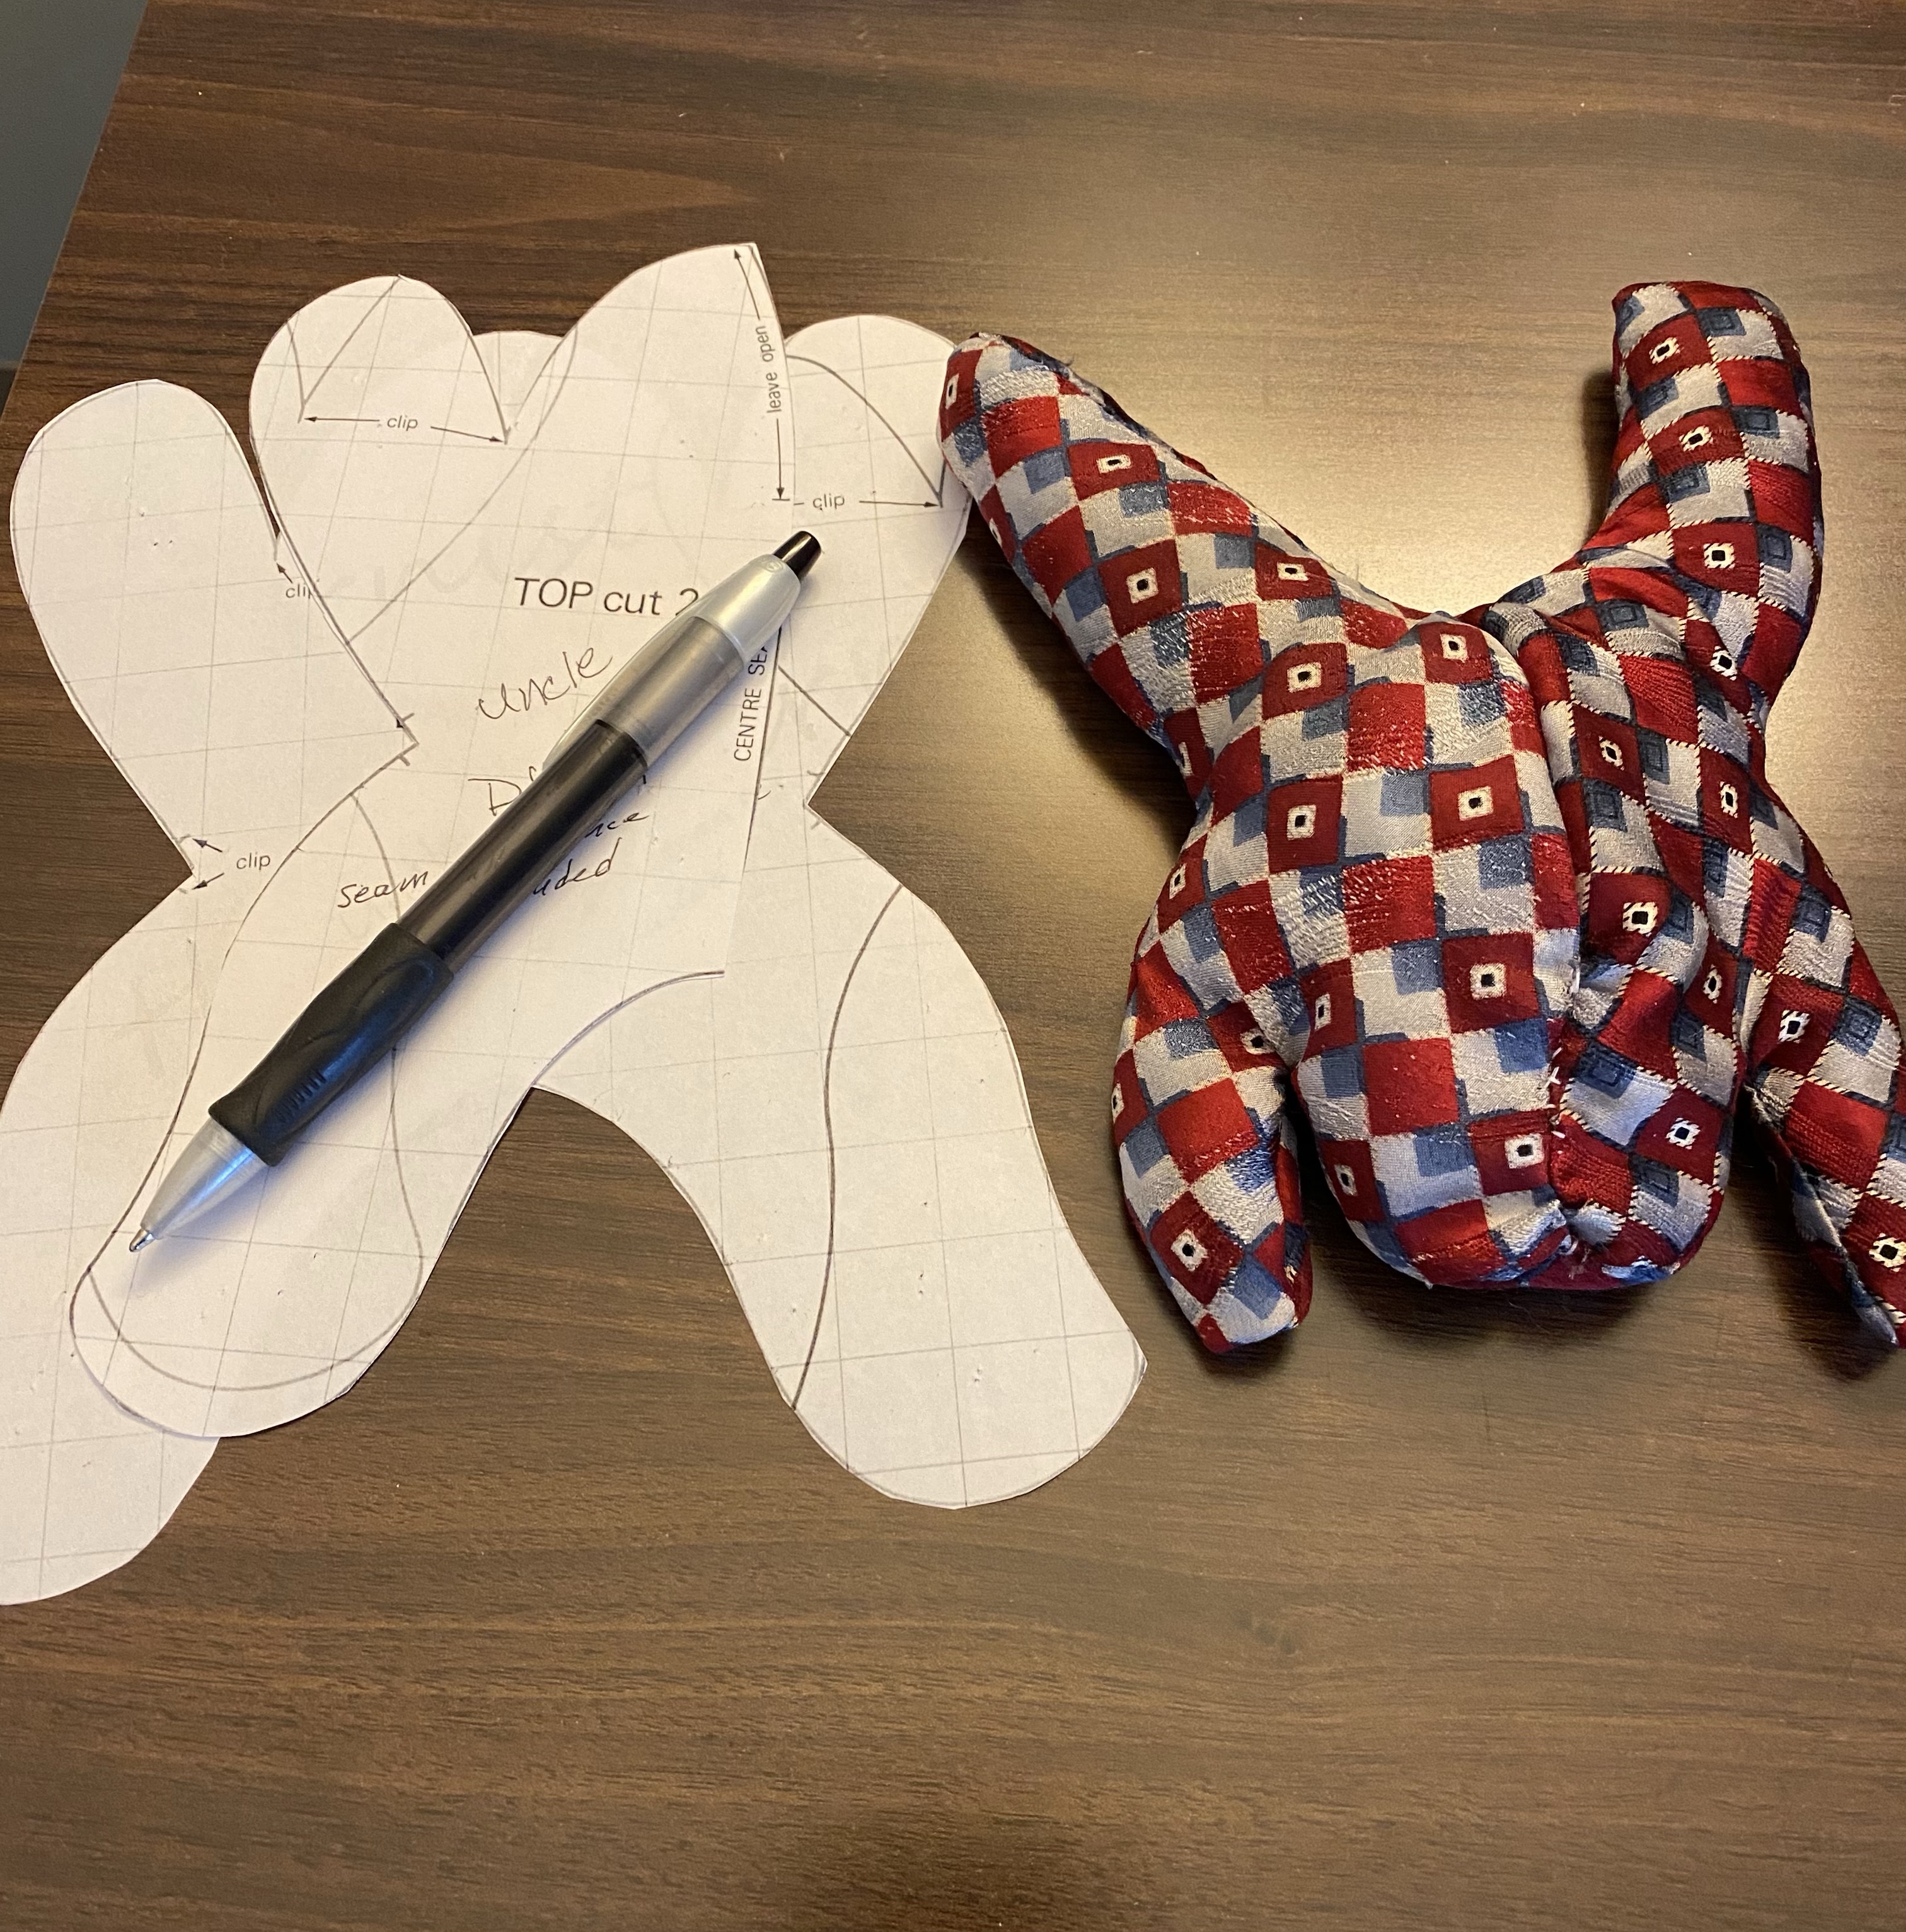
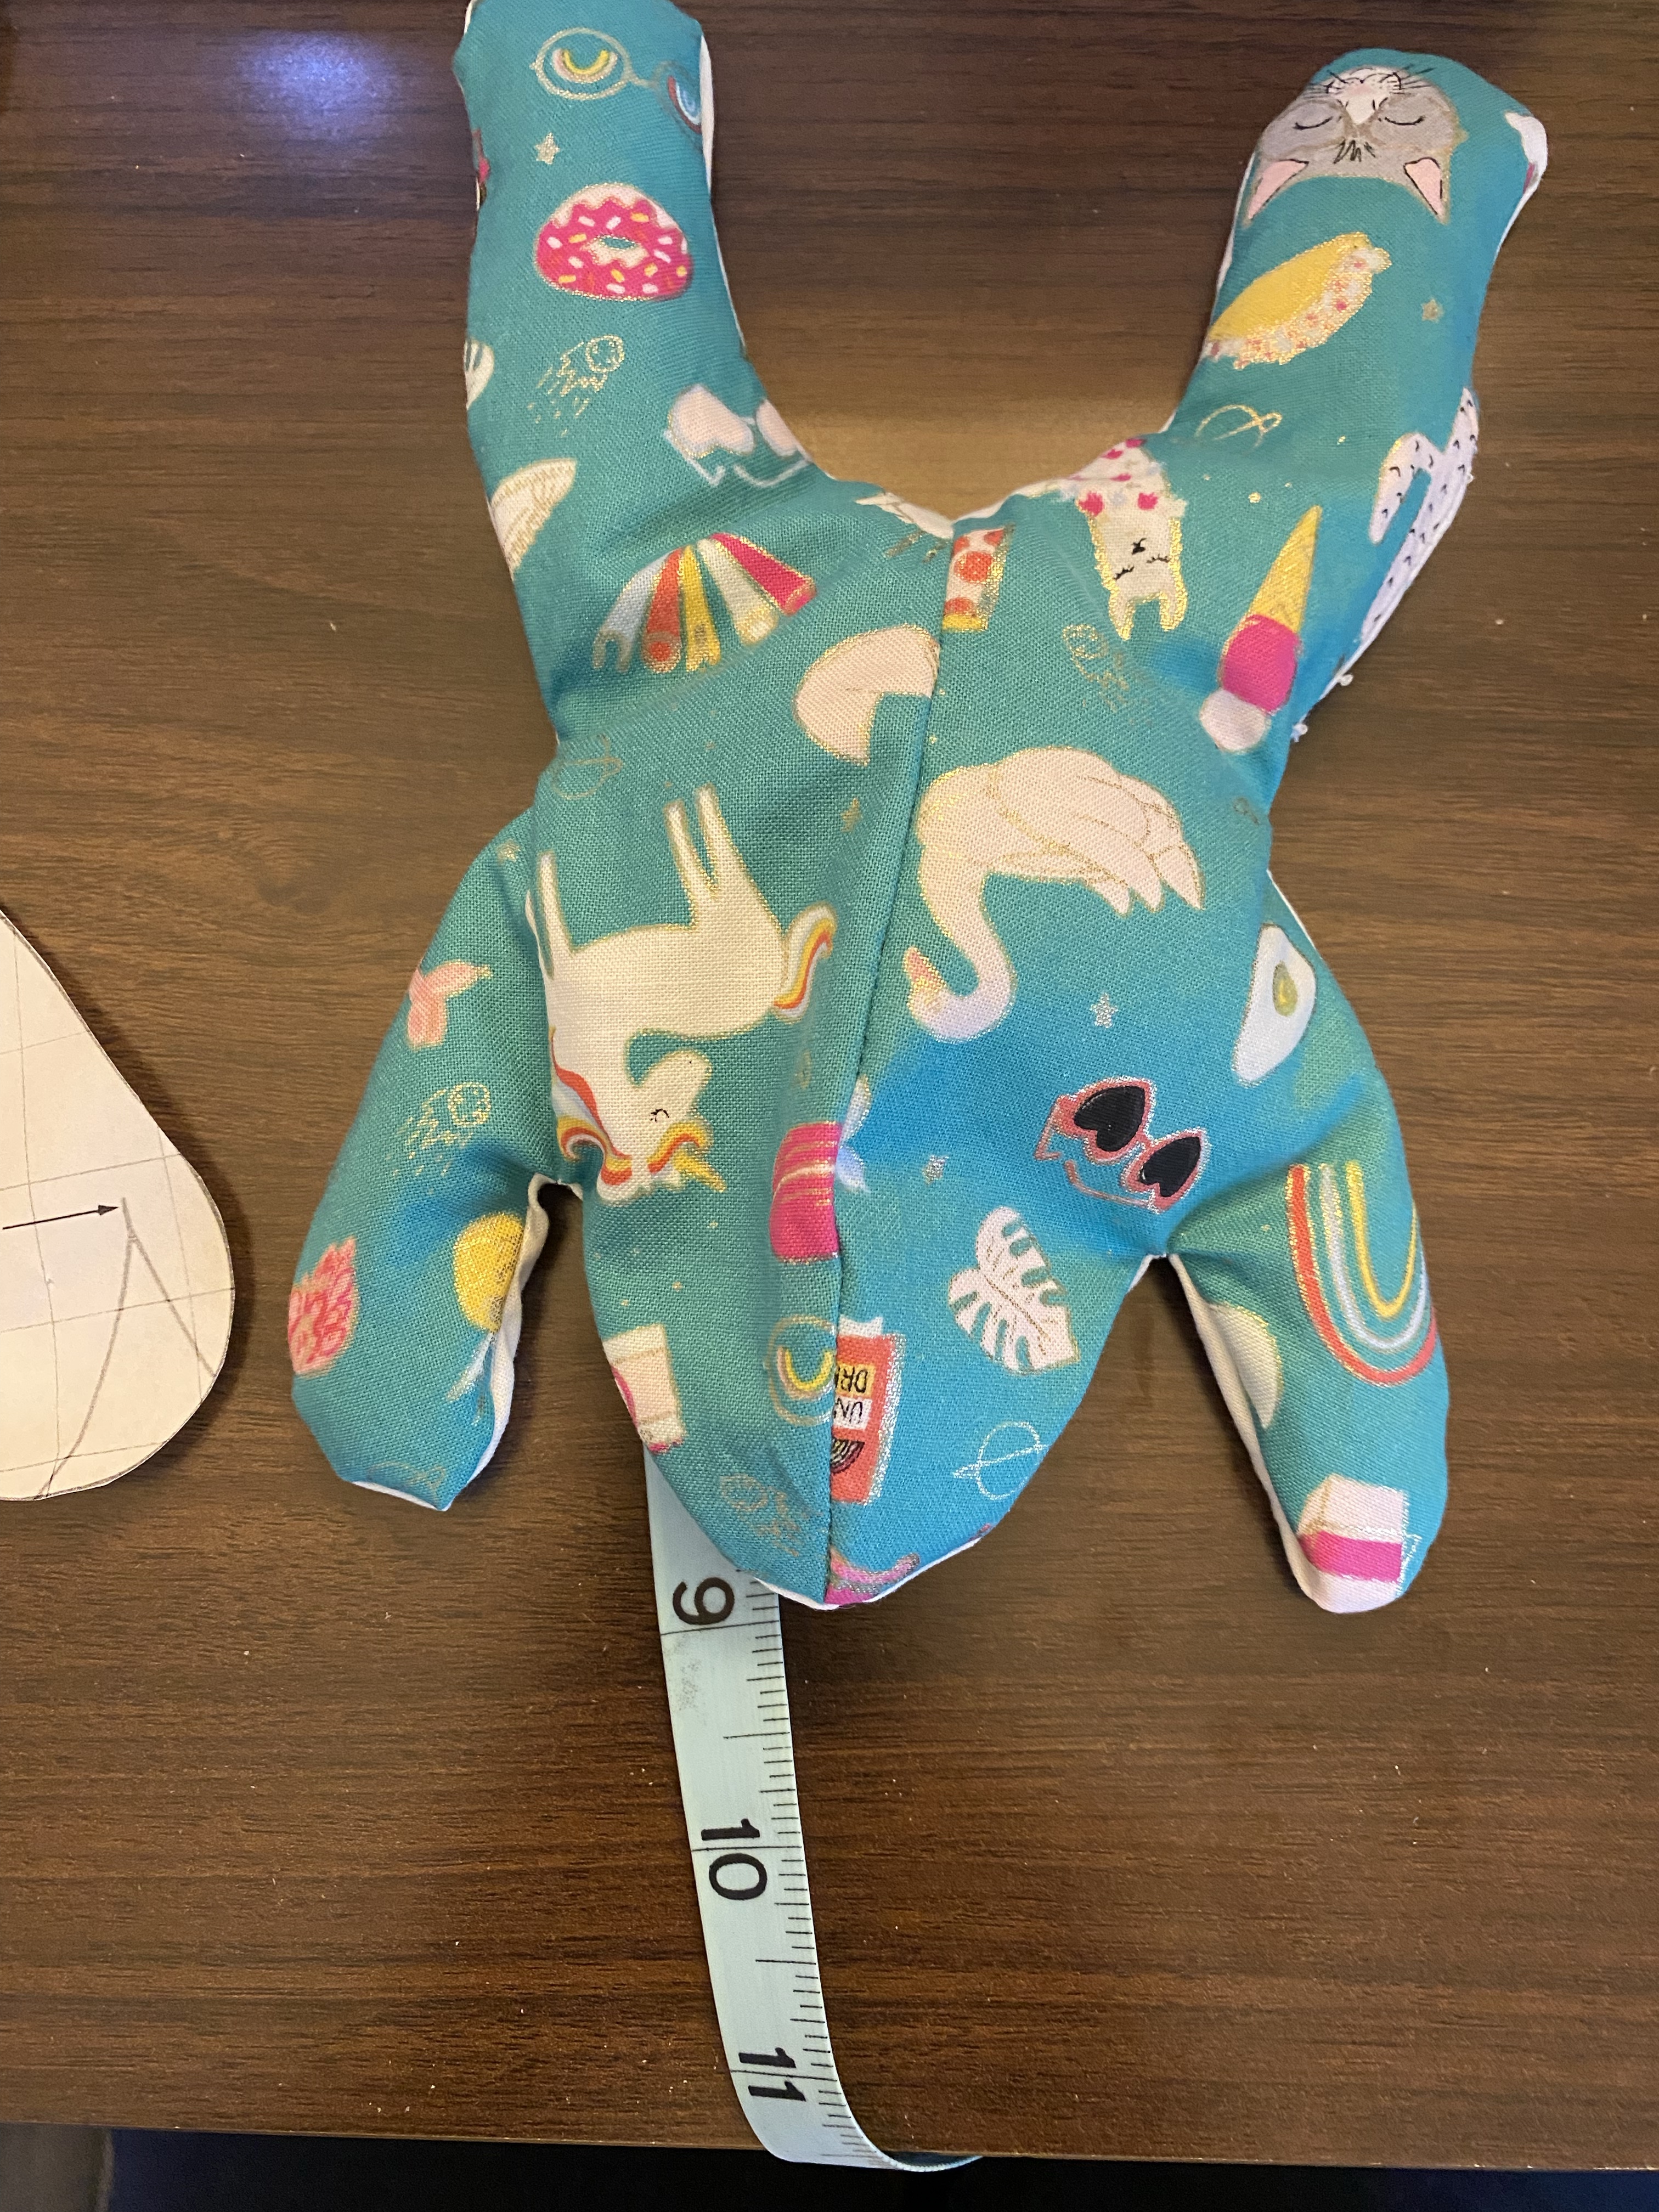
I found the “just right” size of bean bag frog from my Jr. High years. McCalls had come out with a pattern in the early 70s for a bean bag frog. The mother of a friend made several of them for the friend to give away. Somehow I came up with the name Uncle Dudley for mine and it stuck. I played with Uncle Dudley for a long time but I don’t know what happened to it.
Pinterest showed me the frog and I searched for just the right pattern. It couldn’t be a different version, it had to be the original Uncle Dudley. While I couldn’t find the original paper pattern for sale, I did find someone who specializes in recreating vintage patterns, and I jumped on it. It came with several sizes of patterns to print.
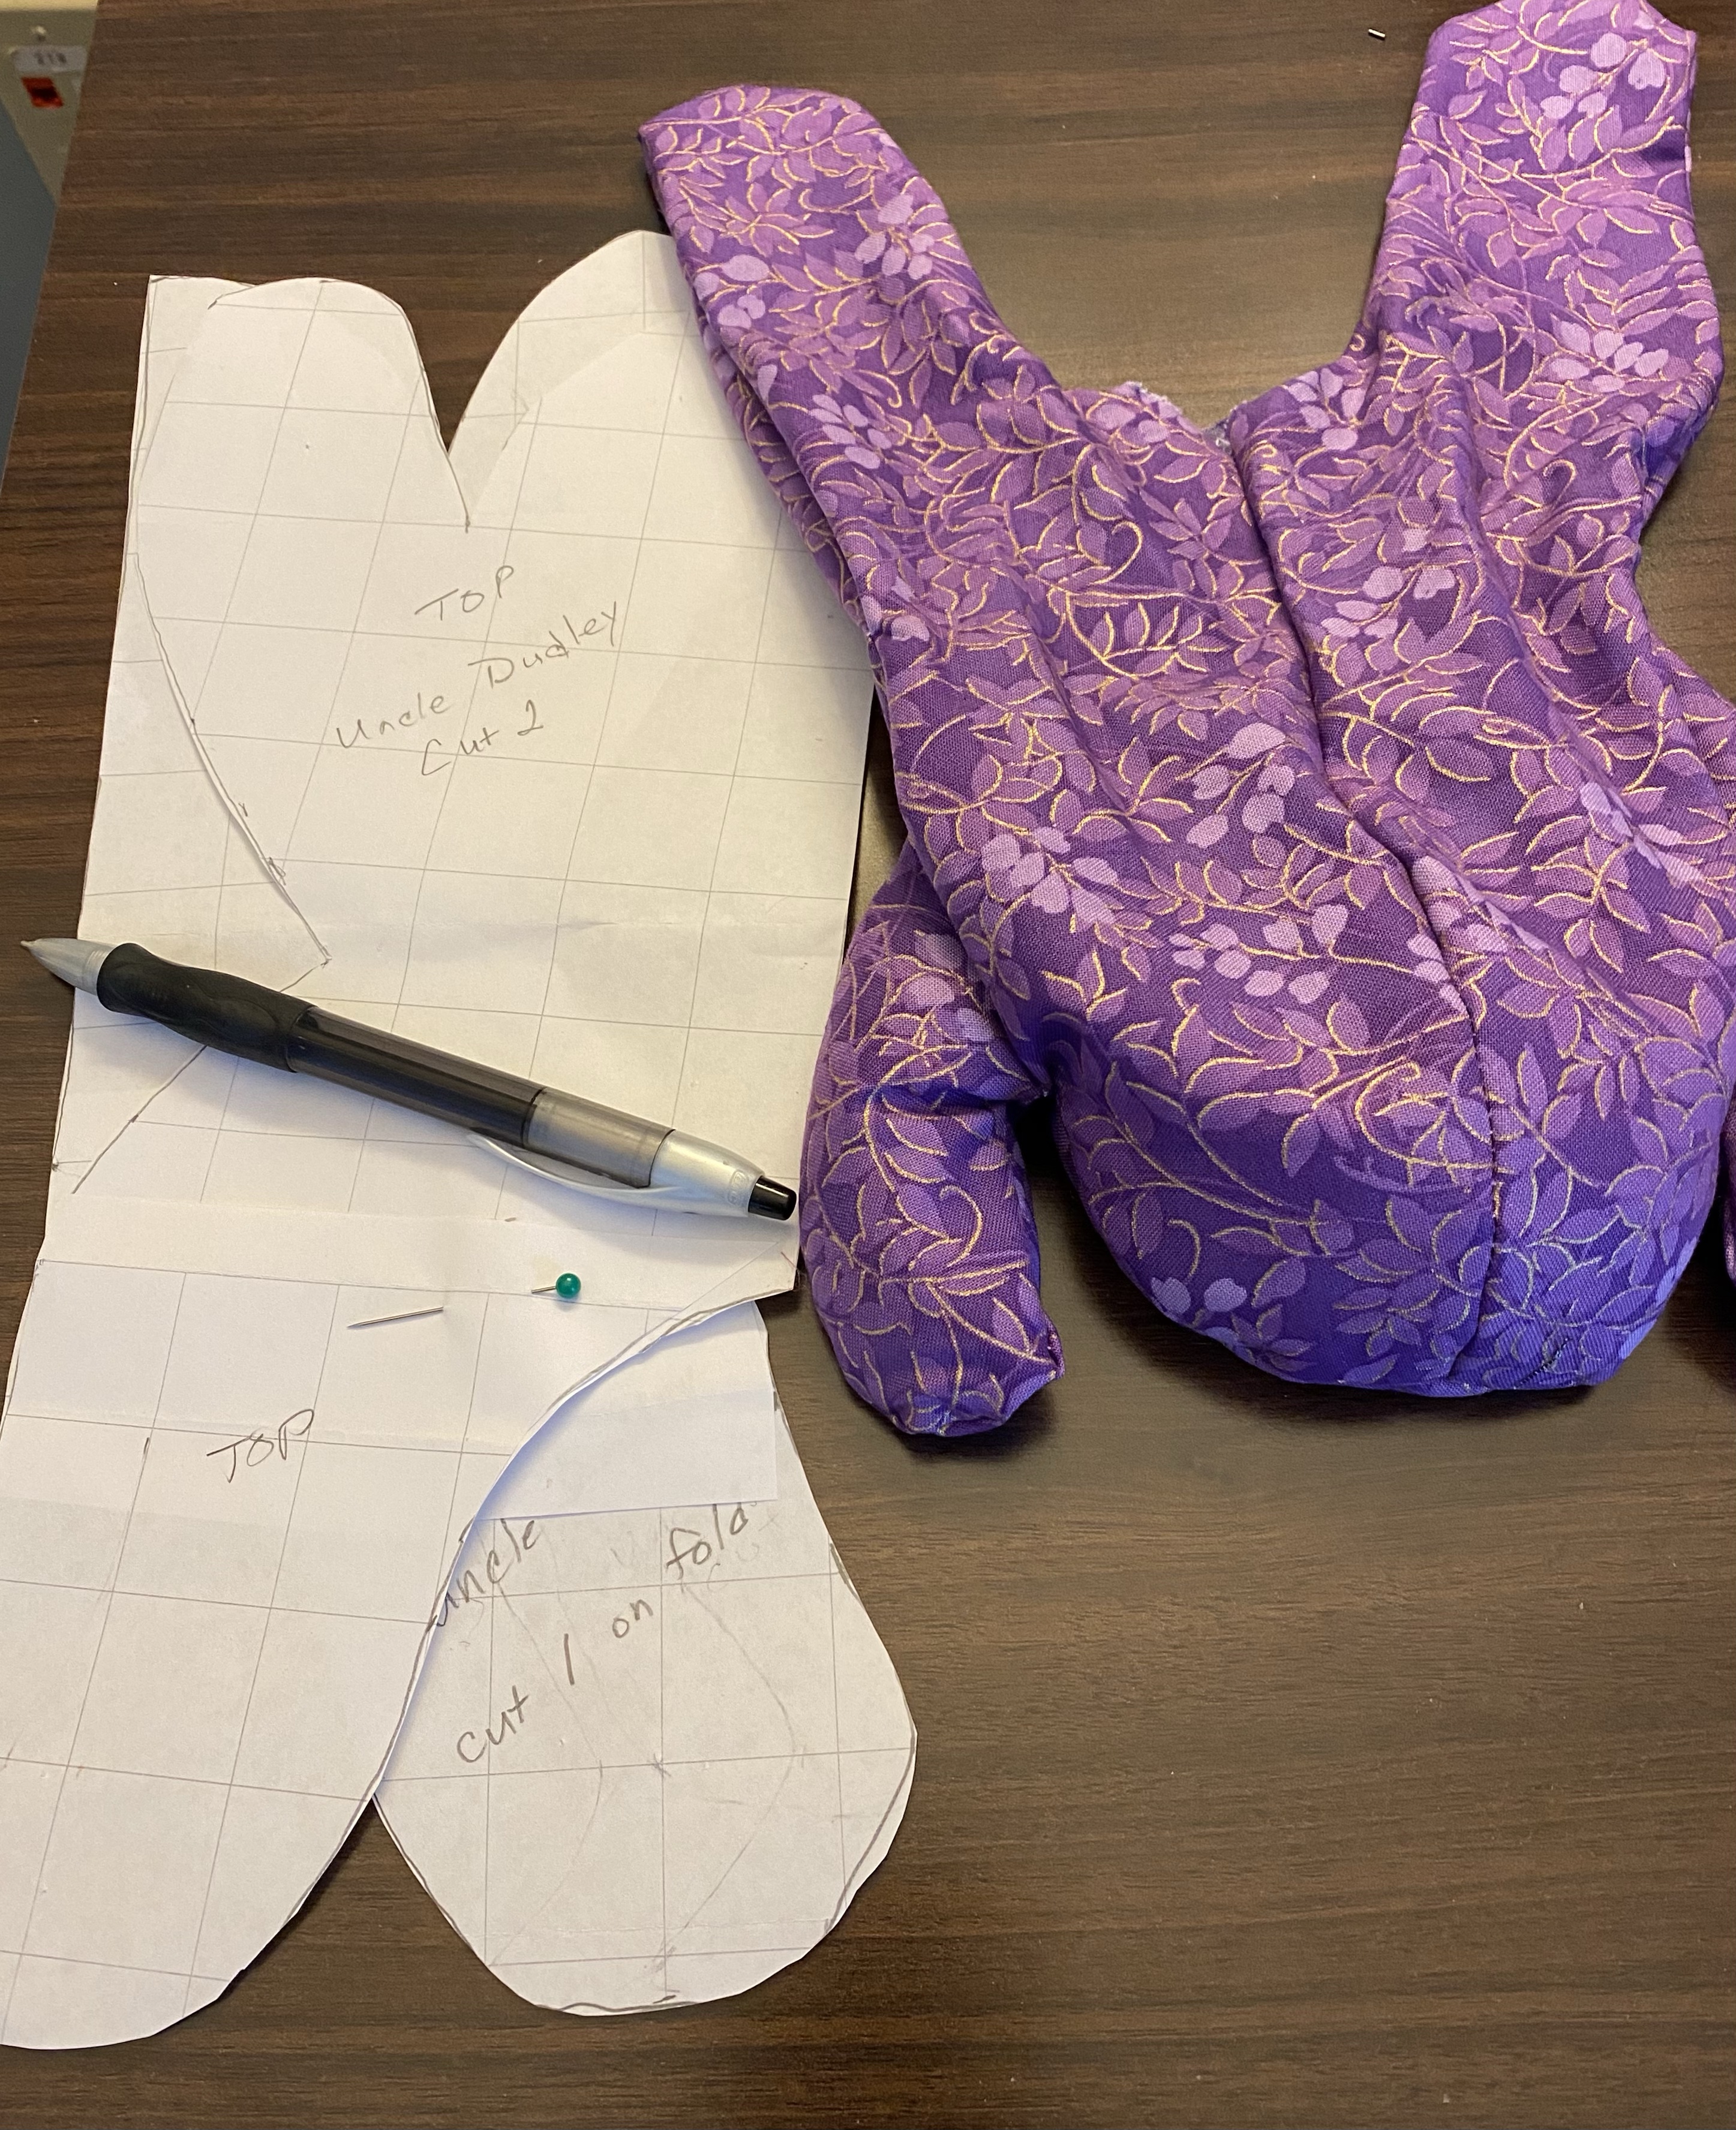
The first one was too small. It was small enough to make from a man’s red tie, but I wanted the right size. Using grid paper, I enlarged the squares to double the size and made it in purple, but that was far too large. I didn’t even finish stuffing that one. I went to the printer again and found a medium size and it’s exactly right.
The final version is 9 inches from toe to nose. I changed where the opening is for turning and stuffing, because I wanted my hand-stitching more hidden than where the pattern said, although it would have been easier to stuff. If you try bean bag animals, be sure not to stuff it completely full so you can pose it a bit. What I had on hand was rice, but I think bird seed would have a better feel and flow to it.
Textural fabrics would really be great for this pattern. I found some embroidered denim at JoAnn Fabrics that spoke 70s to me, but the scale was far too large. Remember all the chambray shirts and denim jeans that were hand embroidered in bright colors back then? Corduroy, satin, microsuede, flannel, there are so many fabrics that would be fun to try.
I hope you enjoyed my hop down memory lane.
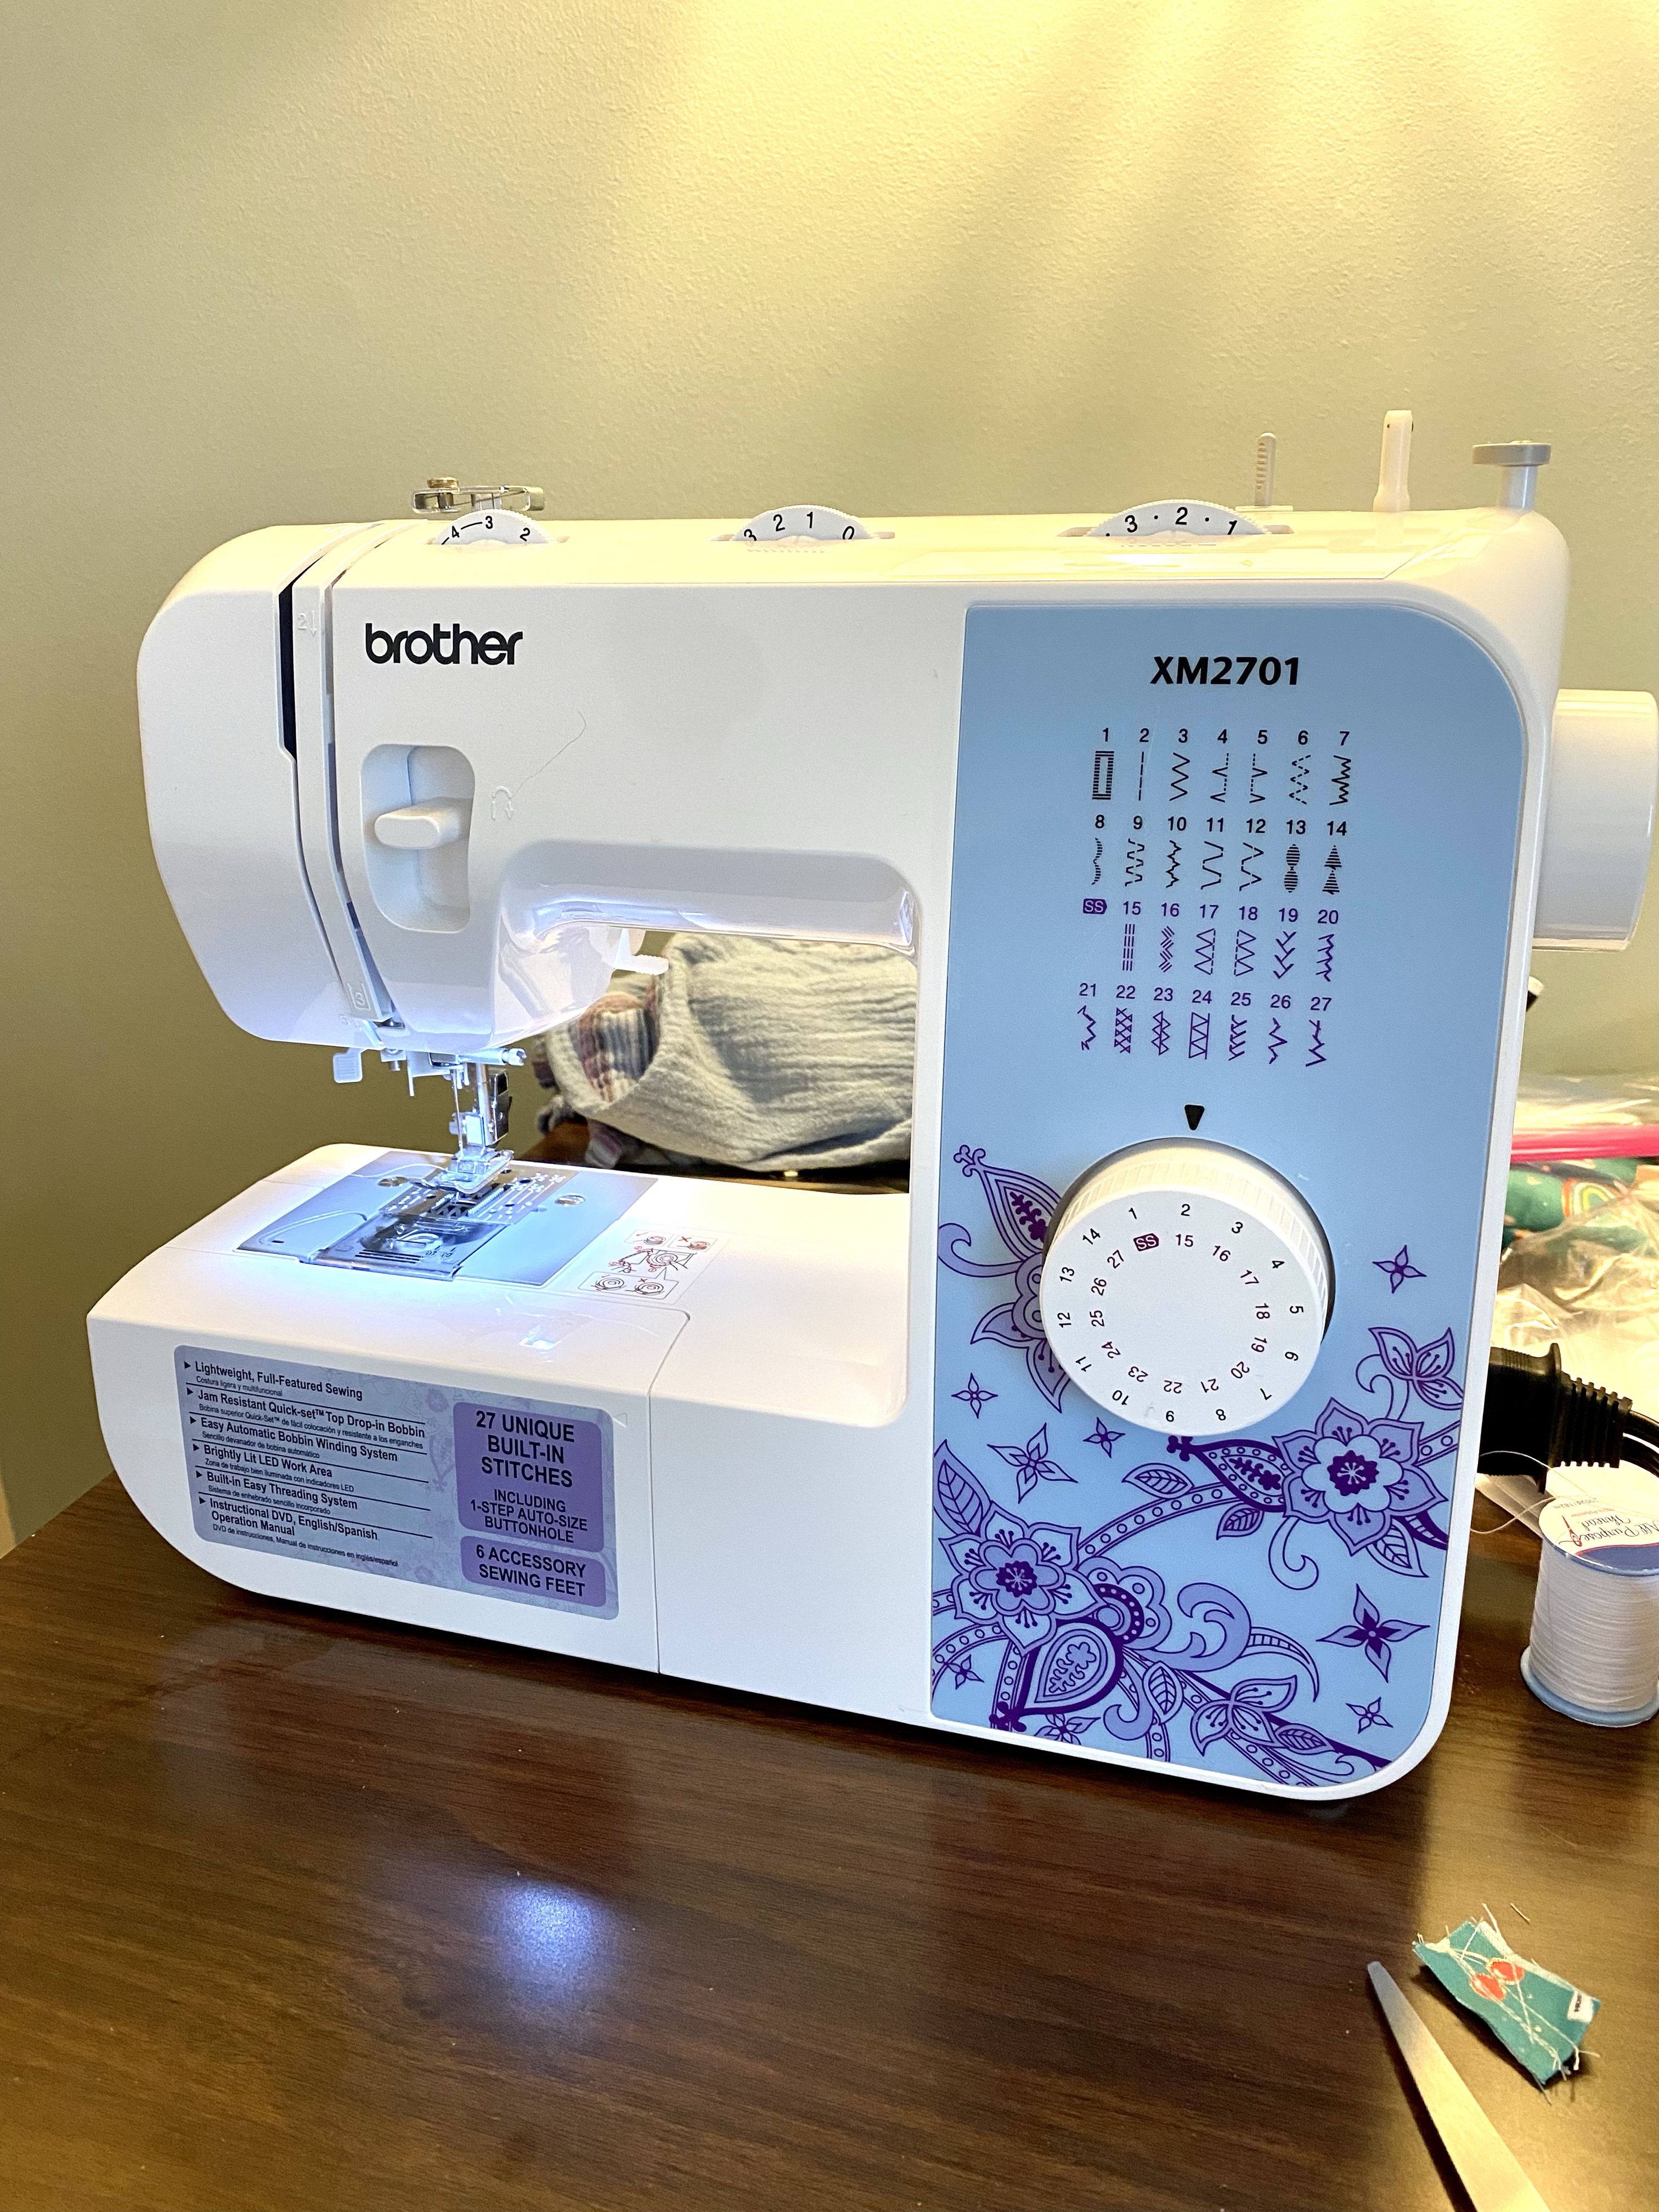
Here’s a look at the sewing machine my granddaughter let me borrow. It’s pretty basic, but a great entry model for her and a great interim model for me.
In my forced time away from home, I brought my lightest, smallest sewing machine so I would be able to create. I bought the Brother PE400D (home embroidery) machine in 2003. I know 20 years is a long time for an electronic machine to keep working well, but I really did hope for more.
I’ve had trouble with it in the past. The LCD screen needed calibrating at one time, and I took it to an authorized repair spot. The fellow looked it over and said he needed to do some research. He ended up calling me after about a week, said he couldn’t do anything for me, and I could pick it up with no charge. I got on the internet and stubbornly searched until I found step-by-step instructions. It worked and I was again able to use the LCD touchscreen.
Lately I’ve had vertical lines in the display and wanted to recalibrate again. I searched stubbornly again but this time I find no mention of how to calibrate this machine. I find instructions for other machines with buttons and features that I don’t have, so I can’t even guess how to do it again. I called the Brother service center and the tech listened patiently but would only suggest I take it to an authorized service center.
The situation got a little worse but I worked with it. I found out I would not be able to change stitch functions if I had been sewing a while, unless I turned it off, unplugged it, and waited at least a half a day or overnight. Recently that changed again. Now the LCD screen won’t respond at all. It lights up but the screen won’t accept my touch, and it has dozens of vertical lines in the display.
I left it unplugged overnight and I get the same non-response, and the same with several days of it being unplugged. Is there anyone with the calibration instructions? Do you have any advice for me? I didn’t want to upgrade my embroidery machine yet, but if there is nothing else offered for advice, I may have to do that. Or I could abandon the embroidery. Meanwhile, my 11-year-old granddaughter is lending me her small sewing machine so I can keep busy.
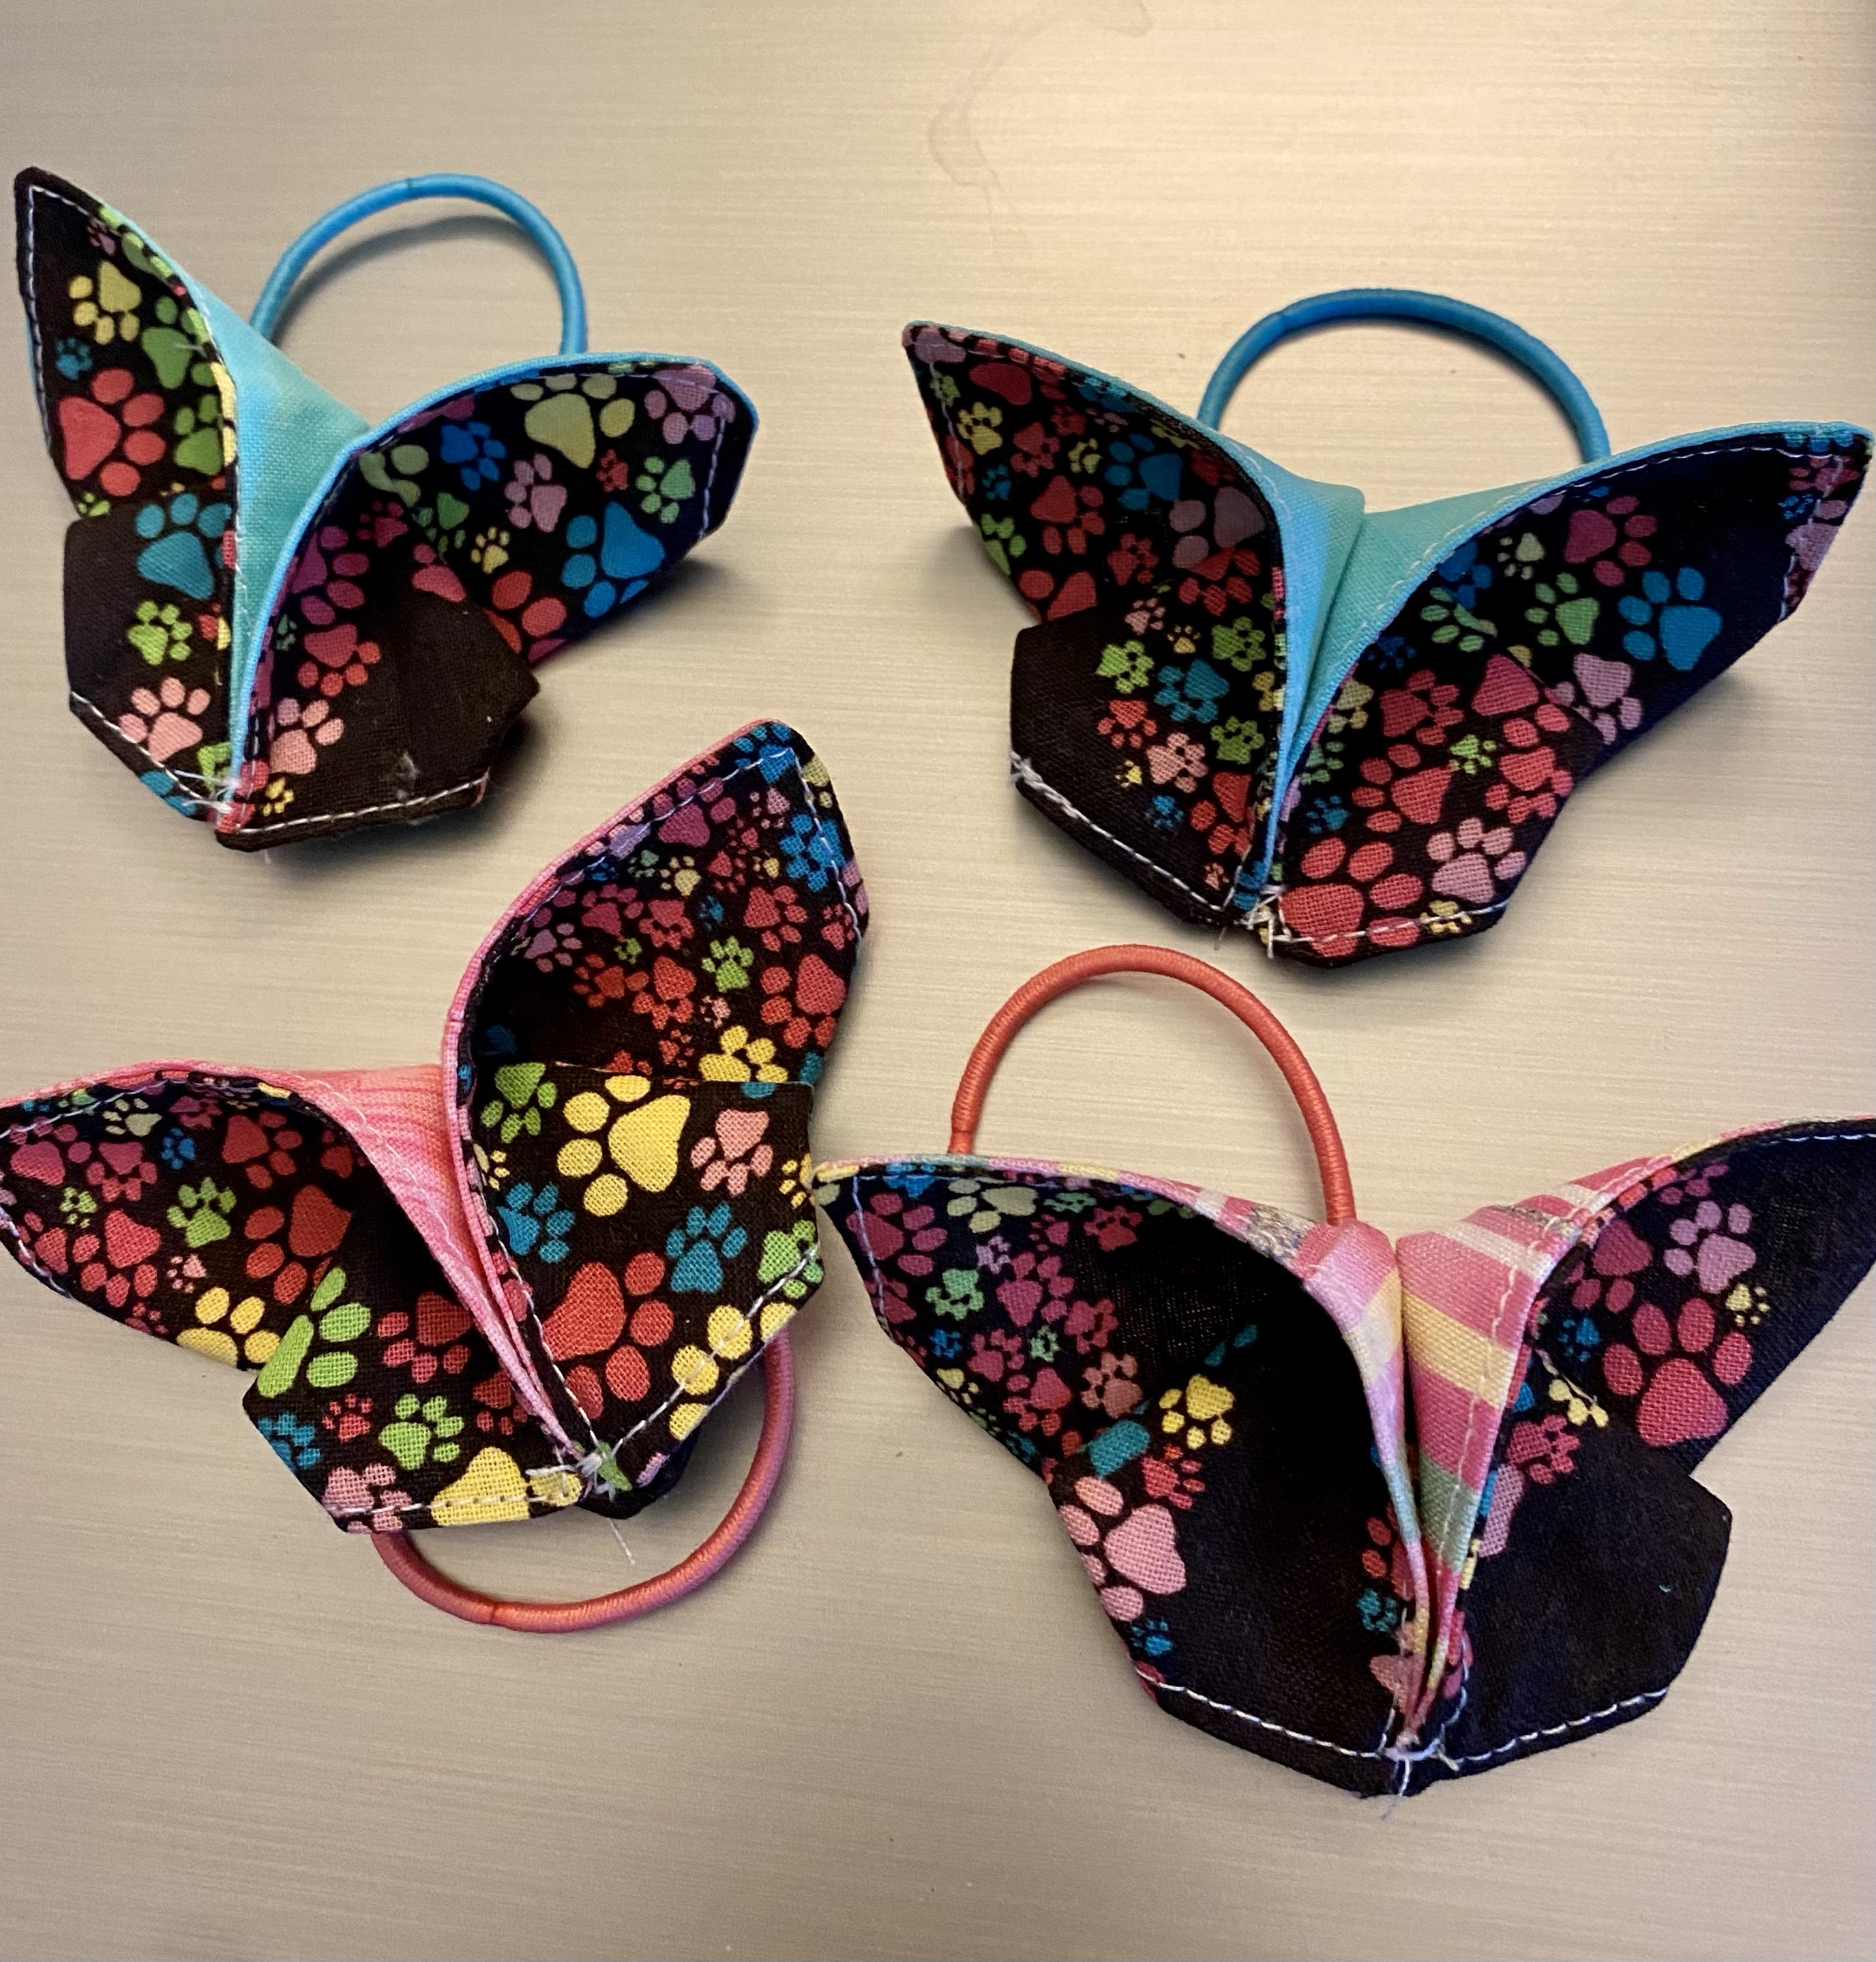
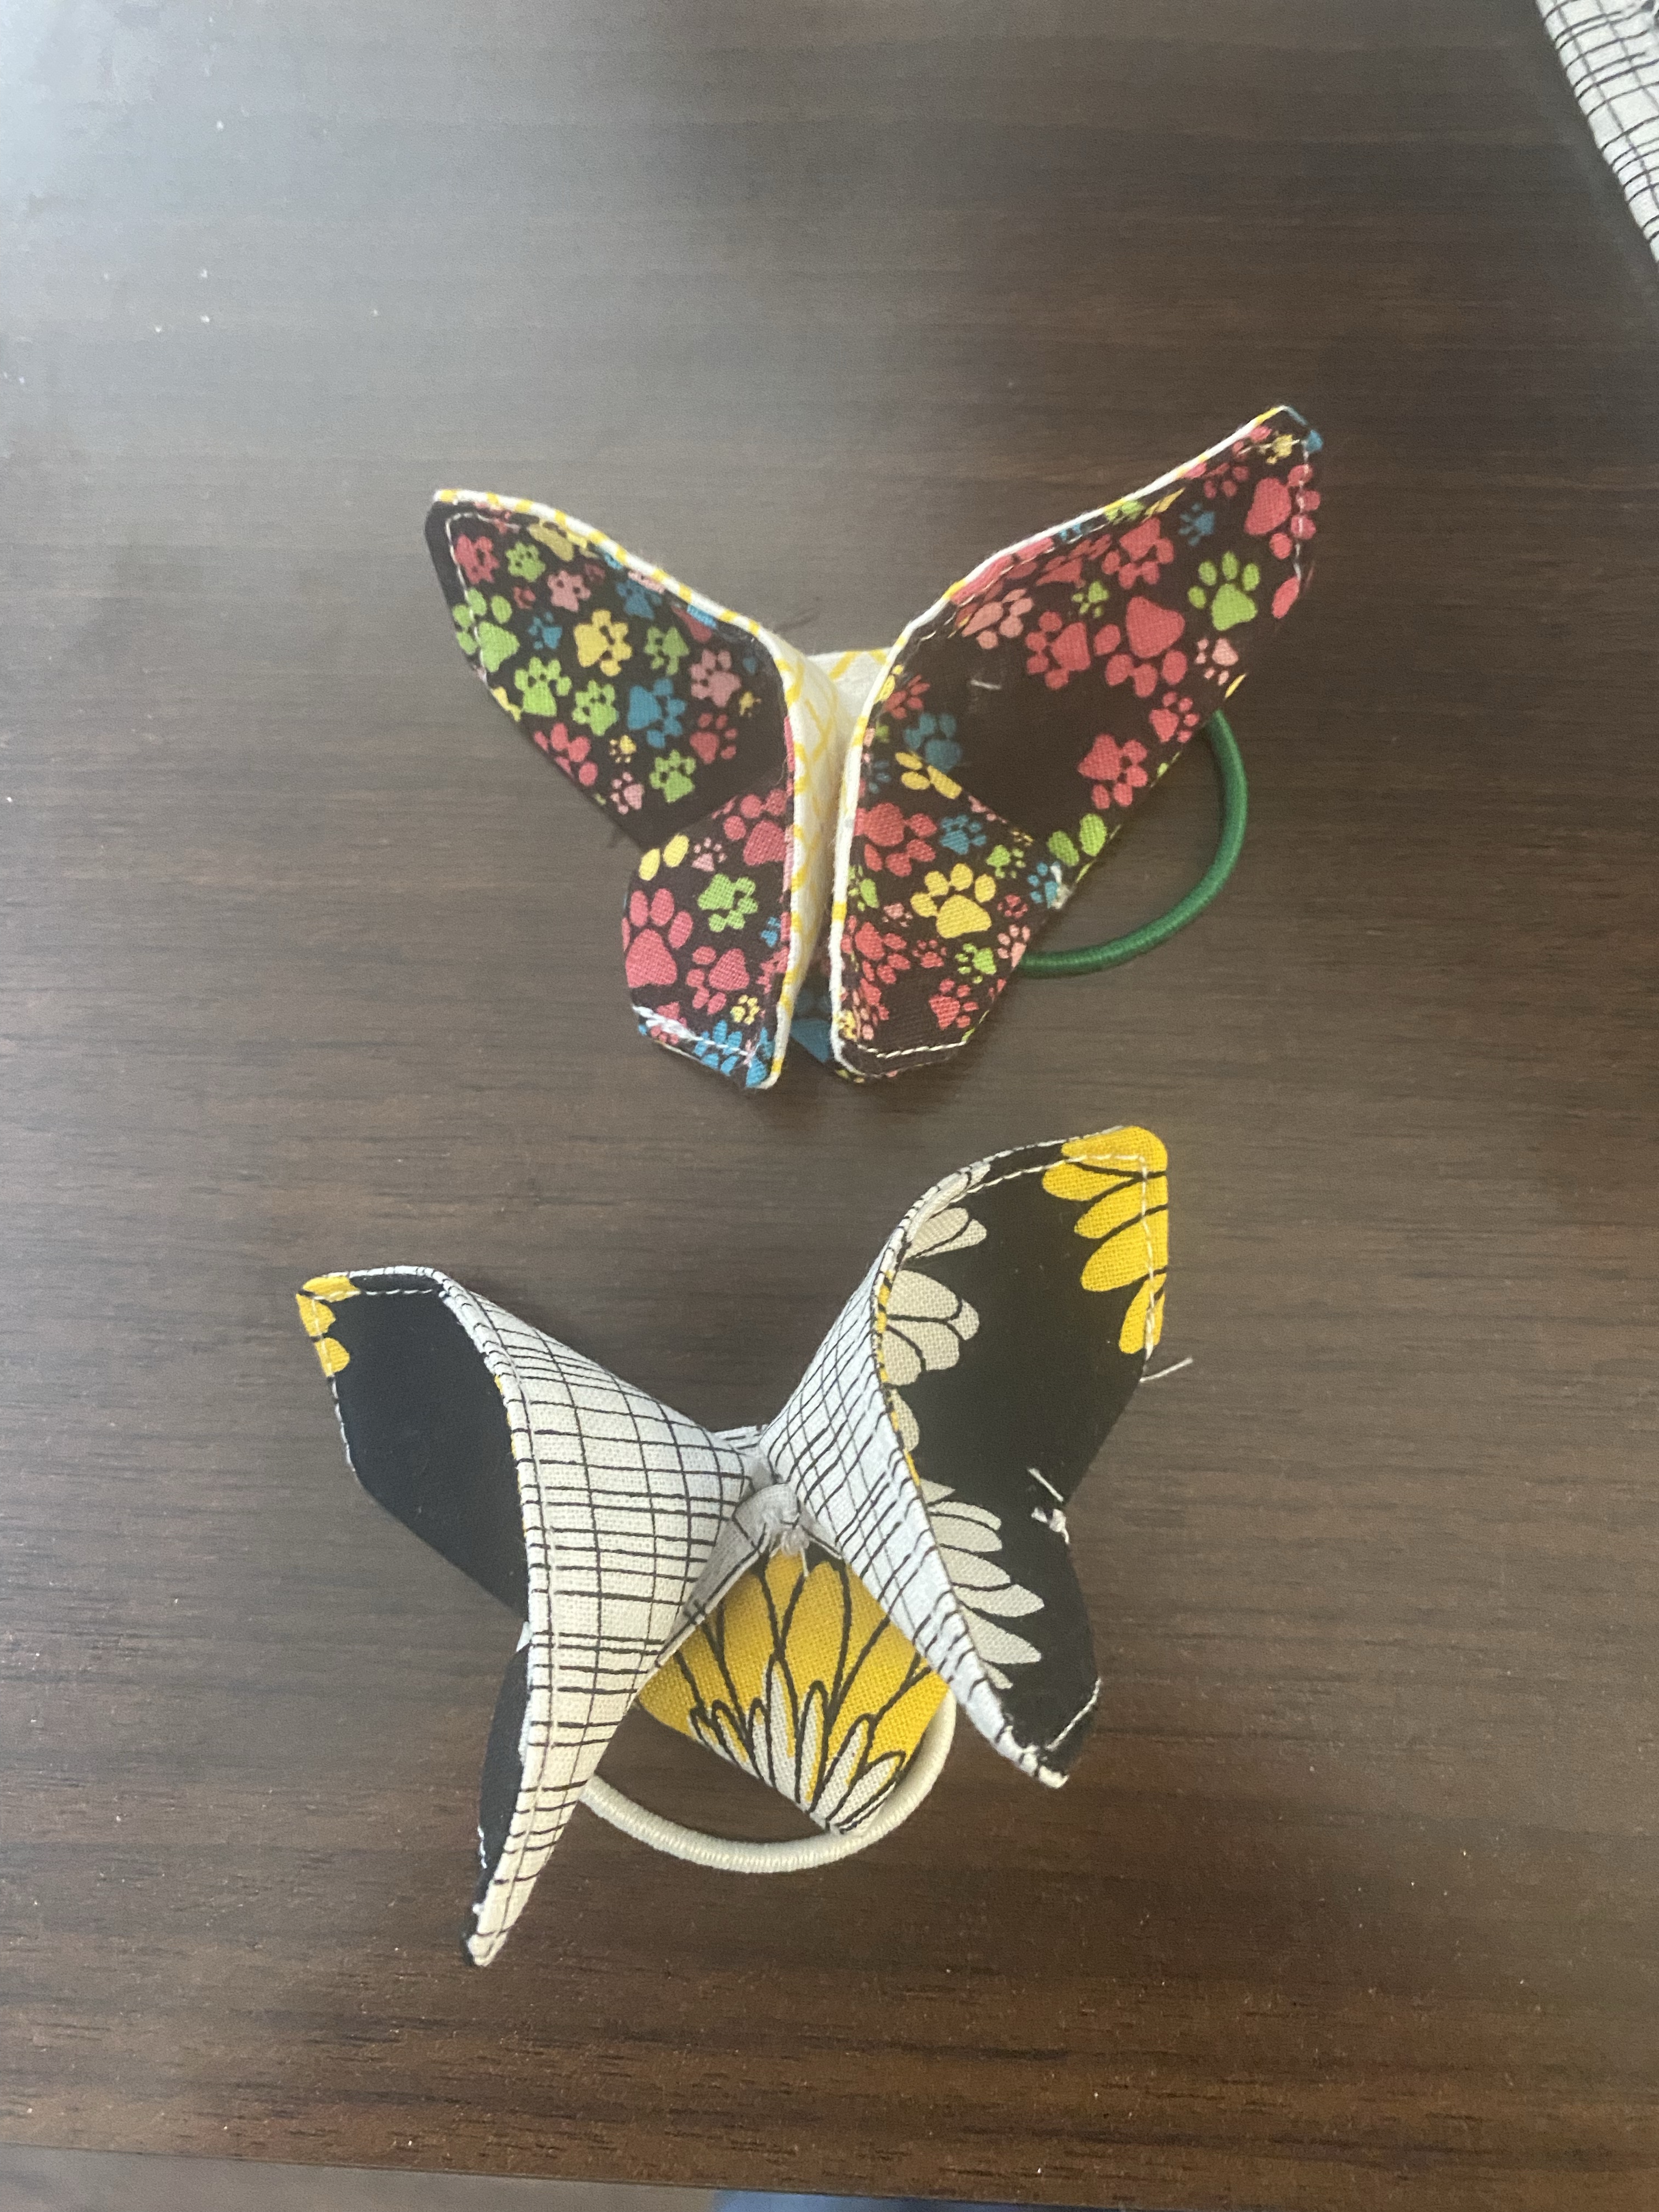
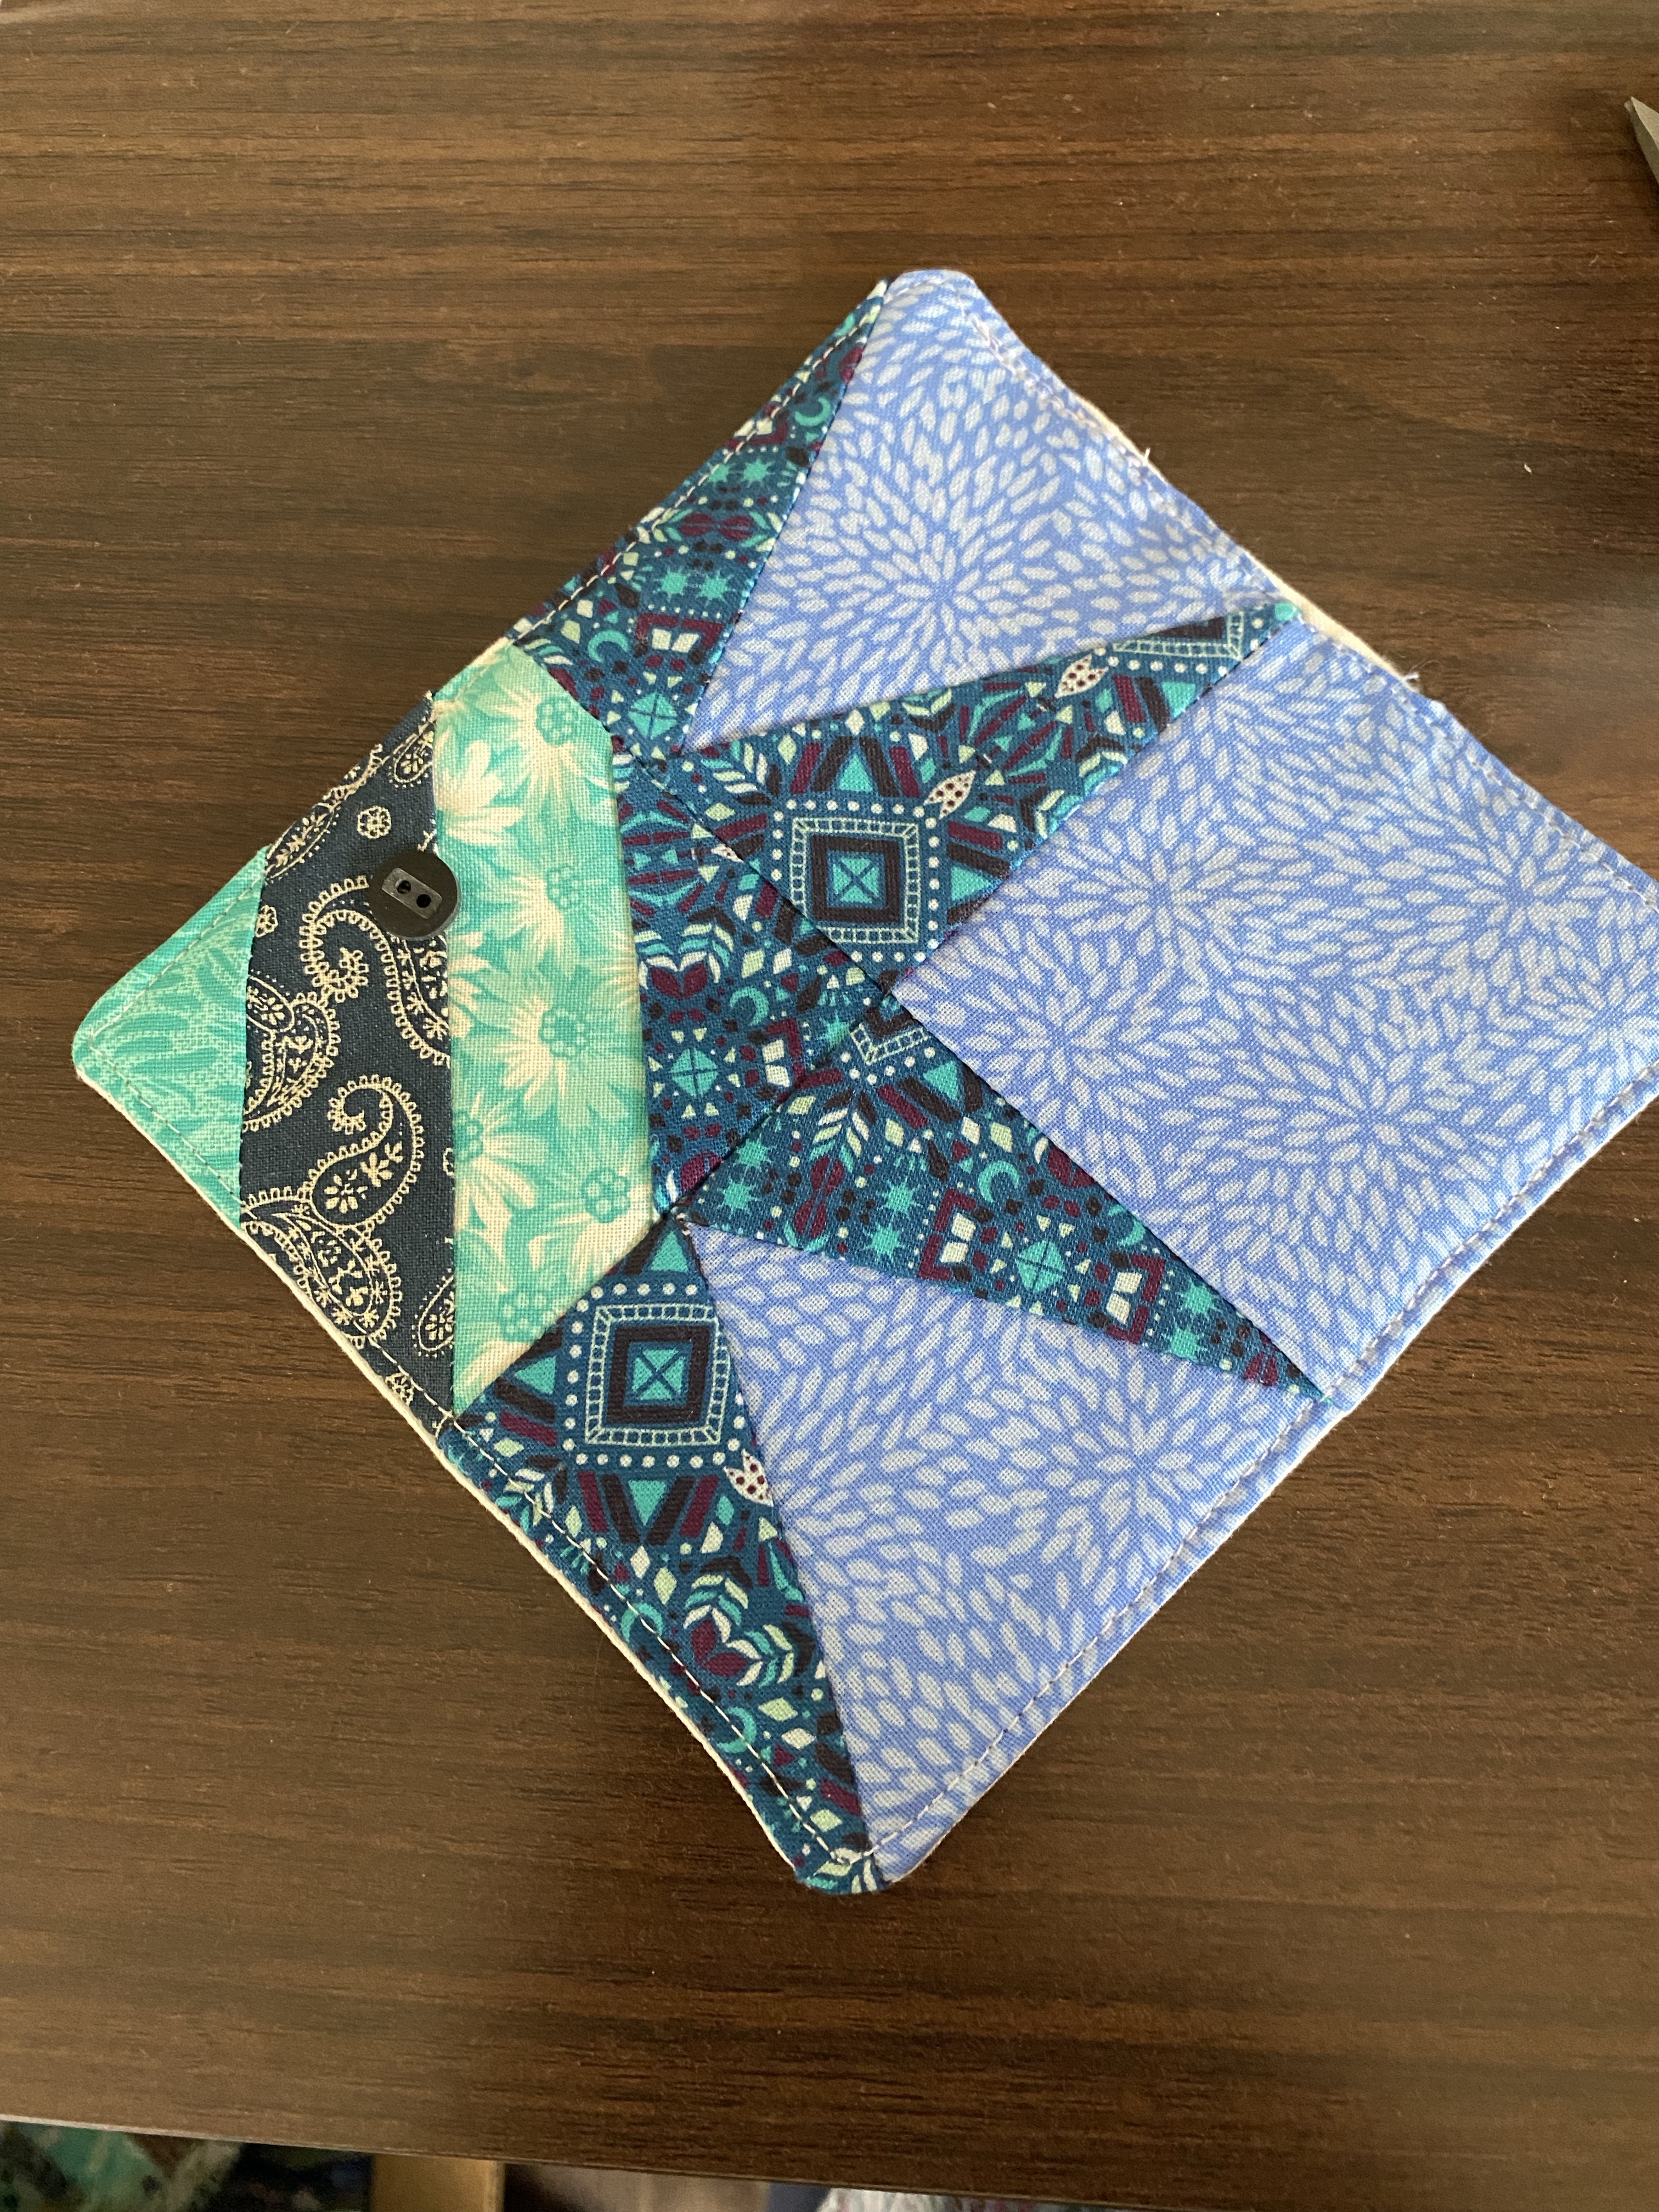
Pinterest is wonderful and yet it can suck all the time out of your day. I open Pinterest to find ideas for making inventory for the flea market. I found these Origami butterflies and I felt challenged to successfully make some. What I found is that the photos and explanations didn’t make sense to me at the final steps. I had to look at more than 5 different blogs (I lost track of how many exactly) before I found one I could follow to the end.
So that I don’t frustrate anyone in the way I was frustrated, I won’t try to write a tutorial or post photos of every step. I’ll just show you mine, say good luck, and send you out to find the blogs if this is something you want to try. I like that it begins with two small rectangles. I also like that it ends with a butterfly that can be attached to a pony elastic or a hair clip.
This week I worked on some applique. I used HeatnBond, which is fusible on both sides. I found some simple outlines I wanted to use, first were the campfire and tent. I traced the shapes onto the paper side of the HeatnBond and cut around them, then fused them to the back side of the fabric I wanted to use. I used a pin to scratch the paper backing and remove it, then I fused the fabric to the items. In this case it was to make two coasters.
The applique needs stitching, so I chose a blanket stitch, made it small to match the scale of the coasters, and I love the result. I added borders and even repeated the blanket stitch there. I cut the backing oversized to fold to the front and bind it.
I found a cat silhouette I liked and added a cat applique to one of the cat-shaped coasters. I will continue to use the method on other things, like an initial on a coin pouch, or other shapes.
While looking for shapes I found some I liked, but they would work better as embroidered accents. To do that I’ll have to work on my embroidery machine (fix the tension) and test out a few.
As I’m designing items for sale in my flea market booth, I am considering several things at once.
~ People want to buy something handmade that someone else made
~ Time invested in each item vs. how much to charge
~ What do customers want to purchase? Practical items or splurges?
I discovered by putting some hotpads out that they sold very quickly. It was right before Christmas so gift giving could be a big motivator. Handmade makes it a one-of-a-kind item.
I can quickly make simpler designs, but a more complex design may be appreciated and purchased sooner. Or not, I’m just guessing what goes on in a customer’s mind. I can charge less for the simpler ones, but would have to charge more for a more time-consuming design.
I’d love to offer a huge variety of items, but I think it’s better to focus more on a varied inventory of a few types of goods. Definitely the zipper pouches, but also more hotpads, drink coasters, and ice cream pint sleeves. I’m still thinking, and collecting potential patterns and designs. I will put a split ring (like a keyring) on the zipper of each pouch, but I’ll also offer a few beaded zipper pulls if someone wants to make it even more unique. Along that line of thinking, I can make wrist bands in many colors that will coordinate, to turn a pouch into a wristlet purse that will hold phone, cards, and cash.
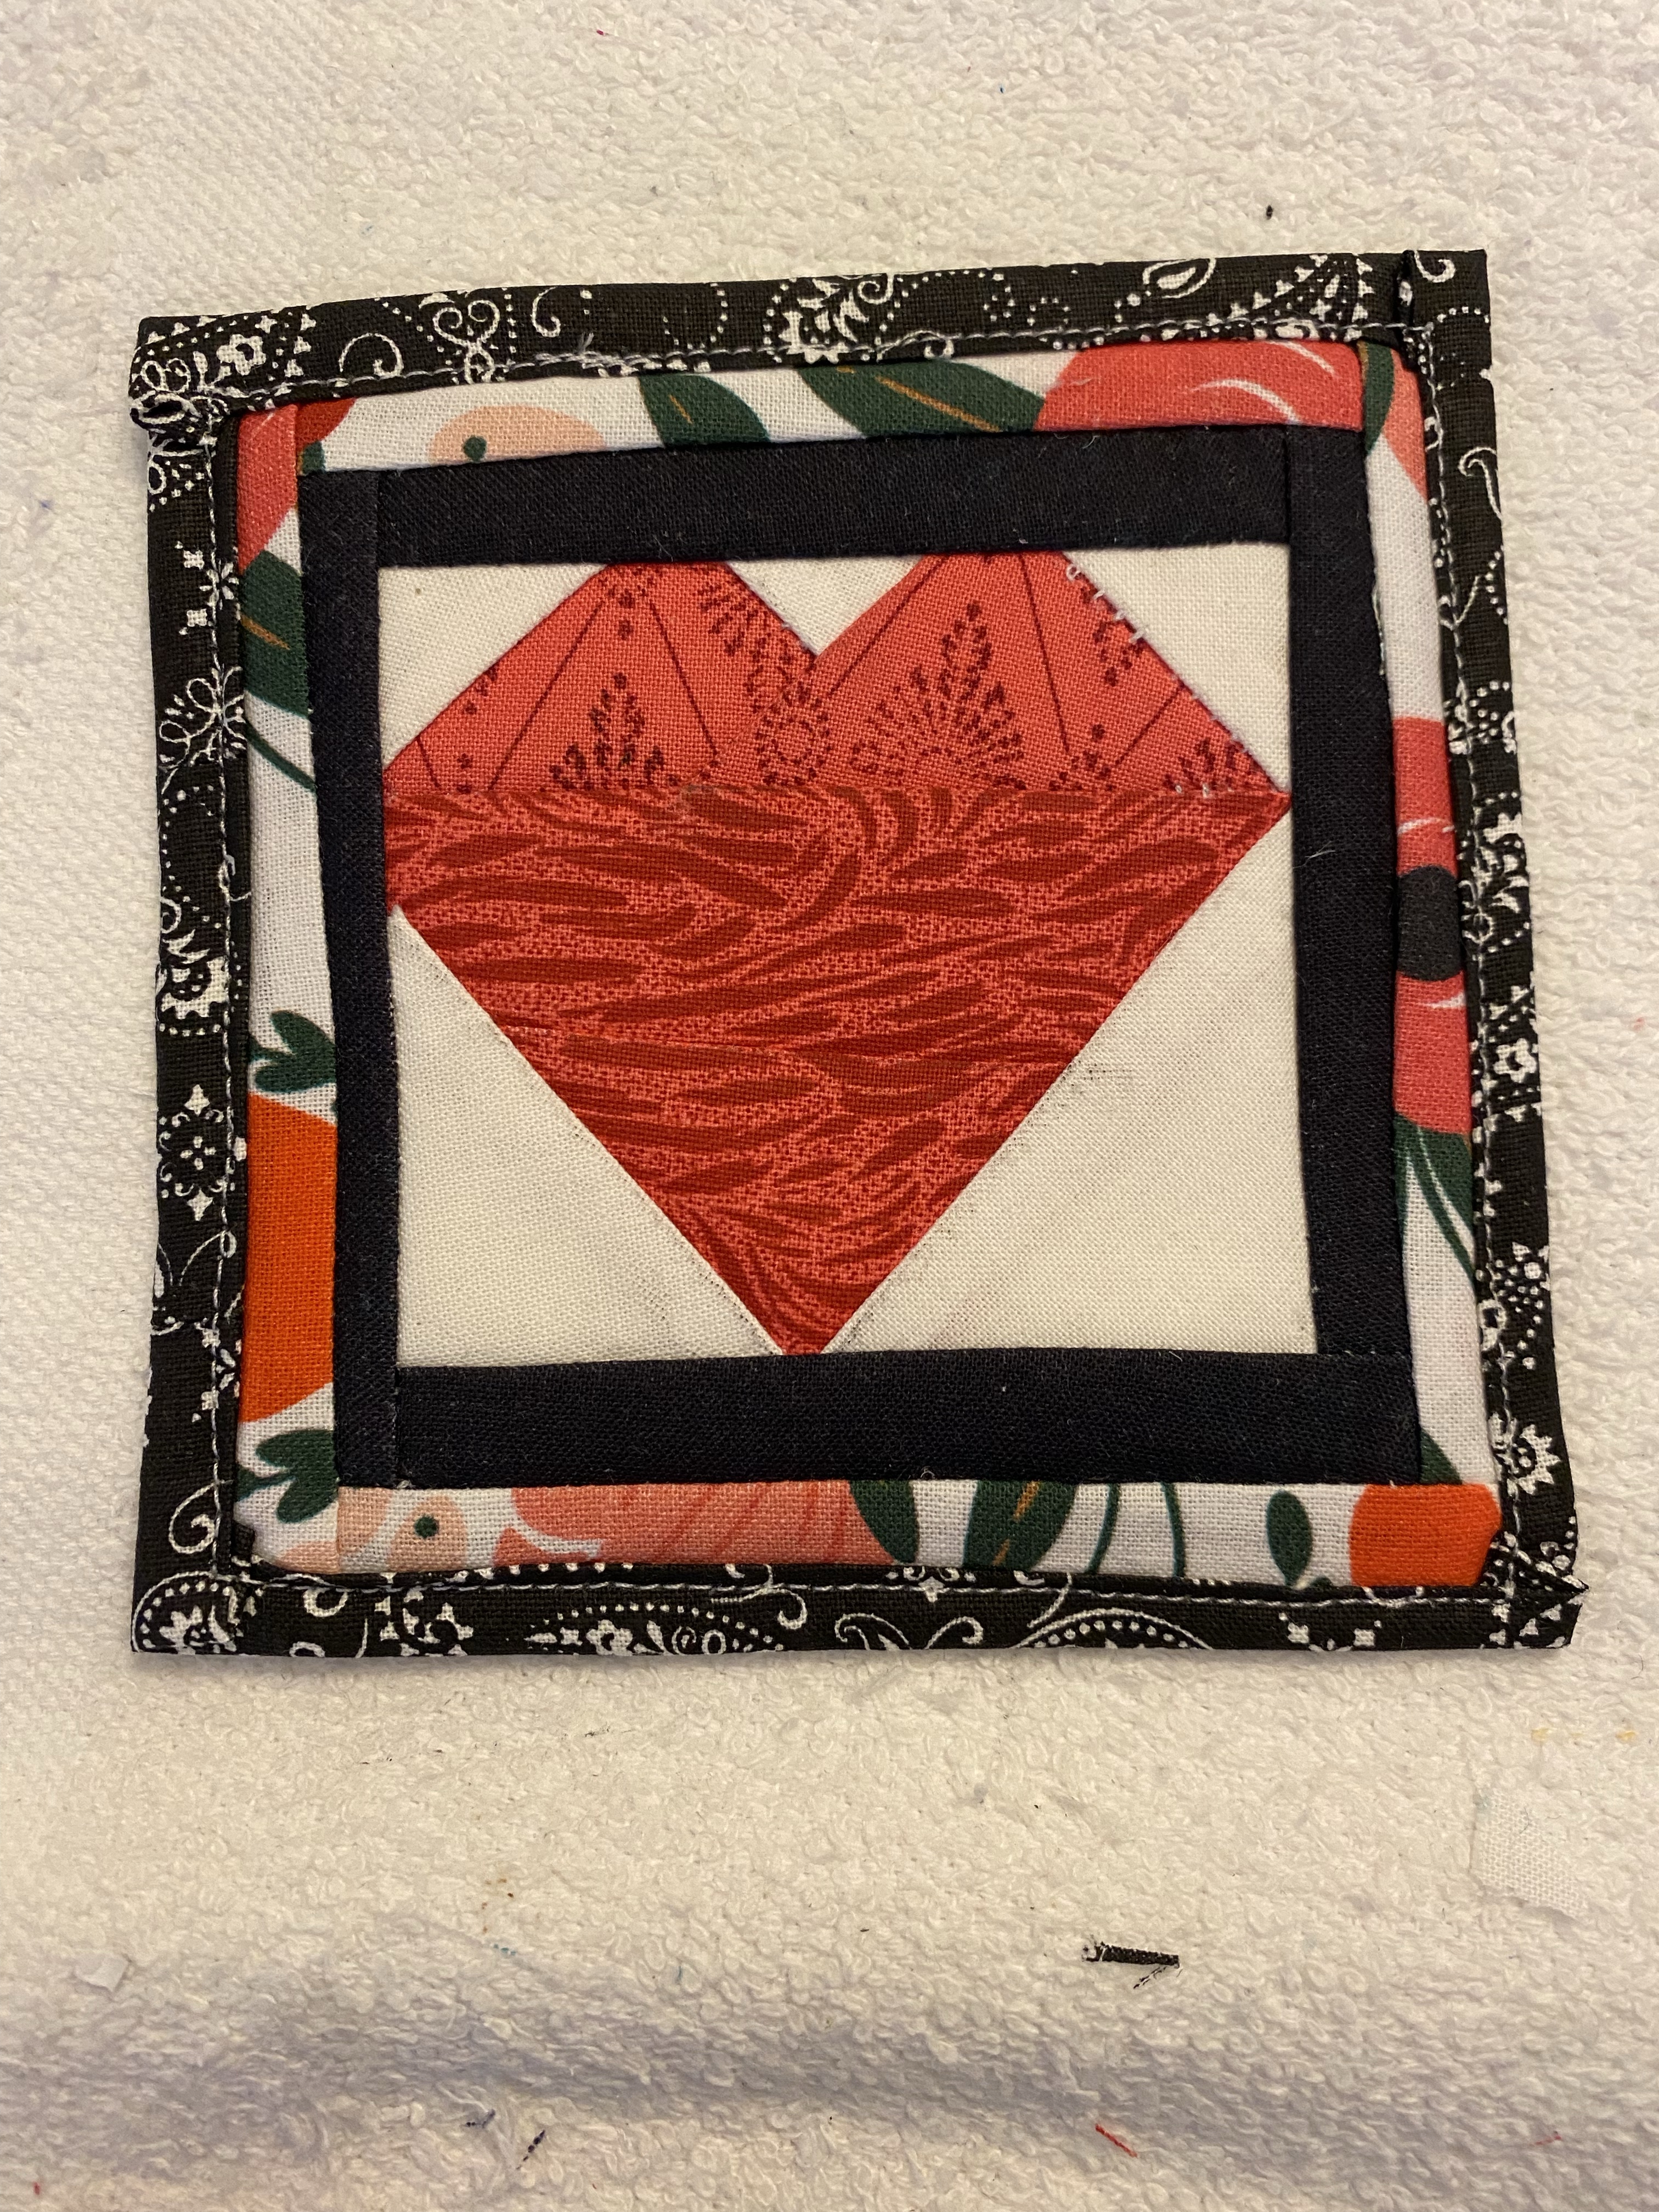
These are a couple of coasters (aka mug rugs) that I’ve made the last few days. I have other prototypes that didn’t work out, these are the good ones.