My Coaster Tutorial

I think everyone who makes a coaster has her/his own way of doing it. I have decided on this method because for me it’s a bit faster and a little more fun in the fabric choice.

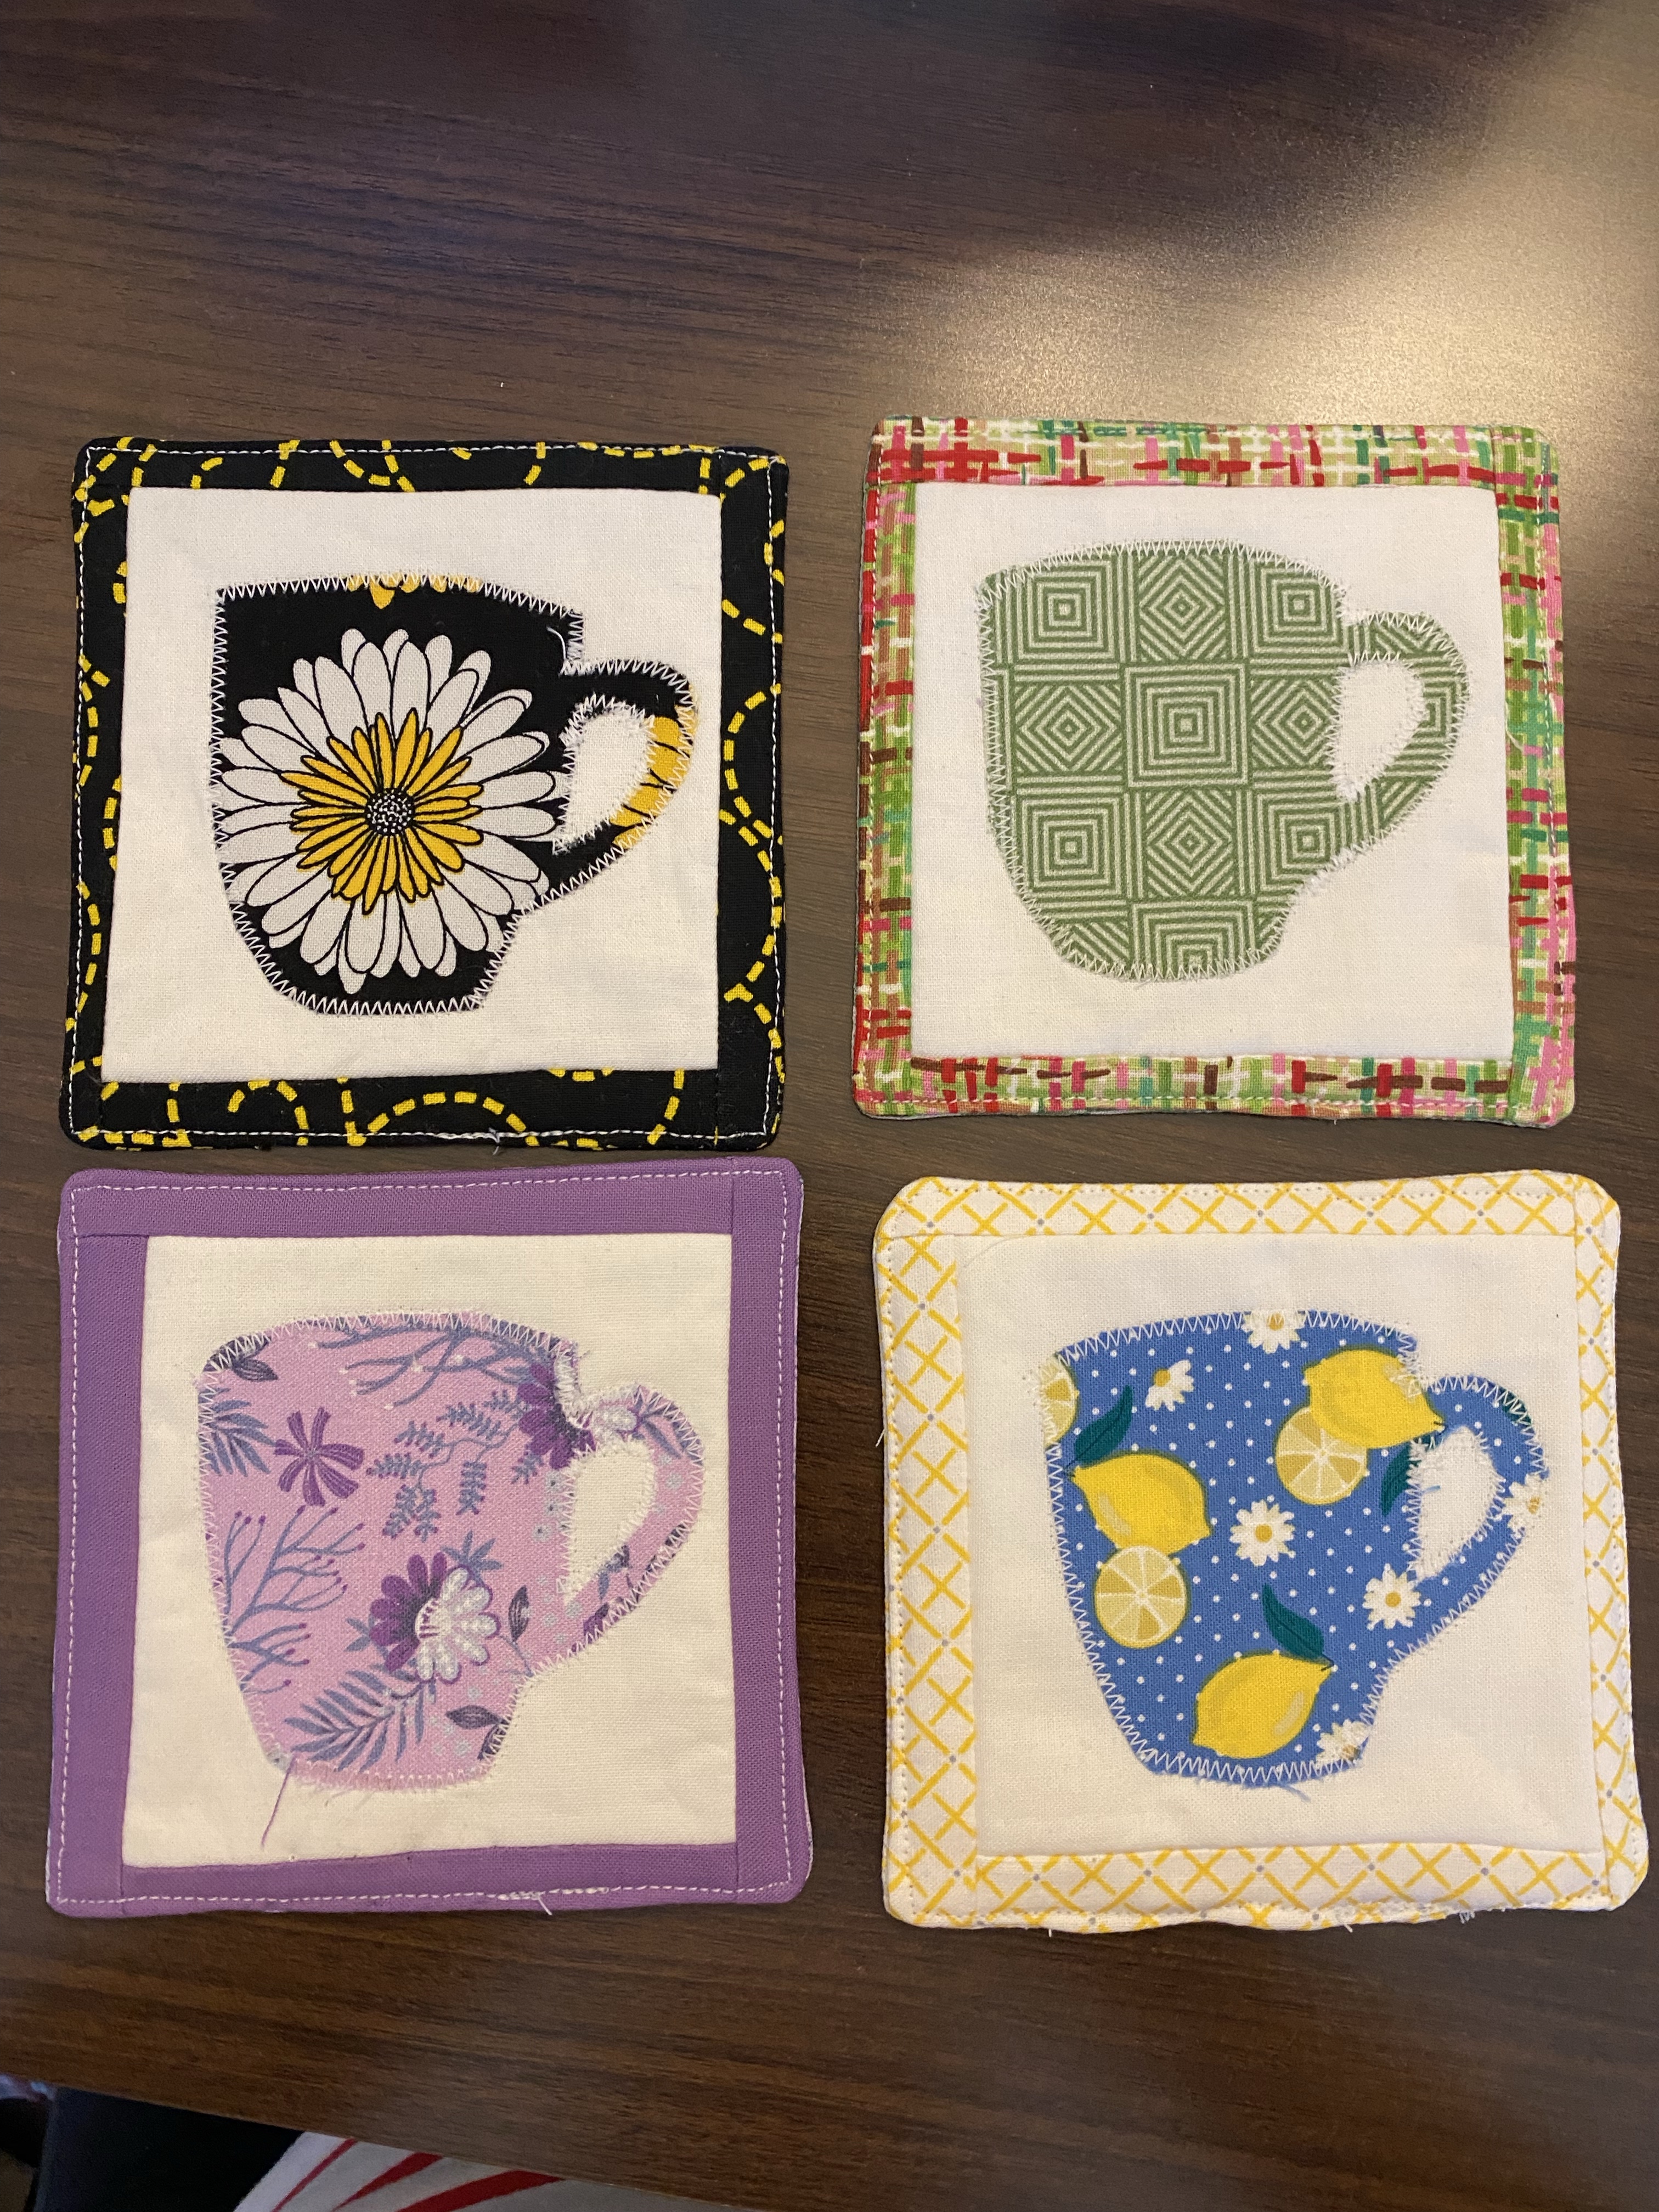
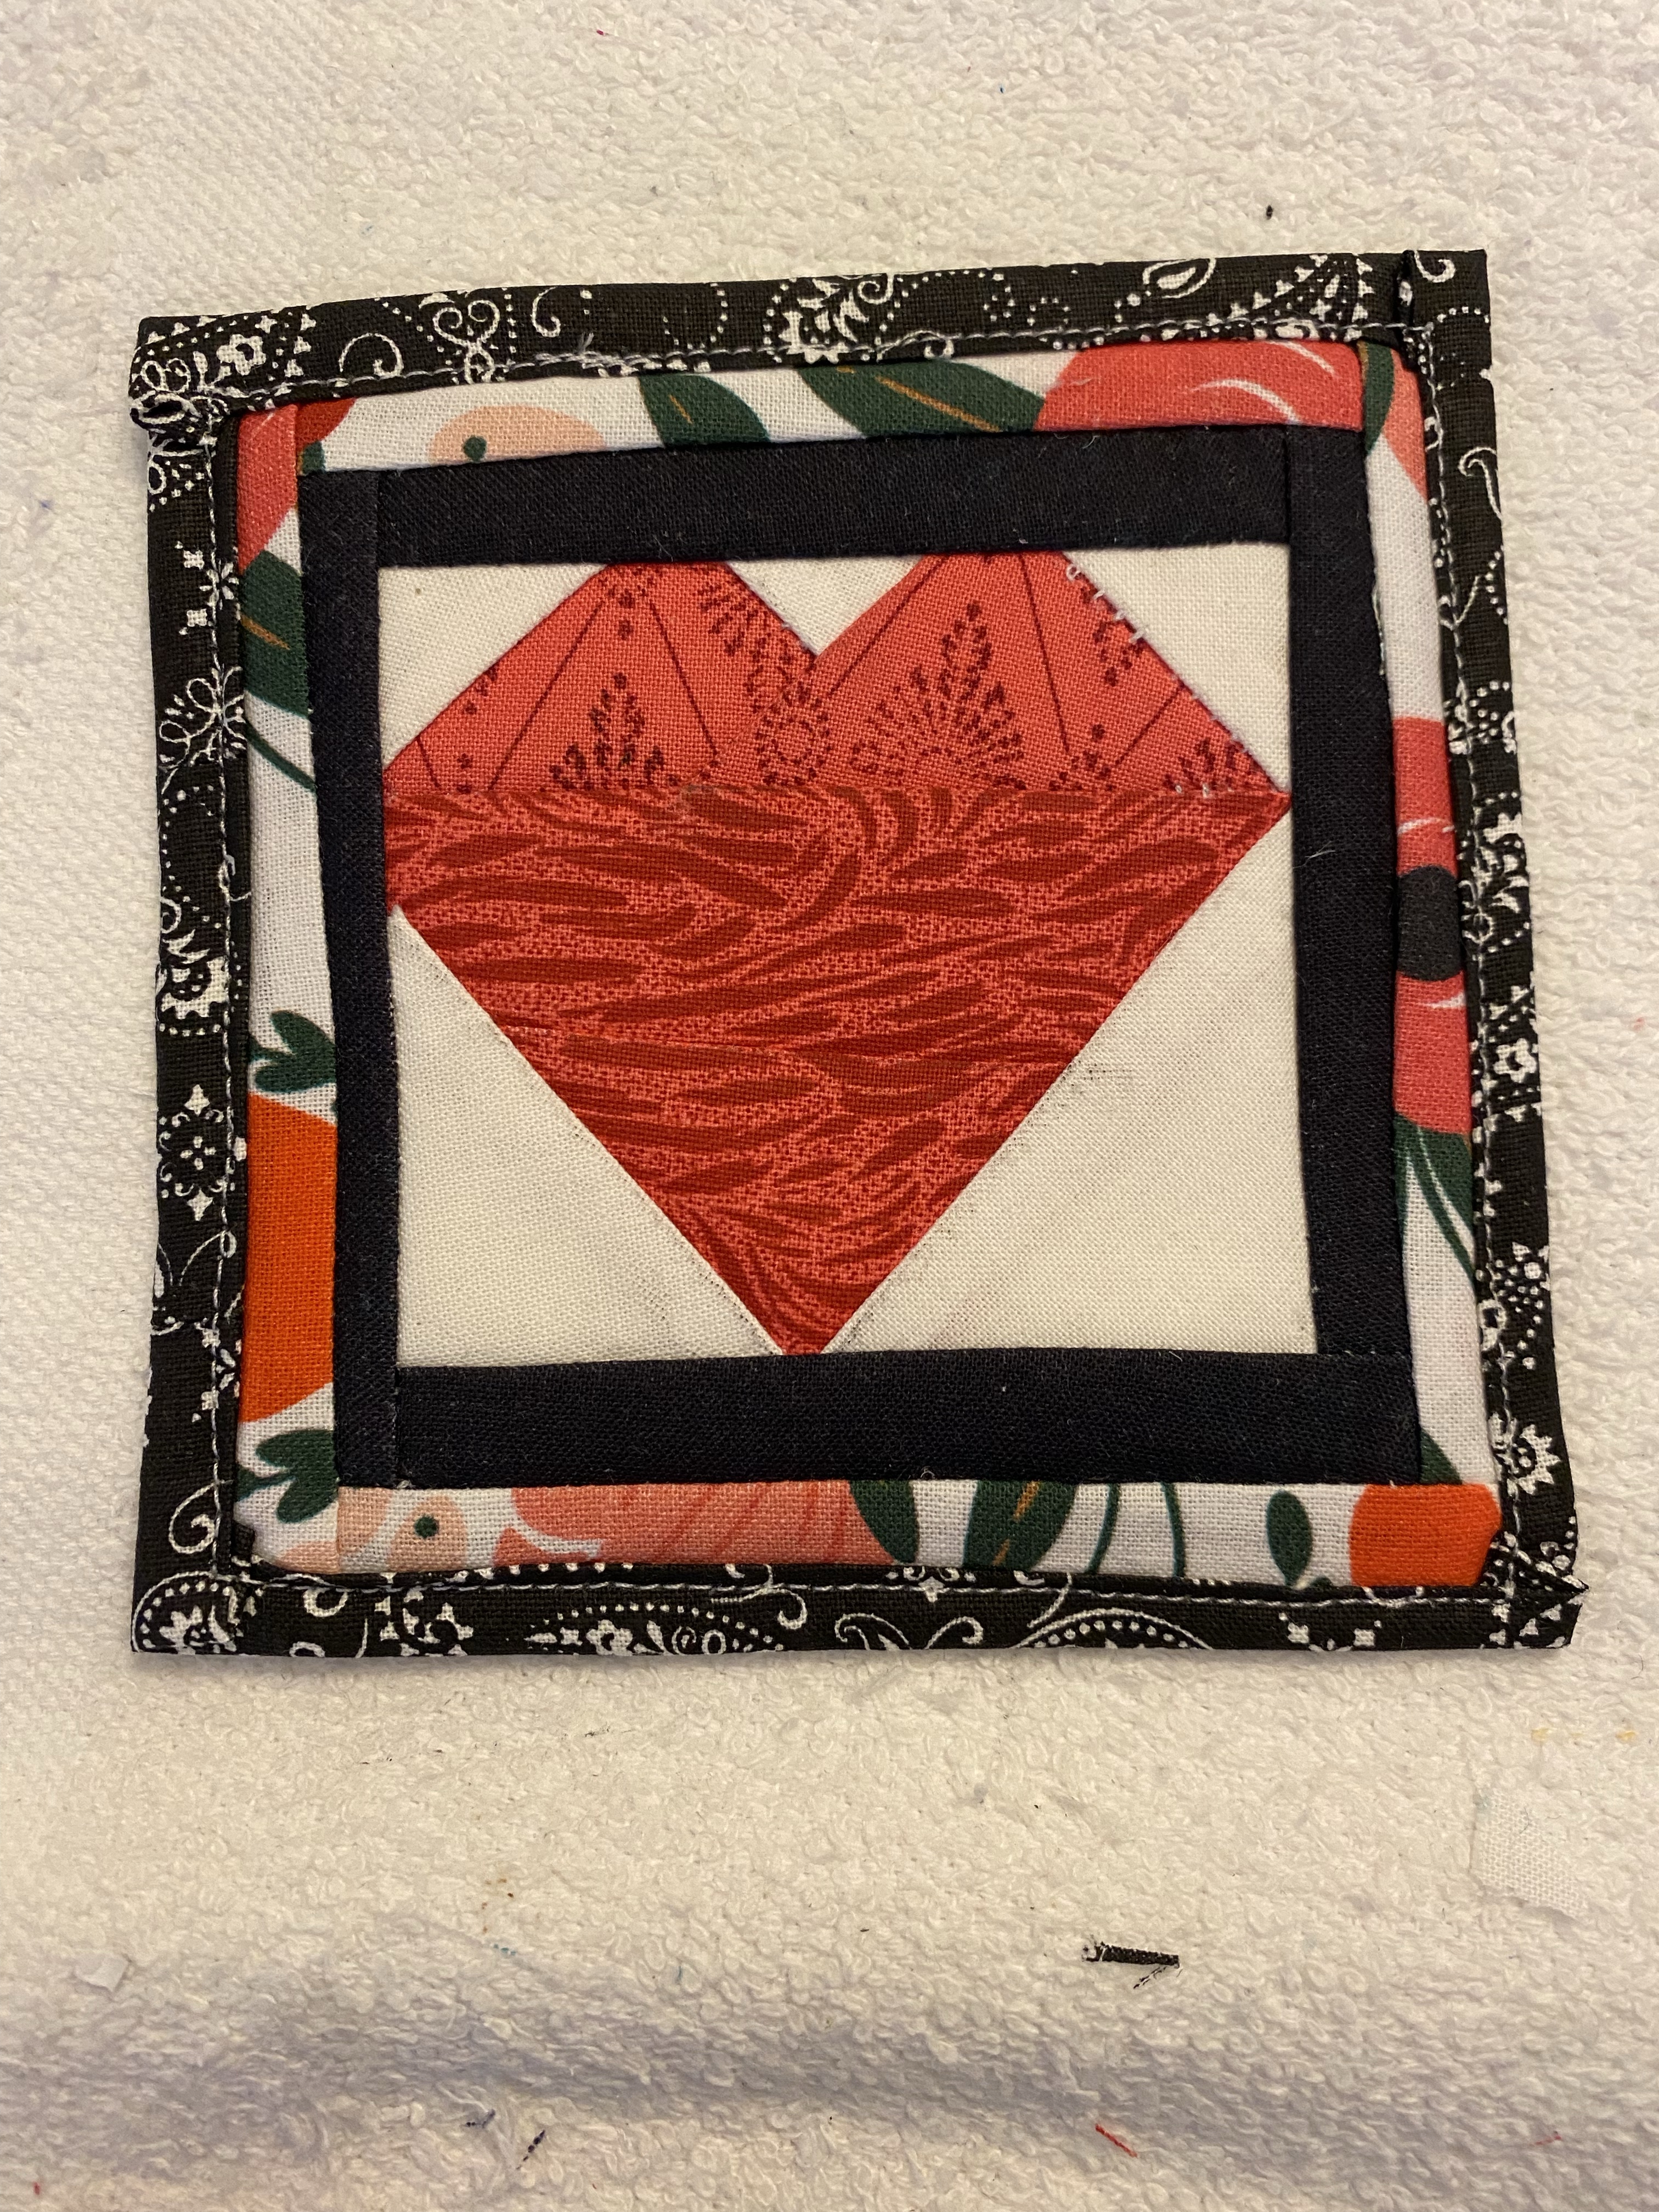
I made a set of 4 coasters for my sister, different fabrics, but all with the same applique. Here it is broken down into steps.

  • Cut a central fabric 4×4 inches. I used white.
  • Cut cotton batting and a backing fabric 4 3/4 x 4 3/4 inches. My backings match either the border or the applique.
  • Trace your applique design onto Heat N Bond or other double-sided adhesive. If it matters, trace the design as if backwards to how the fabric should look. Cut out, including waste pieces within the design.
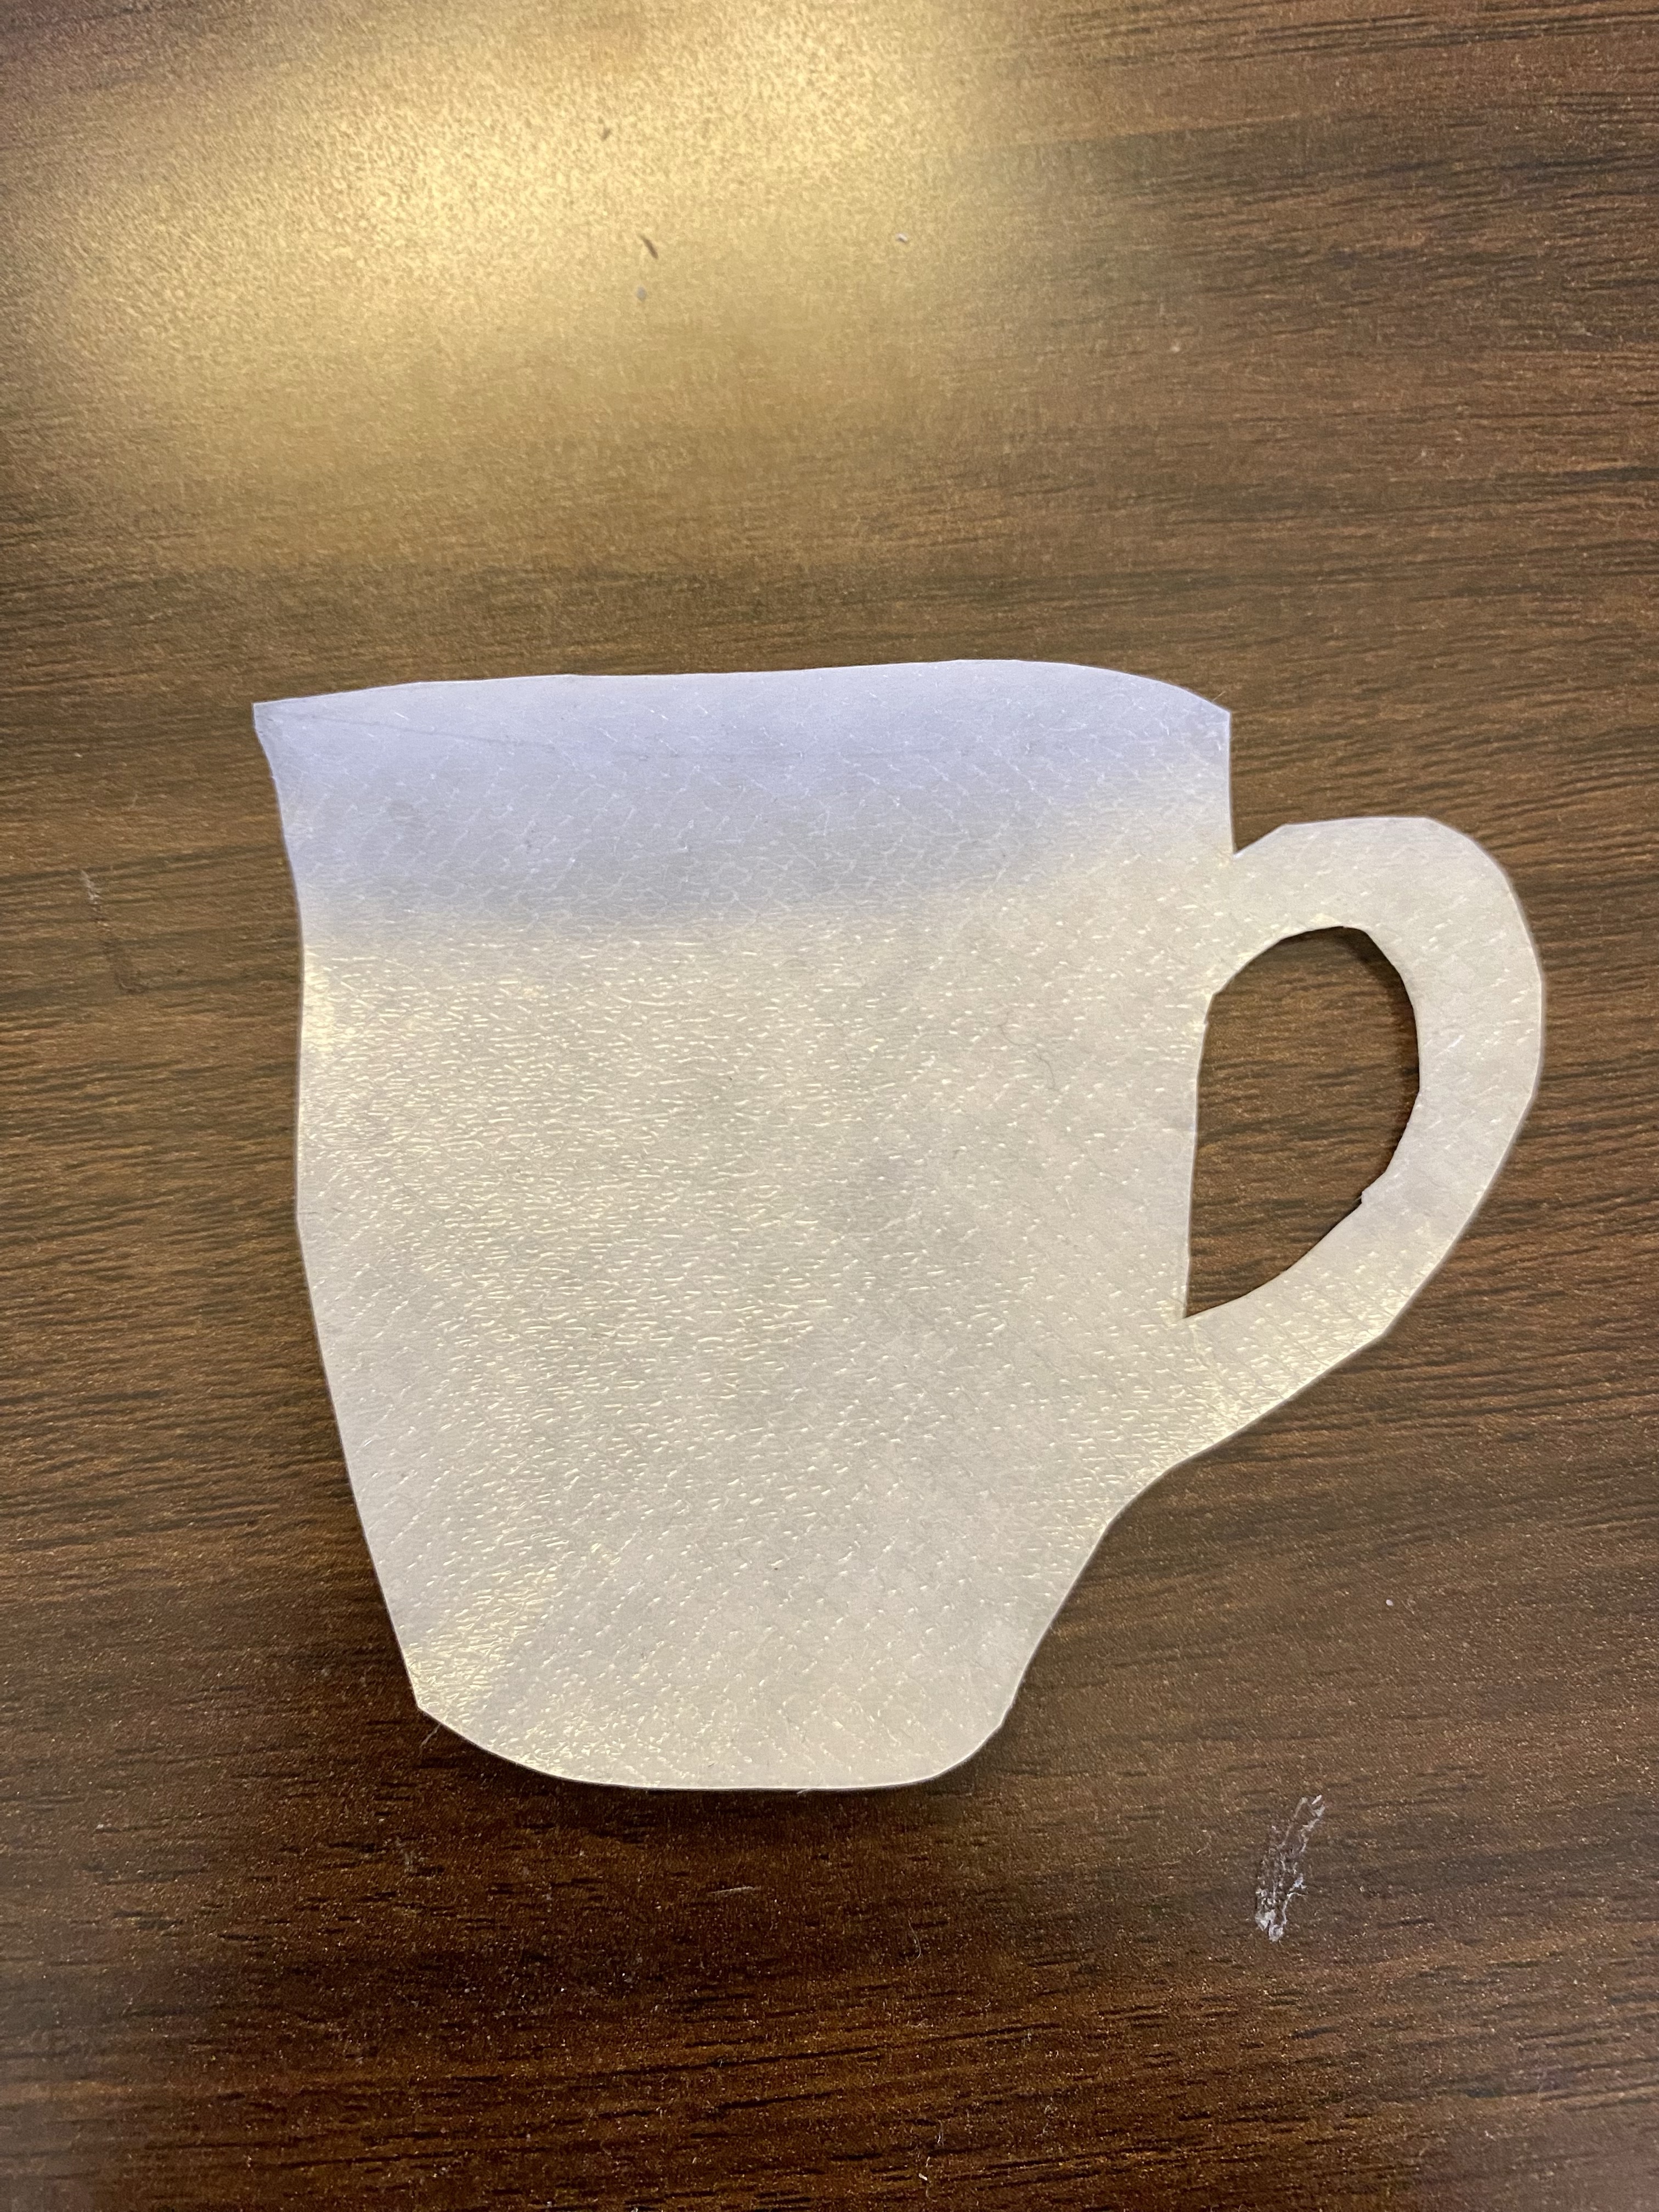
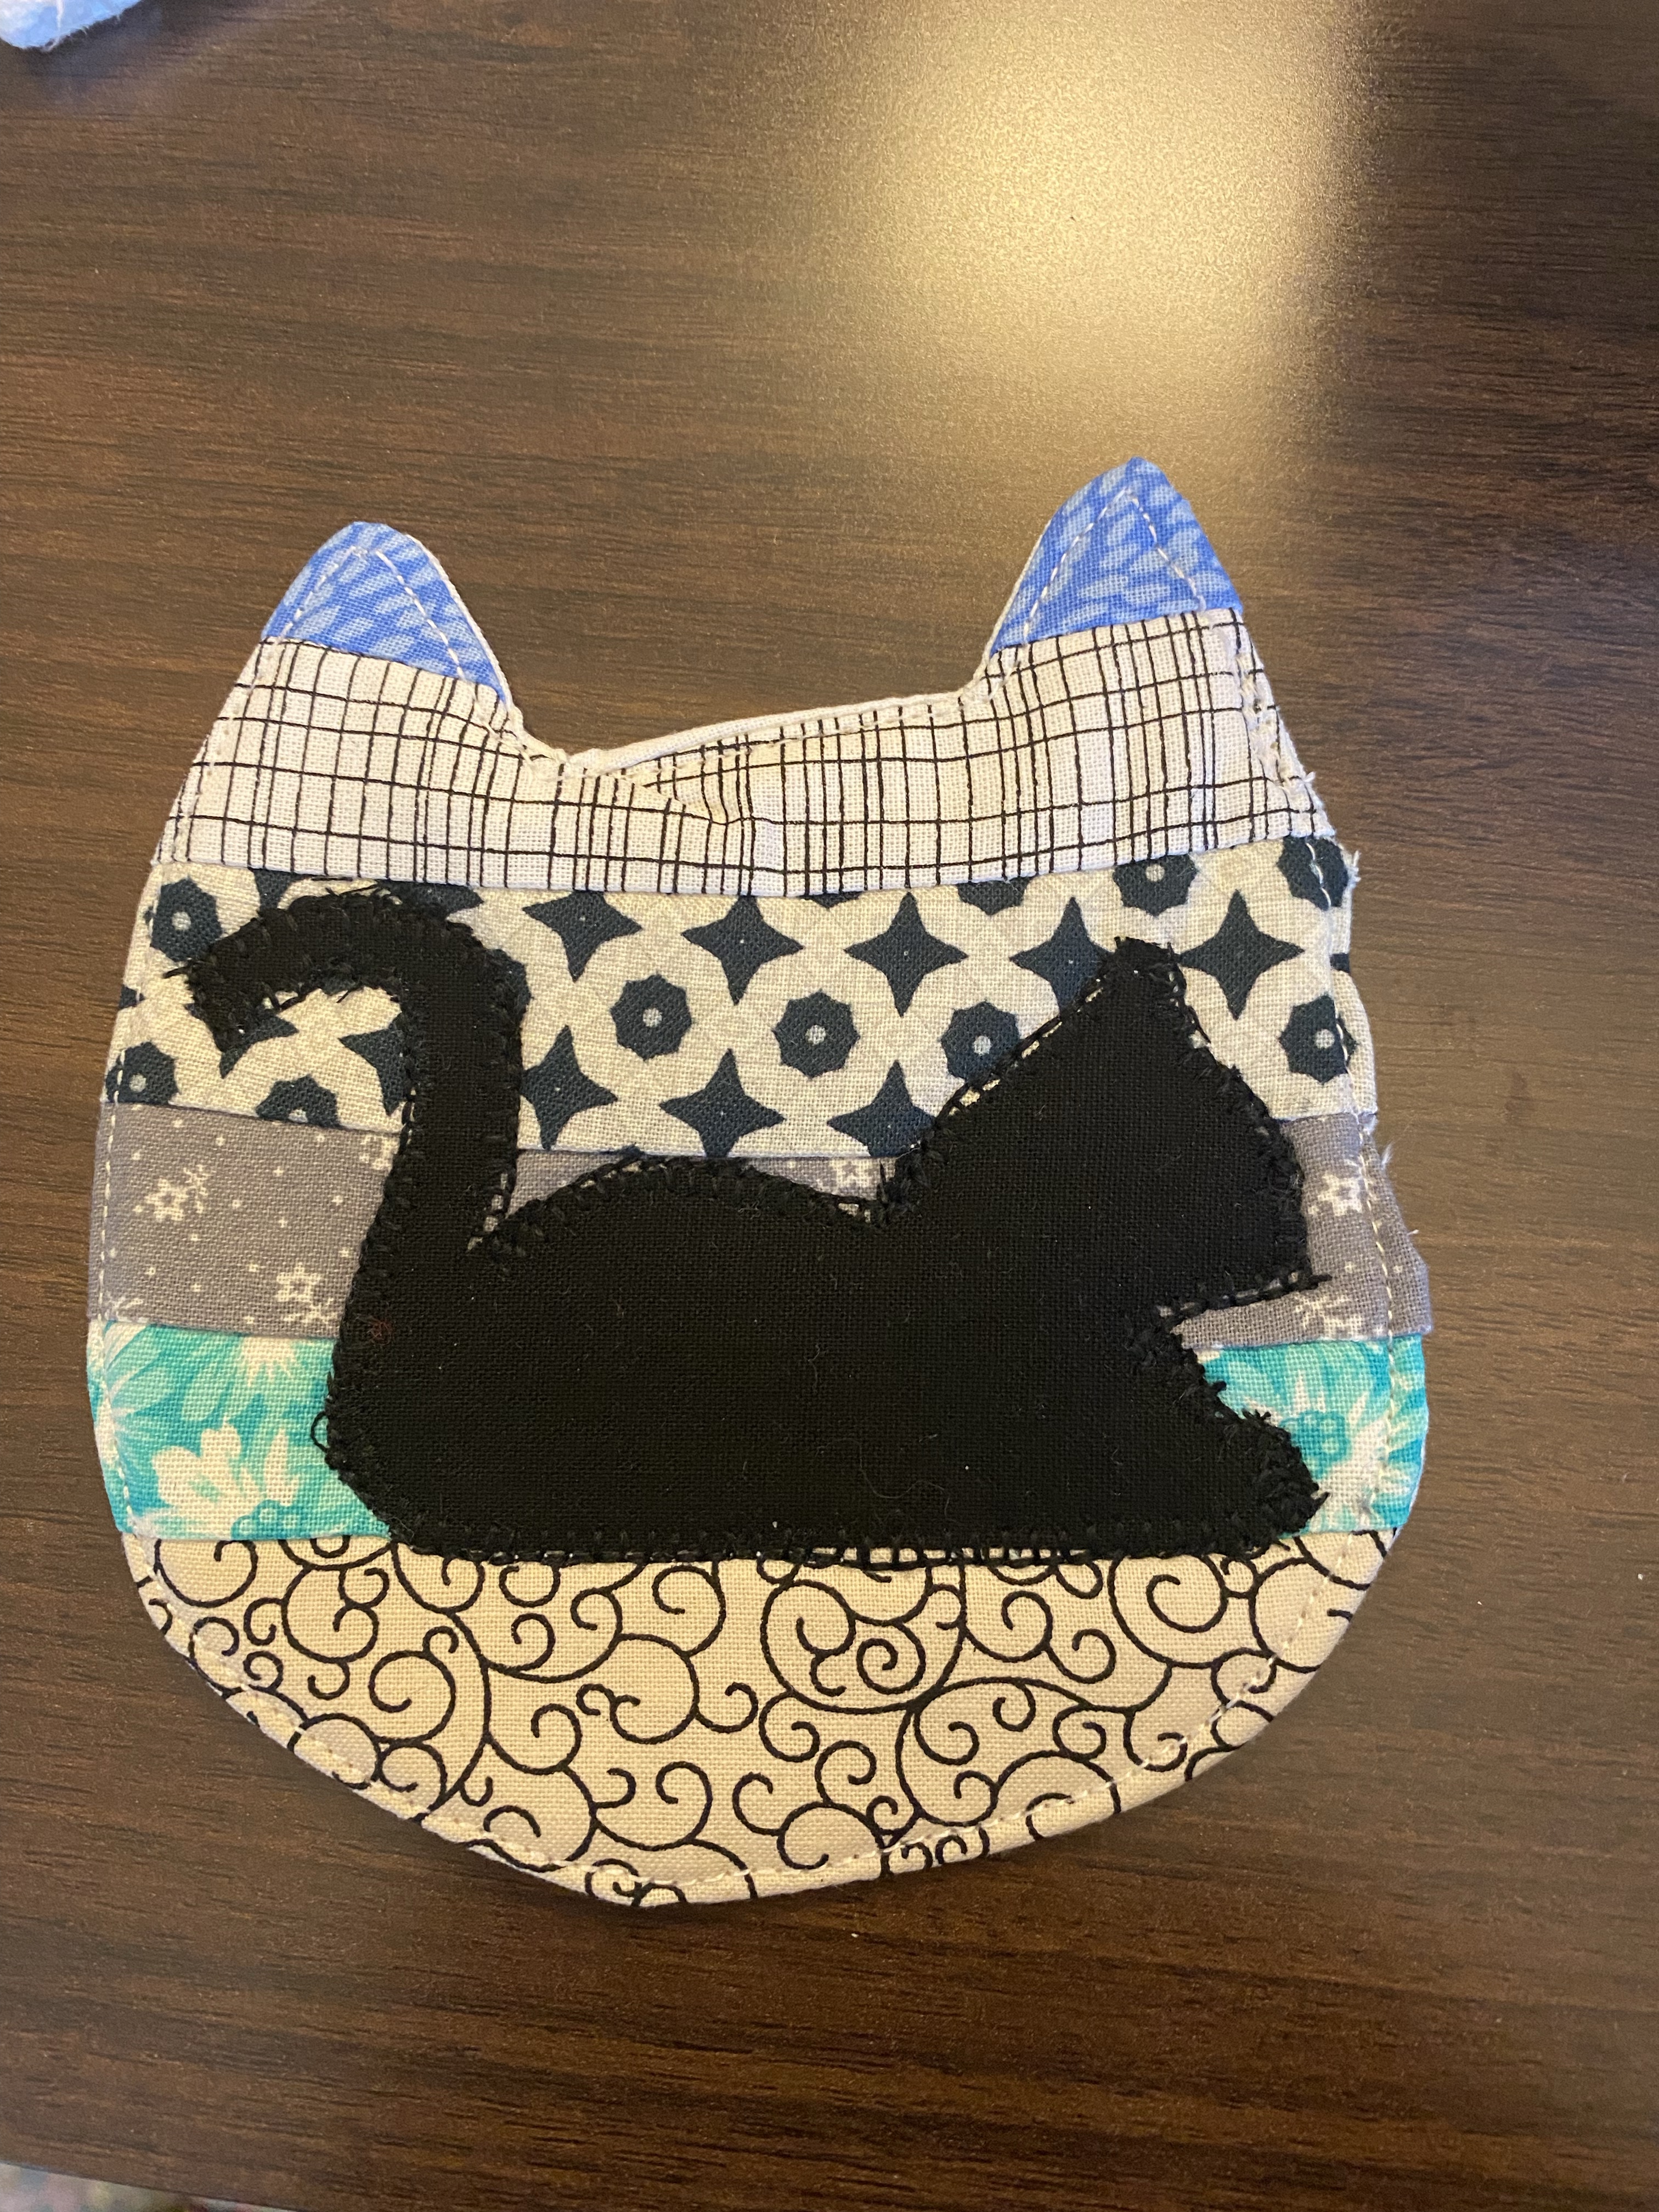
  • Press it to the back side of the fabric and cut out as above. Use a pin to score the paper on the back of the applique, revealing the other adhesive. Place it on the central fabric and press into place.
  • Using a narrow zigzag, or other decorative stitch, stitch all around your applique. Edges may shred without this step. I’ve used a blanket stitch and a hem stitch on other coasters.
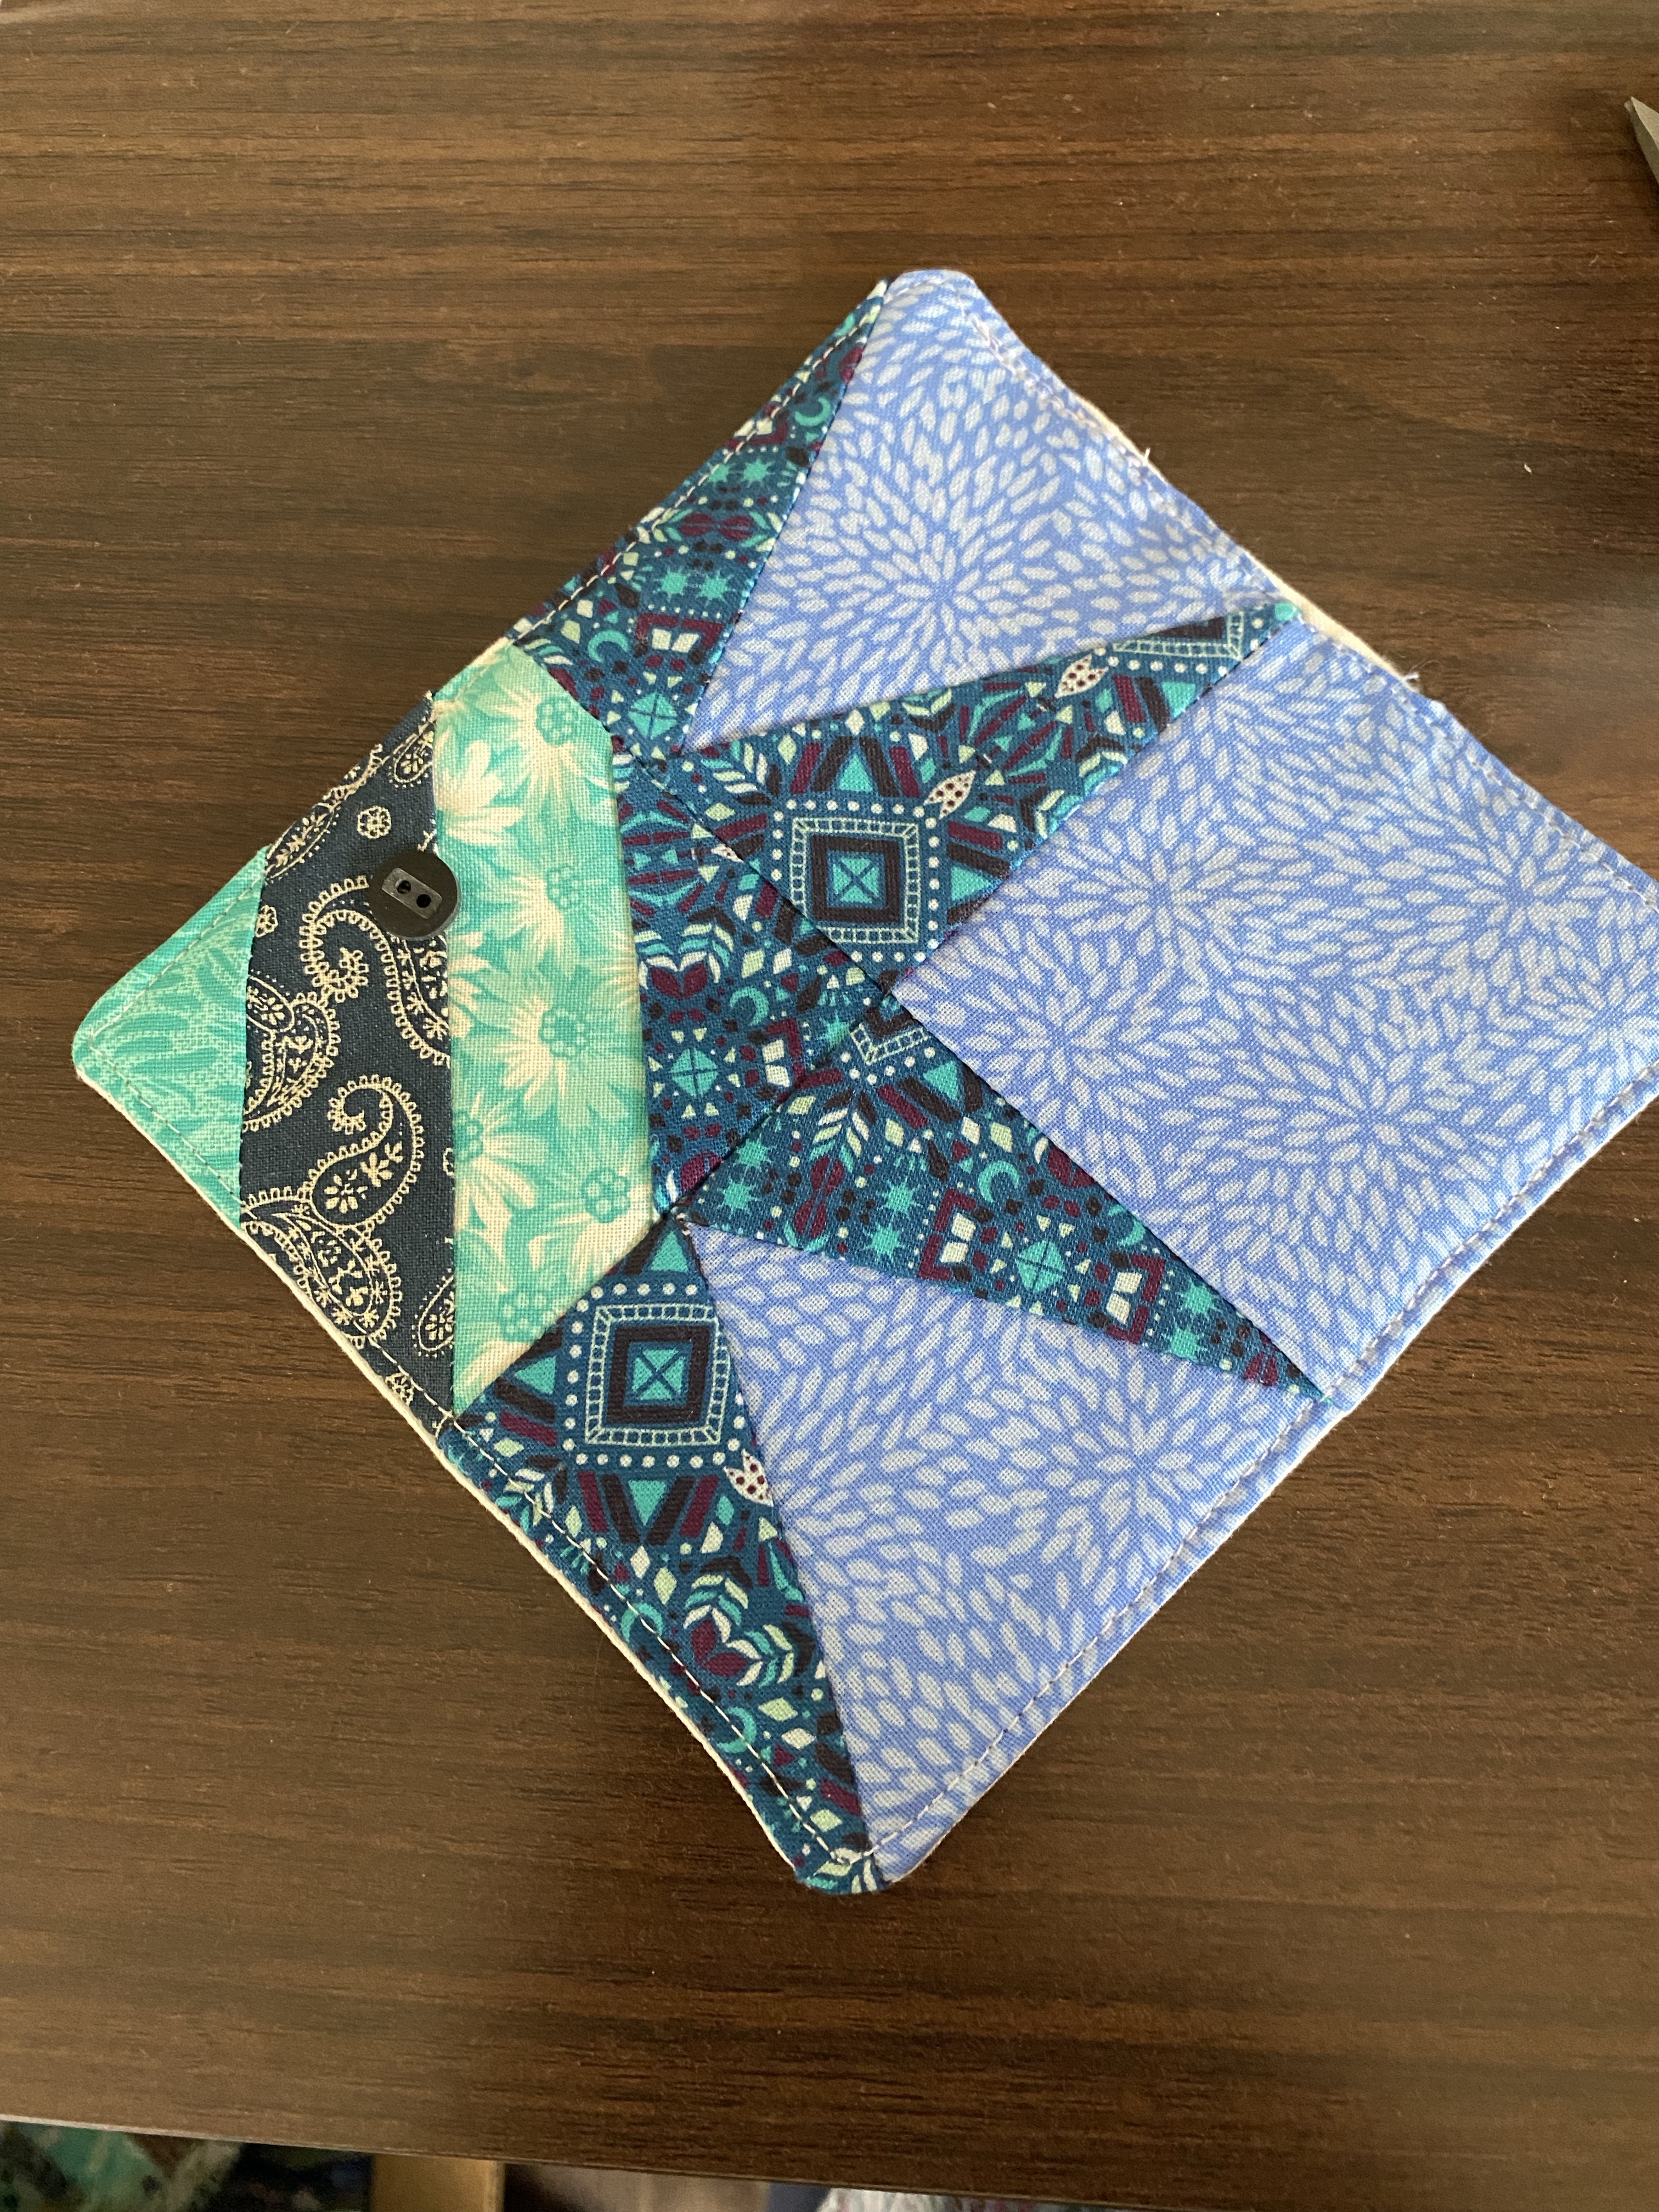
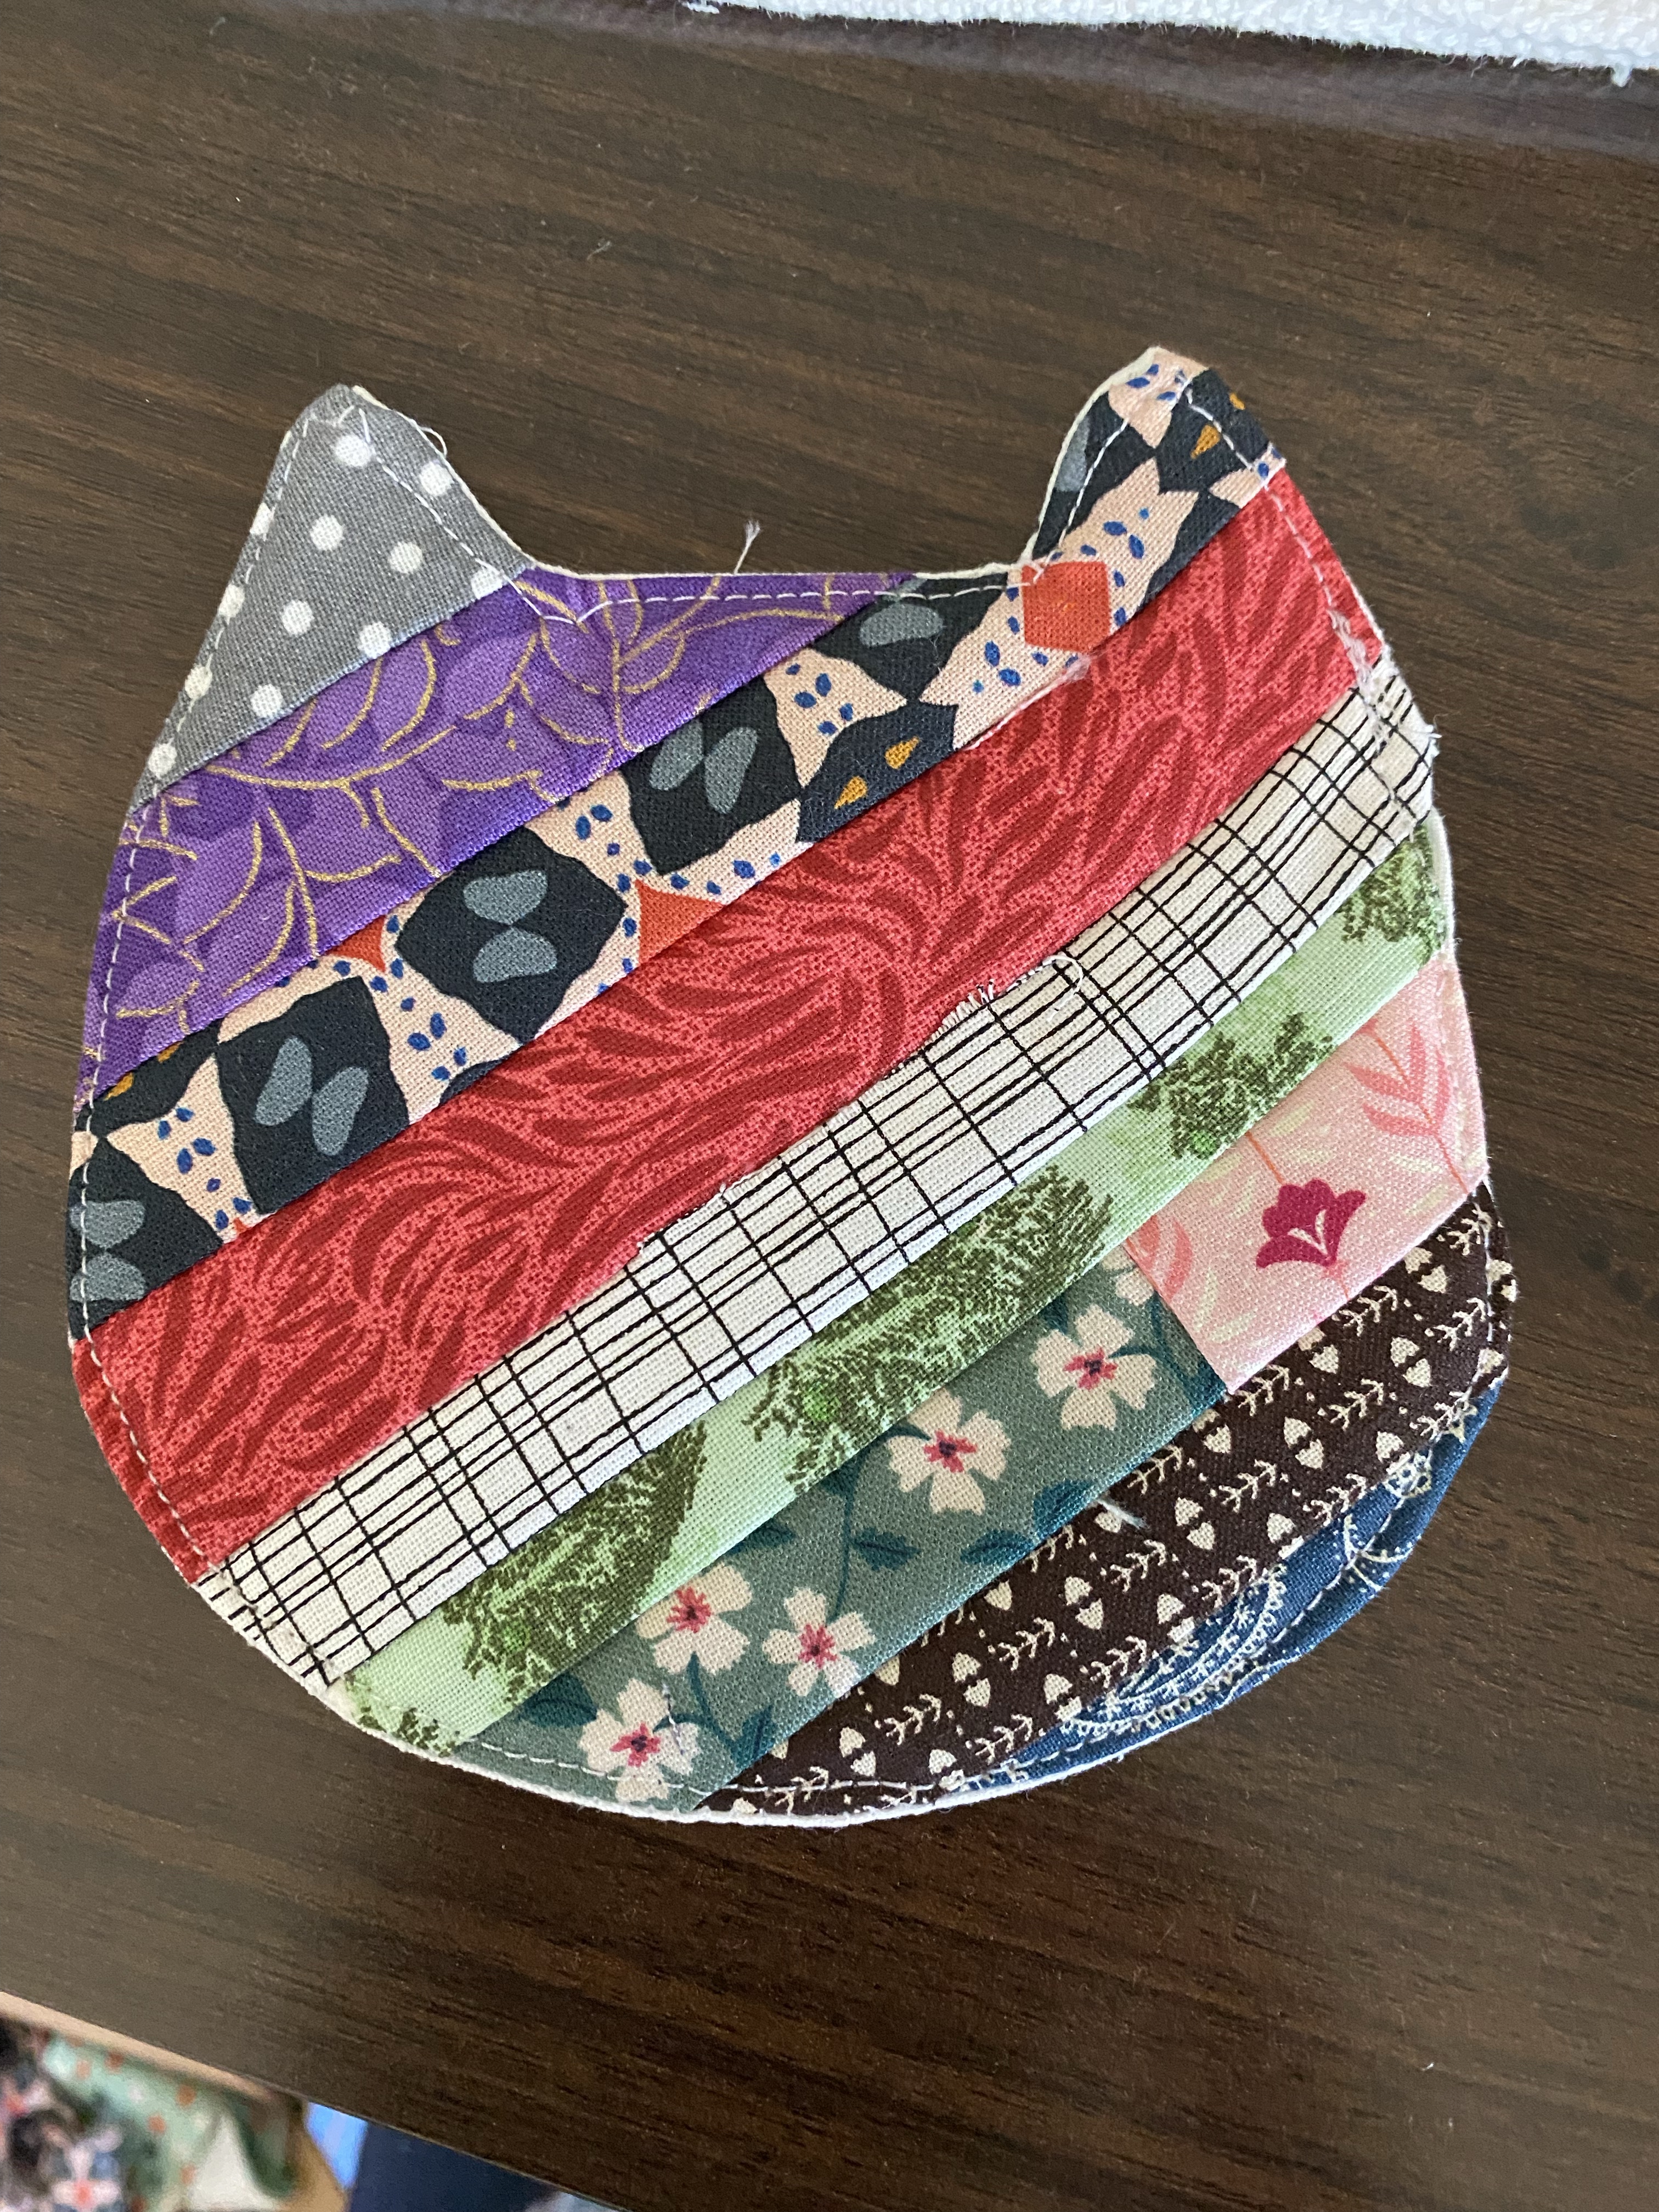
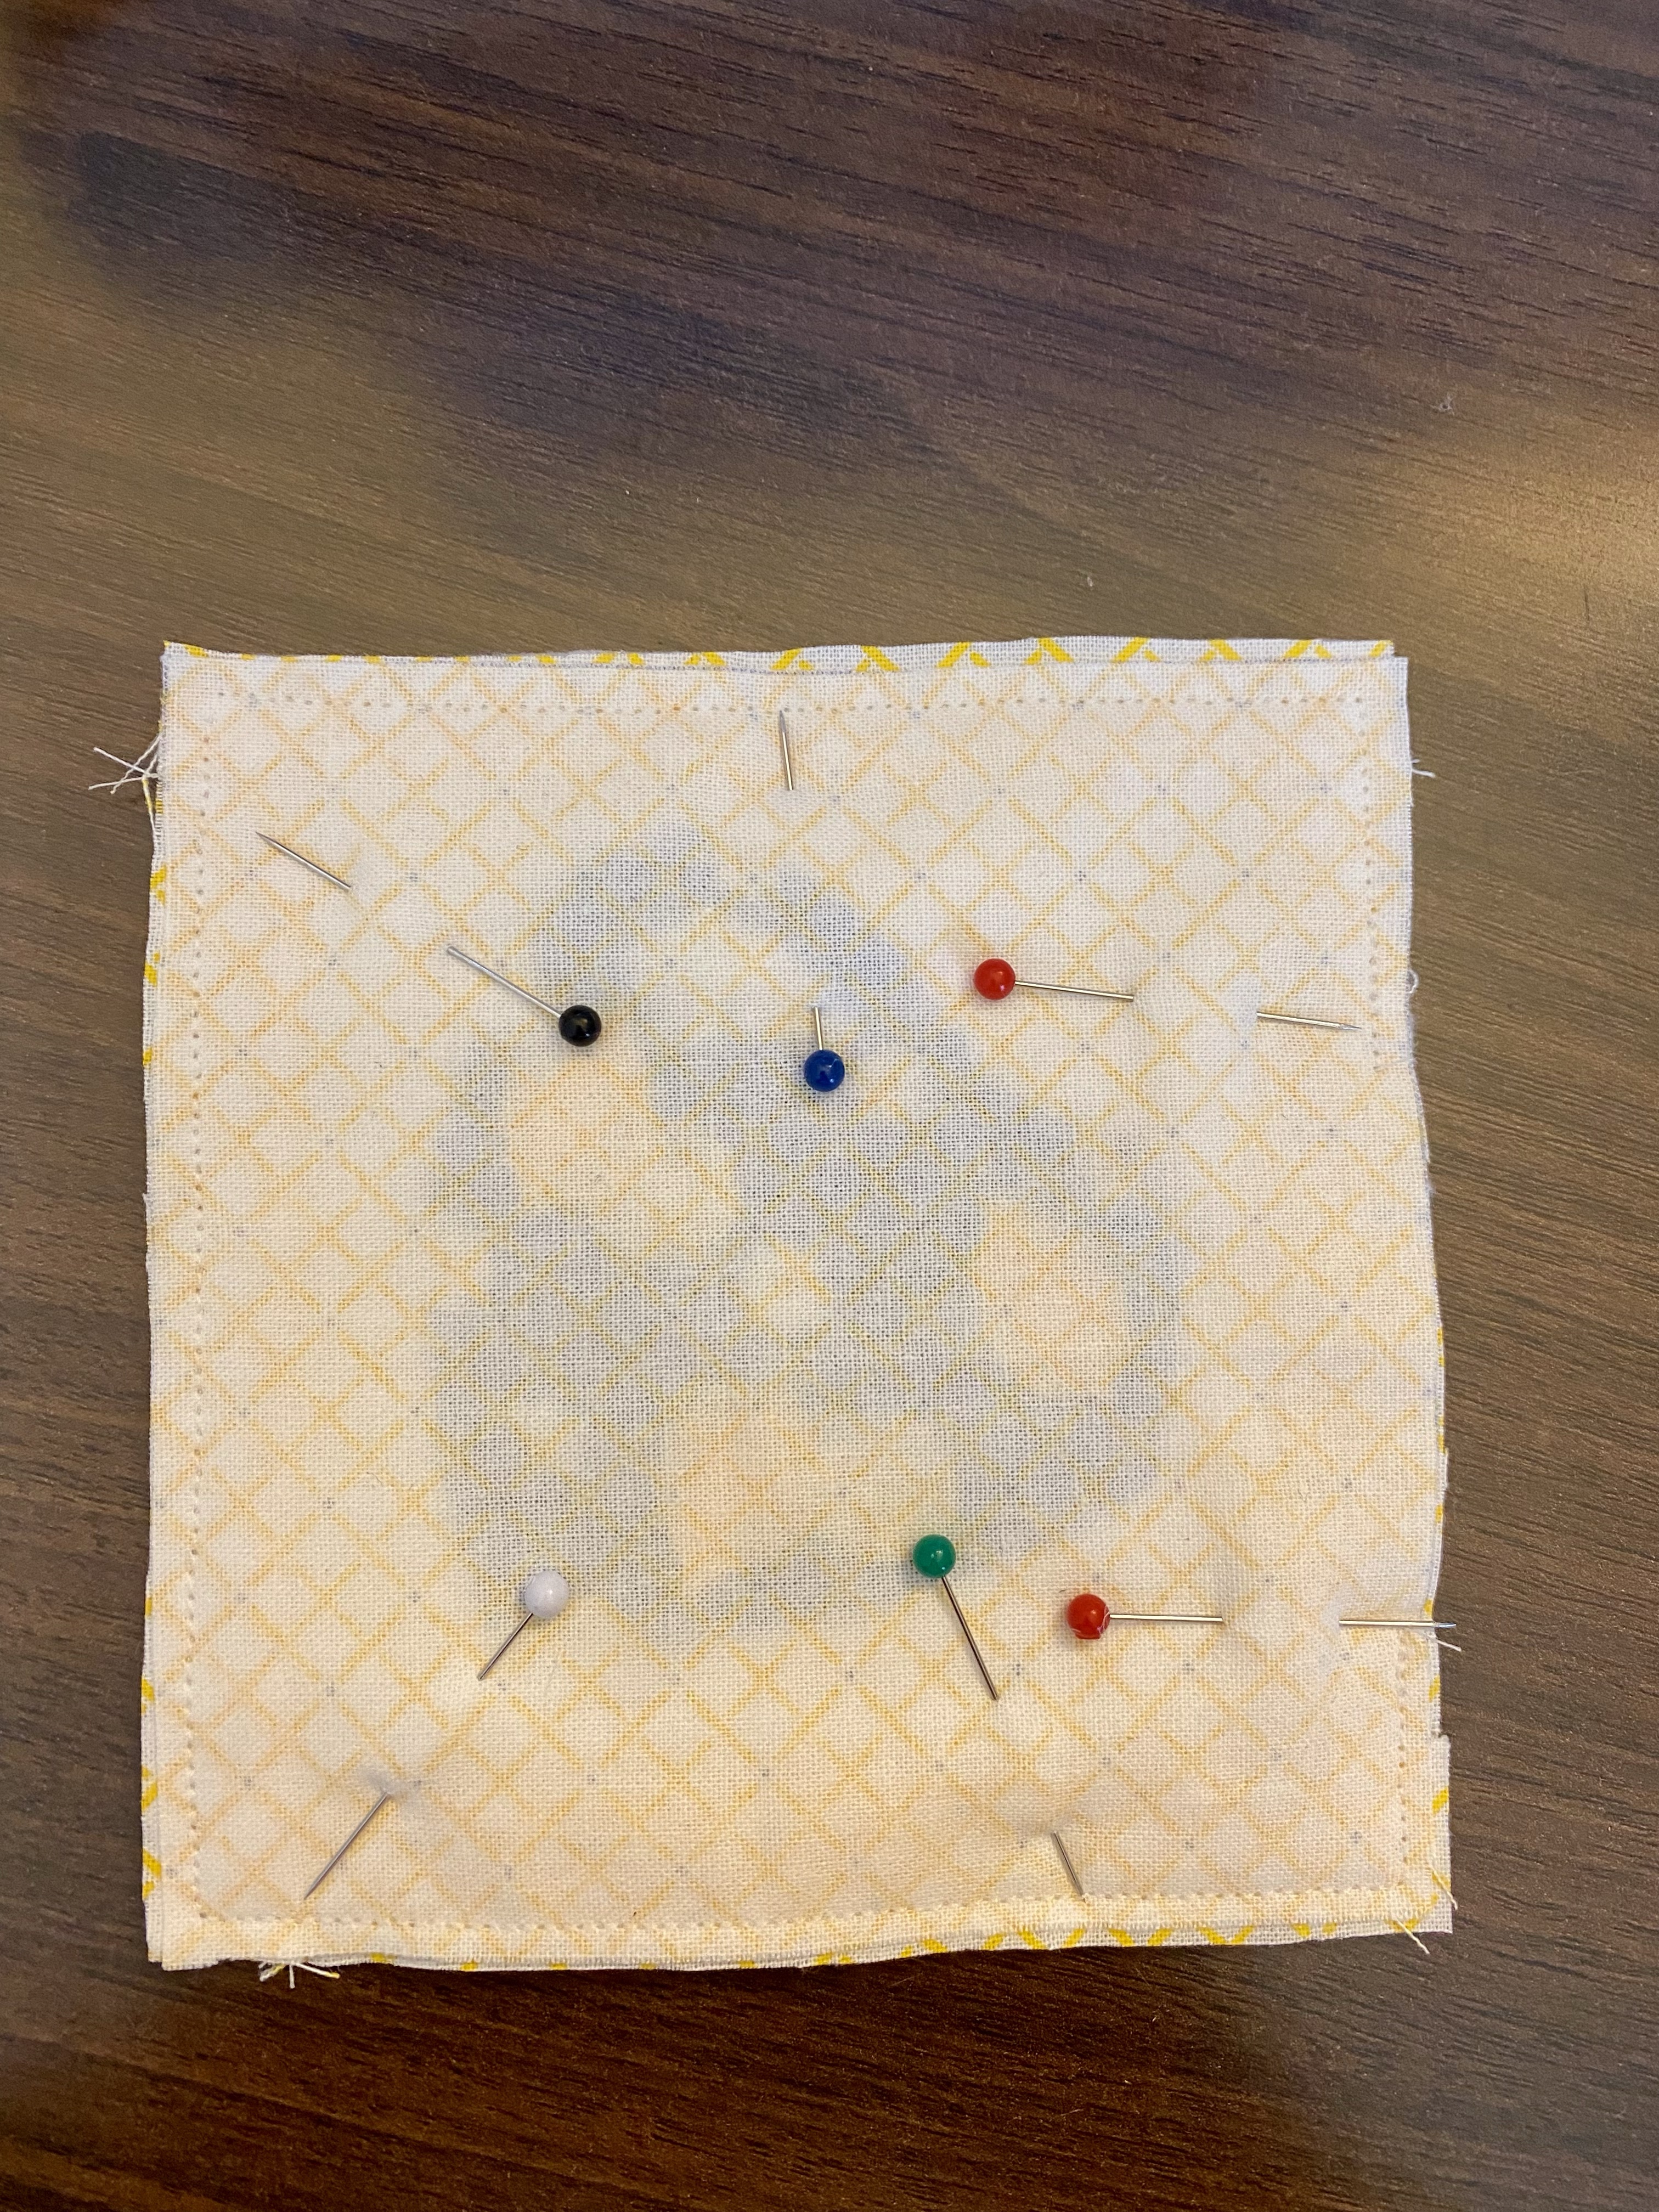
  • Center the design on the batting, leaving the backing off and pin in place. I had cut 1 inch strips of a coordinating fabric for a border. (I used the method I learned for making a precise hem in a skirt, 50 years ago.) Pin at the edge of the white fabric, stitch, turn, press, and flip it over. You’ll see some overlap to trim even with the batting.
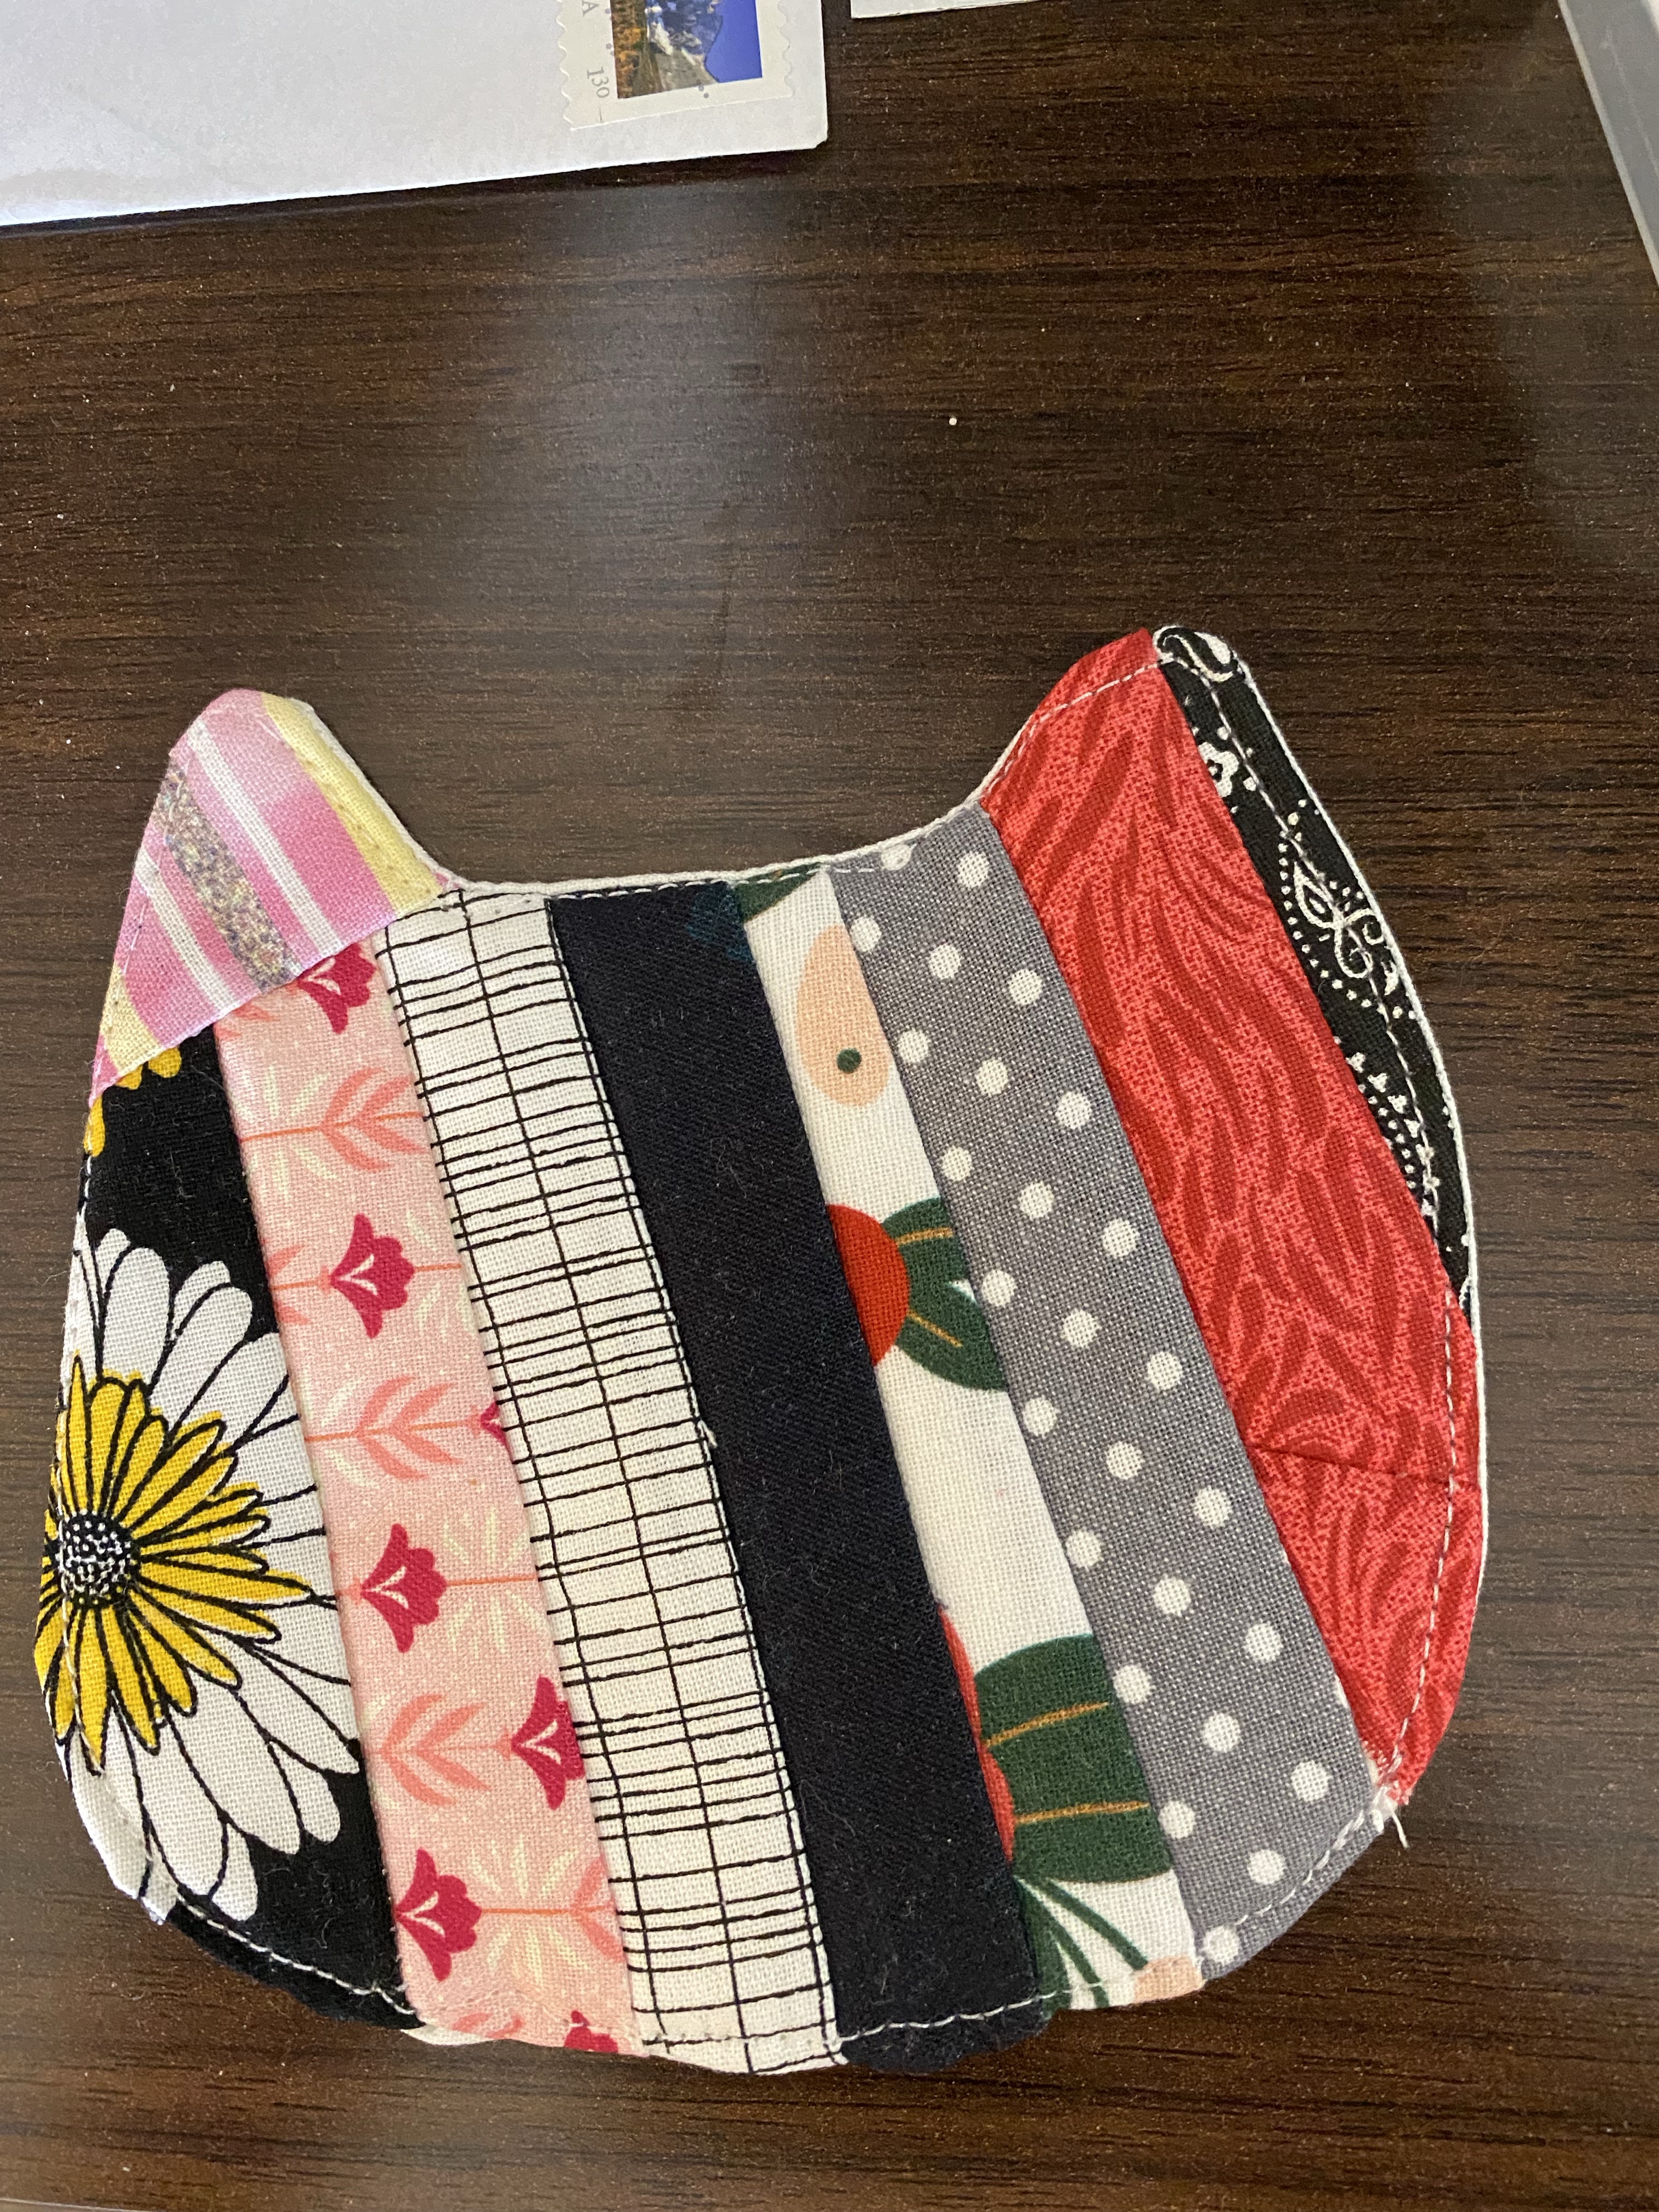
  • When you have done 4 edges the same way, lay the coaster with the design facing up, and layer the backing with right side facing down. Stitch along the edges and leave open about 2 inches for turning. I give myself a visual cue of a red pin where the edges of the turning gap is.
  • Turn right side out, pushing out the corners and straightening the edges. You may want to trim across the corners first, which I had neglected to do to have them sharp instead of rounded. Turn the raw edges to the inside and press, pin (or both) in place. Topstitch close to all edges. Give it a final press.

Applique

This week I worked on some applique. I used HeatnBond, which is fusible on both sides. I found some simple outlines I wanted to use, first were the campfire and tent. I traced the shapes onto the paper side of the HeatnBond and cut around them, then fused them to the back side of the fabric I wanted to use. I used a pin to scratch the paper backing and remove it, then I fused the fabric to the items. In this case it was to make two coasters.

The applique needs stitching, so I chose a blanket stitch, made it small to match the scale of the coasters, and I love the result. I added borders and even repeated the blanket stitch there. I cut the backing oversized to fold to the front and bind it.

I found a cat silhouette I liked and added a cat applique to one of the cat-shaped coasters. I will continue to use the method on other things, like an initial on a coin pouch, or other shapes.

While looking for shapes I found some I liked, but they would work better as embroidered accents. To do that I’ll have to work on my embroidery machine (fix the tension) and test out a few.

Making Decisions

As I’m designing items for sale in my flea market booth, I am considering several things at once.

~ People want to buy something handmade that someone else made

~ Time invested in each item vs. how much to charge

~ What do customers want to purchase? Practical items or splurges?

I discovered by putting some hotpads out that they sold very quickly. It was right before Christmas so gift giving could be a big motivator. Handmade makes it a one-of-a-kind item.

I can quickly make simpler designs, but a more complex design may be appreciated and purchased sooner. Or not, I’m just guessing what goes on in a customer’s mind. I can charge less for the simpler ones, but would have to charge more for a more time-consuming design.

I’d love to offer a huge variety of items, but I think it’s better to focus more on a varied inventory of a few types of goods. Definitely the zipper pouches, but also more hotpads, drink coasters, and ice cream pint sleeves. I’m still thinking, and collecting potential patterns and designs. I will put a split ring (like a keyring) on the zipper of each pouch, but I’ll also offer a few beaded zipper pulls if someone wants to make it even more unique. Along that line of thinking, I can make wrist bands in many colors that will coordinate, to turn a pouch into a wristlet purse that will hold phone, cards, and cash.

These are a couple of coasters (aka mug rugs) that I’ve made the last few days. I have other prototypes that didn’t work out, these are the good ones.

Extra hour

I used my extra hour today to get in a little sewing. I am done with the first round of treatments for the cancer, so no more steroid, and no more insomnia sewing. I have to be intentional about it now.

I decided to purchase the ribbon for the zebra stripe, and applique it to the fabric. It is not double-sided, so I had to get creative to make it look so. The zebra is part of a baby animal safari print I had bought at Jo Ann Fabrics several years ago, to decorate my classroom according to the Safari theme.

Ehlers-Danlos Syndrome is all through my family. It is more prevalent in Europe and in people of European descent. It is a connective tissue (tendons, muscles) disorder. Many of my family members show joint hypermobility (we used to call this double-jointed) and eventually end up with many corrective surgeries, early arthritis, joints that dislocate easily, and pinched nerves. It can affect every system in the body.

My niece and her husband will be receiving these (I made 2) as a thank-you for helping to get my mom safely to me so she can be my caregiver this winter. I love to make homemade thank-you gifts, and this couple in particular are always pleased when I do.

Mug Rugs

This is a good attempt at mug rugs. Again, a sleepless night last night gained me a couple of sewing hours. I used the paper-pieced awareness ribbon and small quilt block patterns to make these.

First is the burgundy ribbon for Multiple Myeloma, my cancer. I used the corners I snipped off the wall quilt I made late in the spring for a customer on Etsy to make the pinwheel block. The second is a pink ribbon (no explanation needed, and I’ll give it to my Mom who is a survivor) and did a simple string quilt block with coordinating fabrics.

I know where the mistakes are and family won’t care, right? I’m considering making a lot of these during my cancer convalescence and putting them for sale on Etsy or eBay. I need to live away from home for a month and I plan to take my small portable Brother sewing machine along, and keep my sewing materials manageable, as in one tub only. Maybe I can use up a lot of my stash and small bits making these.

Something else I decided after doing these – I think I’ll make a fabric “ribbon” (two-sided with hemmed edges) and applique the ribbon to future mug rugs. It takes quite a bit of time to make the paper-pieced portion of the mug rug.

I’ll need ideas on what will sell in the store, what’s your ribbon? I plan to do the zebra-print for Ehlers-Danlos Syndrome (rampant in my family), Alzheimer’s of course, but what else do you suggest?

Sleepless on steroids

I’m back in cancer treatments, and that’s part of the reason for fewer blog posts. On Mondays I take 40mg of a steroid in the morning. By Monday night I have no ability to fall asleep. A few weeks ago I started getting up and heading to the (what else?) sewing room. I fixed buttonholes in my husband’s favorite flannel overshirt, created some Frankestein shirts, and quilt blocks.

Frankenstein shirts is what I call combining 2 or more shirts to fit the parameters I need for my upcoming stem cell transplant. I’ll have a central line (kind of like an IV in the upper chest) and I’ll need my shirts to open in the front to be able to get them on and off without disturbing the line. I’m never able to find cotton button-down shirts that don’t gap at the bust and I’m more comfortable in knits, so I’m working with what I find. I use thrift store purchases, so I don’t feel bad putting something in the rag bag if I can’t stand how it turns out.

I found this cute zip-front hooded sweatshirt in gray with sparkles. I added sleeves from a pink shirt I bought online on clearance, but can’t wear something that thin and too revealing. This way it’s cute!

I used a man’s NRA t-shirt, added a button placket by cutting from a discarded gray t-shirt of my husband’s and adding interfacing, along with green sleeves from another of his discarded shirts. I like this one too! Two of the metal buttons I found have the look of a shotgun shell with the brand name Remington.

The quilt blocks I’ve done are the “awareness ribbons”. The first is from Carol Doak, but I didn’t like the proportion of the top part of the ribbon compared to how wide the rest of the ribbon is.

I found another at Connecting Threads   that I liked better. I made one up in purple for Alzheimer’s and one in burgundy for Multiple Myeloma. These make up smaller, so I’ll use them as a basis for mug rugs.

Update on Mug Rug

I decided to join the 4 small designs into one and sell in my Etsy store.

embroidery design

I think it came out great. I adjusted the proportions so they look a little more life-like. The finished design is 3.82 x 4.76, which is larger than my little embroidery machine will handle, but others will appreciate having the complete design in one file.

So, click on over to my Etsy store and make a one-of-a-kind gift for someone special. Quilt it any way you want, backing fabric that fits the personality of the recipient.

Also, for a limited time, anything in my Etsy store is 25% off with cash transfer from PayPal. Use the coupon code IUSECASH to take advantage. This even applies to special requests where possible.

Mug rugs

At work, there are two hardworking secretaries, and I thought I would make some mug rugs for them as a token of appreciation. I started designing in my head beforehand, as I always do. I wanted to notice what they drink and how they might use the rugs.

They both get a large insulated glass of tea in the morning. One of the two also drinks hot coffee, and an occasional treat in the afternoons is a fast-food iced coffee drink brought in by her husband. That started the thoughts whirling.

I looked through some clipart to digitize as embroidery designs. I found four that I liked, and I happened to notice that two were coffee, two were tea, but they also represented hot and cold. I came up with the following design.

My embroidery machine is a small one, so I did the design as four small designs. It required a little shifting of the fabric, but I think I did well.

Small Bits

I worked a little bit this weekend on small bits. Sample blocks to see if I want to go further and make a whole quilt.

jigsaw puzzle quilt

I’ve seen this quilt pattern  in photos on the internet. It intrigued me because I love tessellating patterns. I decided to figure out the dimensions and try it out, thinking I wanted to make it for a baby quilt for an expected grandchild.

After doing this much sewing, and the concentration it takes to keep the tiny pieces organized, I decided this little mug rug would be my only use of this pattern. I finally understand the importance of making a test block! Each jigsaw puzzle piece is 3″ by 2″, and the tiny “head” part of each puzzle piece finishes to 1/2″ by 1/2″! Too tiny for me to repeat!

A friend recently lost her husband, and wants a memory quilt made from some of his clothing. I tried describing this method to her, using denim from jeans and scraps from shirts in the centers, and she requested a sample block so she could see what I was talking about. I whipped this up this weekend. Please – don’t ask me how to figure out the size of the square that goes inside the circle. I guessed big, then cut a square of fabric progressively smaller, until I found a size that worked for me. The directions for this quilt can be found here.

Today I’m working on a tessellating star quilt, paper pieced, with only star patterned fabrics. I had started it several years ago and got frustrated with it. I have a half a baby quilt size top done, and I’ll add enough to finish a baby quilt.  No pictures yet, someday when it’s complete.

Cute little coasters

A recent project: embroidered coasters. I wanted to make a little something to thank someone who has helped me recently, and I figured these were too cute. I searched through some home embroidery files a friend had shared with me and found these two. I spent the evening yesterday loading, clipping, and changing threads on my machine. Today I cut cotton batting, backing, and a pale green dotted fabric for the binding.  Finished product, something useful, cute, and simple to do.