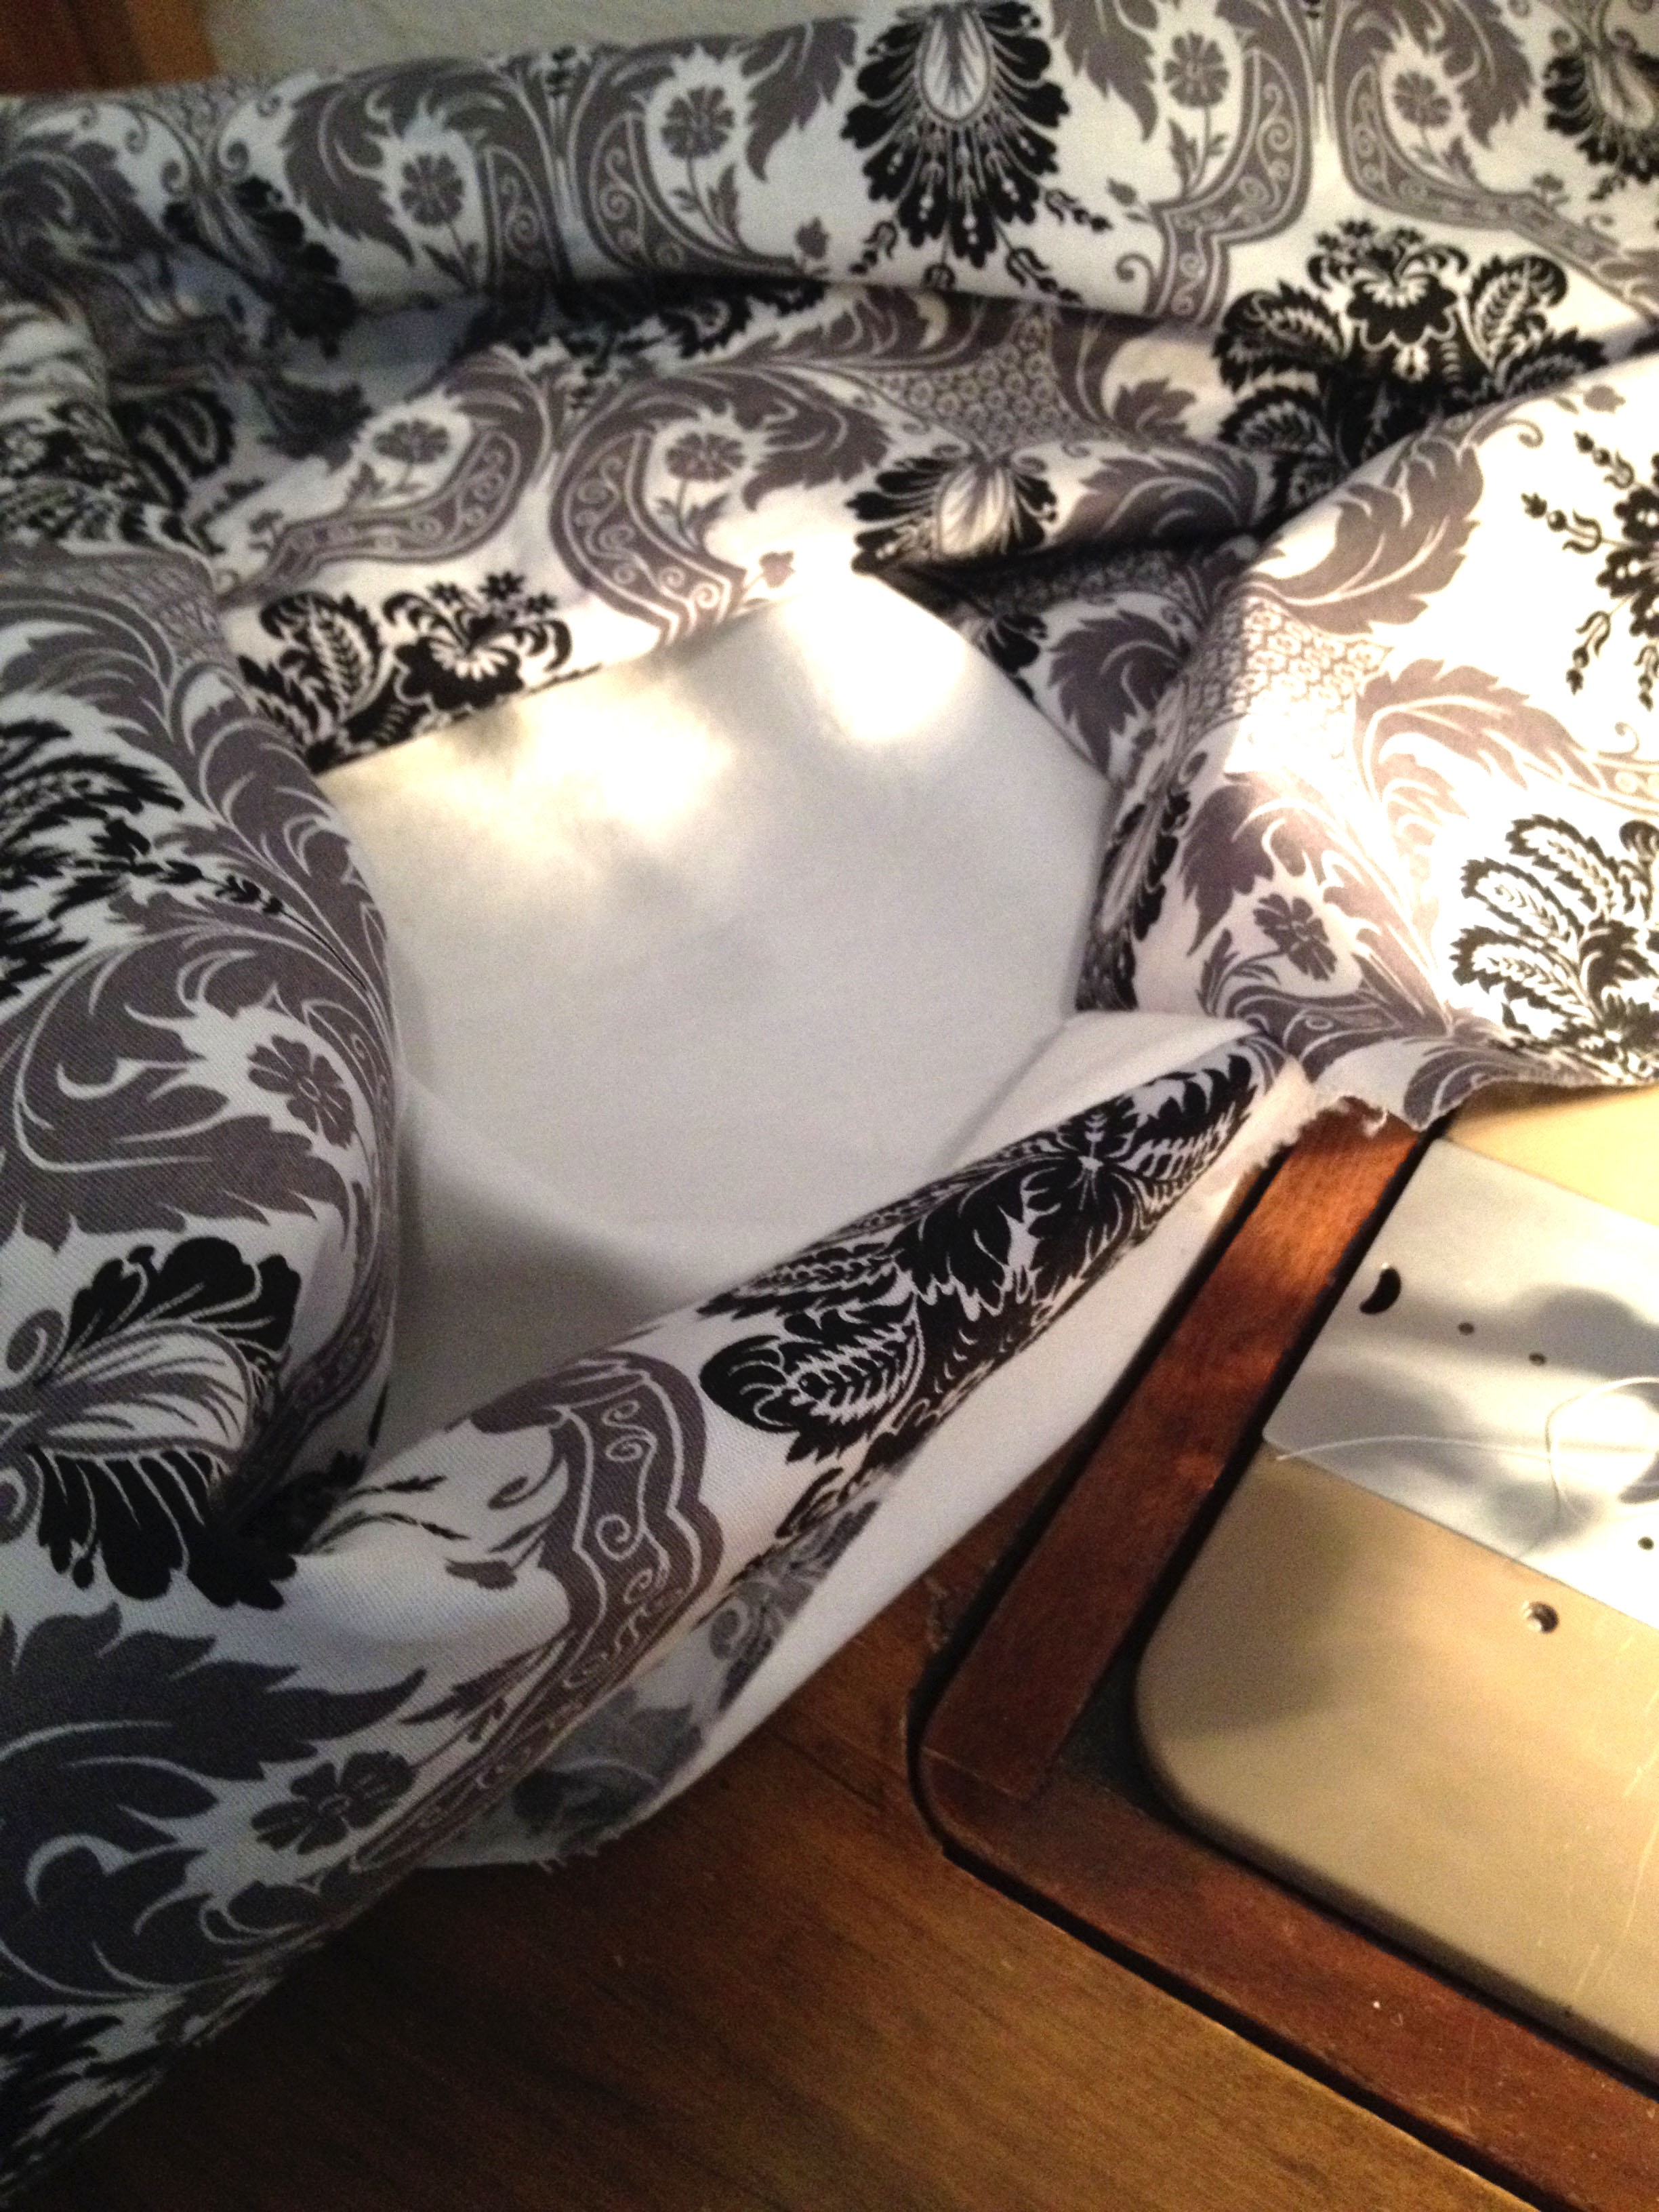
I began the final basket liner quite a while ago, but haven’t finished until yesterday. I had the fabric, just not the time when home improvements cluttered my schedule. Of course, I didn’t think ahead once I started the liner, just wanted to plow through and get it done.
I forgot that the lengths of the sides where they attach to the base of the basket liner would be a bit shorter than the length needed to fold over the edges at the rim. The basket sides had a slight flare at the top, and a large rim. All I needed to do to fix the situation was to rip out the stitches to below the rim, and finish the edges. Isn’t it strange that I knew how to fix it, knew it would only take a few minutes, yet couldn’t find the time?
I decided the liner would have a gap at every corner where it folded over, and it was simple to fold the side under and create a sleeve. Then, I had forgotten I hadn’t yet painted the basket black. It only took a quick trip to the garage and it was painted.
We had painted the bathroom since my last post, a nice soft grey color. I love the baskets and liners, keeping the necessary clutter out of sight.
I know it has been quite a while since my last post. This blog has become more than just quilting, but will include any of my projects that I want to document.
I will be posting about making my Quick and Simple Quilt, in twin and full sizes. We have a guest bedroom now with two sets of bunk beds so we can host many sleepovers with children and grandchildren. We have a twin/full bunk bed and a twin/twin. I haven’t begun that project yet, but we will end up with 4 coordinating quilts for extra winter warmth.
This project is all about bathroom storage. We have been unable to find a wall cabinet of the dimension we wanted, so I’m making do. We were given a shelf unit that fits around the toilet. I had found mismatched baskets and filled them with bathroom essentials, but it looks too scattered.
Bathroom shelf
Please pardon the beginning of redecorating. I decided to keep the shelf, use baskets, and make them coordinate. The black basket with the white/black fabric liner is my starting point. Of course, this meant going to the thrift stores to find similar baskets. I found these:
I wanted them to fit in particular places on the shelves, and be of a very sturdy weave.
Preliminary fit
Next, I found some black and white fabrics that I thought would look great. We’ll end up with grey walls and some small black cabinets near the mirror. I had some matte black spray paint and got busy on painting the baskets. I did not document every step and I may include a liner tutorial on a future basket. The thing is, the first one always has mistakes and problems.
So, today I sewed the first basket liner. I had bought 1/2 yard of a few fabrics, and found that it wasn’t enough for the largest basket. So – white bottom fabric, where I will be the only one to see it. First I sewed the sides onto the square bottom.
It takes concentration to remember which way the seams go. I wanted to roll some fabric over the edge and tie a ribbon through a casing. I wish I had made the roll-over fabric a bit longer.
I left the corners open and hemmed everything, made the casings on the four side sections, made a ribbon of some leftover fabric, and put it all together with the basket.
I do like how it turned out. It will hold the cleaners and extra shampoo bottles, things like that.
I have the basket with the hinged lid partially painted, and I’m waiting for nicer weather before I attempt to finish the painting. The two baskets on the right side are options to keep, but I’d prefer to find taller baskets.
I belong to a quilting group on Facebook and this project for pot holders was posted. Here is my own photo tutorial on the simple potholders.
template for batting
Using dish covers, I traced circles on the cotton batting. I made both sizes, blue and orange. 😉 You can use cotton batting or batting that is made specifically for potholders.
Widows and orphans and crazy patch
These are some of the potholders I whipped up quickly.
scrap pile
I gathered my materials – scraps from other projects and box of bias tape bindings. I plan to use up much of what you see.
On to the tutorial. To start, I placed a leftover block on the cotton batting. I did not use a separate foundation (muslin); I simply sewed right onto the batting.
I topstitched the seam lines, because I like the quilted look.
I placed coordinating fabric along the edges so that fabric covers the batting completely.
Trim around the batting.
Then I found another green print and cut 3 circles. Place one circle on the back of the batting with the right side up. The other two circles should be folded in half with right sides facing. Place them on the back of the potholder so the fold lines are together.
I sewed a narrow zigzag all around the edge to keep the layers together.
Add a binding and you are done. If you are making a circle, you must use bias binding.
The folded circles added to the back allow you to use the potholder as a pan or lid grabber.
Simple to make, this quilt can be whipped up in a few hours and make a child happy all winter long.
quick lap quilt
I made these in snuggle-quilt size for a child, but the same steps apply if you want to make it adult size or large enough for a bed. No batting needed.
My husband and I couldn’t resist the monkey and frog fabrics we found in flannel one day. I had already made lap quilts for the two of us using cotton for the front (not pieced, whole cloth) and batting with flannel backing. I wondered how it would work to use fleece for the backing. It would be soft, and warm and heavy enough to replace the batting as well.
For each quilt I purchased 1 1/2 yards of flannel fabric and 1 1/2 yards of a coordinating color of fleece. I knew there would be some leftover, but it’s never wasted.
I prewashed the flannel and trimmed it. Then I laid it out on my cutting table with one corner of the flannel matching a corner of the fleece. I cut the fleece with 2 inches overlap on the other two sides.
Then I repositioned the flannel so there was 1 inch of fleece overlap on all sides. Turn the fleece from the back to the front and pin to the flannel. No need to finish the edge of the fleece, as it won’t ravel.
I made mitered corners by first folding over the point at the corner, then folding down the two sides of the miter. Pin very well.
Because the fleece may tend to get caught between the toes of a presser foot, I used a teflon foot with a flat bottom, and the left position for my needle. I simply topstitched around.
teflon presser foot with roller
Then comes the fun part! I used the darning/embroidery foot and machine quilting thread, and hopped all over the quilt. No need to baste or pin, the flannel grabs the fleece and holds tight, and in doing both quilts I had only one instance of a wrinkle being stitched in place. I blame being distracted, and a careful person wouldn’t have that happen.
darning foot
I moved all around the frogs, sometimes even twice, to secure the layers of fabric together. I could have added shapes, or hearts, or even the grandson’s name, but I left it as a meander stitch.
I wrote down the times as I did the steps. I was very surprised I went from pre-washed fabric in the first photo, to the finished product in only 1 hour 50 minutes. Perception is odd, isn’t it? I was thinking it took so much longer than that.
Here’s the breakdown:
30 minutes to press the prewashed flannel, trim off the selvage, make sure it’s square, trim the fleece to 2″ larger each direction, reposition to 1″ overlap all around, and pin the fleece as a self-binding.
15 minutes to stitch the binding along 4 edges.
65 minutes to change the presser foot on the machine and meander-stitch the body of the quilt. The timing on this part depends on how densely you stitch.
Very quick and very easy to make. Finished size on these is 41 1/2″ by 53″. The fleece backing is so snuggly I really don’t want to give up the quilts, but I’m going to force myself to wrap them and put them under the tree so I don’t change my mind. I can just see two little boys watching TV with these quilts, or sitting in their mother’s lap under the quilt to hear a story.
Some clever someone had converted old sewing machines into tractors. Add a few bits like gears, wheels, shafts, paint a bright color, even add a decal.
We were at an old gas tractor show in Scottville, MI last July and came across these.
I decided to join the 4 small designs into one and sell in my Etsy store.
I think it came out great. I adjusted the proportions so they look a little more life-like. The finished design is 3.82 x 4.76, which is larger than my little embroidery machine will handle, but others will appreciate having the complete design in one file.
So, click on over to my Etsy store and make a one-of-a-kind gift for someone special. Quilt it any way you want, backing fabric that fits the personality of the recipient.
Also, for a limited time, anything in my Etsy store is 25% off with cash transfer from PayPal. Use the coupon code IUSECASH to take advantage. This even applies to special requests where possible.
At work, there are two hardworking secretaries, and I thought I would make some mug rugs for them as a token of appreciation. I started designing in my head beforehand, as I always do. I wanted to notice what they drink and how they might use the rugs.
They both get a large insulated glass of tea in the morning. One of the two also drinks hot coffee, and an occasional treat in the afternoons is a fast-food iced coffee drink brought in by her husband. That started the thoughts whirling.
I looked through some clipart to digitize as embroidery designs. I found four that I liked, and I happened to notice that two were coffee, two were tea, but they also represented hot and cold. I came up with the following design.
My embroidery machine is a small one, so I did the design as four small designs. It required a little shifting of the fabric, but I think I did well.
I’m finally feeling better, but this post isn’t about my health issues. I’ve found a few minutes here and there in which to sew, and I finally have something to show (you) for it.
crescent Santa tree skirt
Since the beard was the last thing I did, besides stitching down the various parts, and it was freehand and spontaneous, it took me a while to plan out the spontaneous part. Yes, I’m that much of a planner. The final part was to place the stars. The book suggested painting small wooden stars with gold paint, drilling two holes, and stitching them on like buttons. I chose to use 3 different colors of yellow and embroider them. I did few, so they didn’t overpower Santa, and none on the back side because it wouldn’t show.
doll quilt
I also worked on another doll quilt. This one used scraps from this wall quilt I made for signatures at a 50th wedding anniversary party. I found 4 matching half-square triangles and arranged them as a pinwheel, then sewed the pinwheels together. This will go into the Etsy store for sale, and I plan to make more. I found a doll that could model the quilts for me, but still am lacking a bed for more polished-looking pictures. Of course, since the doll needed a nightgown, I made that for her, too.
I worked a bit on the circle quilt, but I’ve found that I’ve done too much unnecessary work. I will have a future tutorial to explain the shortcuts I’ve found. Since I have at least 3 more to complete, I don’t feel like I’ve learned these things too late.
My husband and I bought a new home in Michigan, where we will move next summer. We were fortunate enough to have time to stay in that house for a week and enjoy the lake and the cooler weather while here in Missouri the heat melted all our friends and family.
I had taken measurements, and wanted curtains over the windows in the sunny lakeside room. The previous owner had white walls and no window treatments. I’ve sewn before with sheer material, and I’ve sewn large pieces of fabric, but not large pieces of sheer fabric. It slips off the table so easily, I had to weigh it down with anything handy. I finally managed to get hems in the sides and bottoms of the panels, and they are fairly straight.
As a self-taught novice, I hadn’t known about drapery header. It is stiff like firm interfacing, the one I bought was 3 inches wide and comes on a roll. I used it at the top edge of the curtain panels so they wouldn’t droop between curtain rings. I do love the look of the room now!
windows beforewindows after
The sheer fabric will allow plenty of light to come in. If they happen to be pulled across open windows, the slightest breeze will push them aside to allow for air movement. We plan to have them open mostly, and be a decorative element in the new house.
Last summer I had picked up a photo album at a thrift store. I used the hard cover to make over into a book purse.
Seaside Date Evening Bag
Now I find I have a need for a small photo album, so I remembered that I had kept the photo sleeves and decided to make a new hardcover for the album. It was very quick (about an hour) and pretty easy. In fact, no sewing needed!
Find a piece of cardboard larger than you need. In my case, 8.5×11 was plenty big enough. I wanted some overhang on 3 sides to protect the edges of the photos.
Trim the cardboard to the size you need. Center the photo sleeves and mark the two fold lines to form the spine.
Use something with your straight edge to score the two fold lines. I used a regular screwdriver. The scored lines will be on the outside of the folds.
Choose your fabric. Cut fusible interfacing the same size as your cardboard. Center it on your fabric and press, leaving a margin for turning under.
Use a craft or tacky glue, and first glue the spine, or narrow center portion of the cardboard to the back side of the fabric. Then, in turn, fold one cover and glue to fabric, then the other. It is important to fold as you glue, so that the book will tend to stay closed rather than try to flop open.
Squiggle some glue around the edges, eyeballing the distance that your fabric will turn under. First, fold the corners at an angle, as shown. Dab the corner fabric with more glue, and turn the rest of the fabric.
Choose your inner cover fabric. Measure just larger than the cardboard cover. Fuse with interfacing on the reverse side, interfacing being a little less than the size of the cardboard. Turn under raw edges.
Center the inner fabric to the inside of the album cover. First, glue the center (spine) portion, then fold and glue each end. Glue the spine of the photo sleeves and press to the spine of your cover. Finished!


 We had painted the bathroom since my last post, a nice soft grey color. I love the baskets and liners, keeping the necessary clutter out of sight.