Just the essentials

Ready to go to the auction!

As I said, I wanted a small crossbody purse to wear to auctions. I didn’t want everything I usually carry in my purse, because it would be too heavy. Thus, the name, Essential. This worked up so well that I may sew some companion zip pouches and crossbody purses to sell.

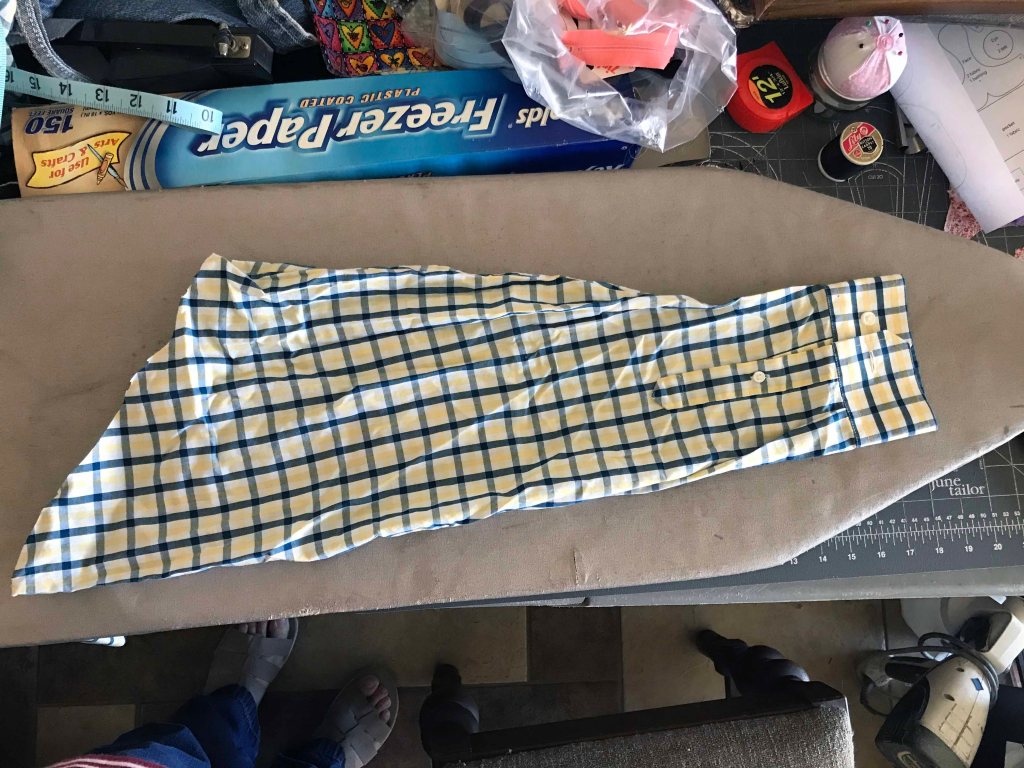
I was glancing through my stash and this yellow/blue plaid men’s shirt caught my eye. I had thought to remake it into a blouse for me, but I couldn’t resist using it to make this purse.

A messy workspace is a sign of a creative mind…..right?

First I cut off the sleeves. I wanted to use the cuffs as the top edge of the purse. I love the shape, and it has the stabilizer inside. I cut the cuff with a little of the sleeve fabric still attached, for the seam allowance.

I didn’t want my purse as wide as the cuff originally, so I made a seam in the middle. I pressed the seam open and topstitched.

Before and after

I decided on the dimensions for my purse, and cut 2 of the shirt fabric and 2 of a muslin for the lining. I wanted it thinner than what it would be using cotton batting, so I found a scrap of flannel and cut 2 of the flannel. It has a faint floral pattern, but it won’t show through the plaid.

I layered the fabrics and pinned, then stitched some straight line quilting.

I sewed the cuff to the top of each body piece, topstitching to finish. I had trimmed the fabric and serged it for a neater seam.

I often find leftovers of binding. Either in a bag of thread and notions at a thrift store, given to me by others, or part of the treasures in a sewing basket. I pulled out some blue binding, but the color wasn’t right. I had almost the exact amount of white. You can see I need a little more practice making mitered corners.

Now for the strap. I actually have a basket of men’s ties, and I thought it would be perfect to use a blue/yellow tie with the purse. I had one, with a shape on it that looks like New Jersey! After trying it on, I didn’t like it after all, so I dug in another box of potential purse straps. I found a blue trim that is a little stretchy, just the right width, and a beautiful navy blue. I cut small pieces of the shirt fabric and made tabs at the ends so it won’t unravel.

I attached the tabs to the inside of one cuff piece, then topstitched so it was sandwiched between both cuff pieces.

I really love it! I can’t wait for the local auctioneer to have more auctions I can attend. I like to purchase the lonely sewing machines that others don’t bid on, and get them oiled, repaired, and working again. My husband realizes that if I see one, it will probably come home with us.

New purse from quilt blocks

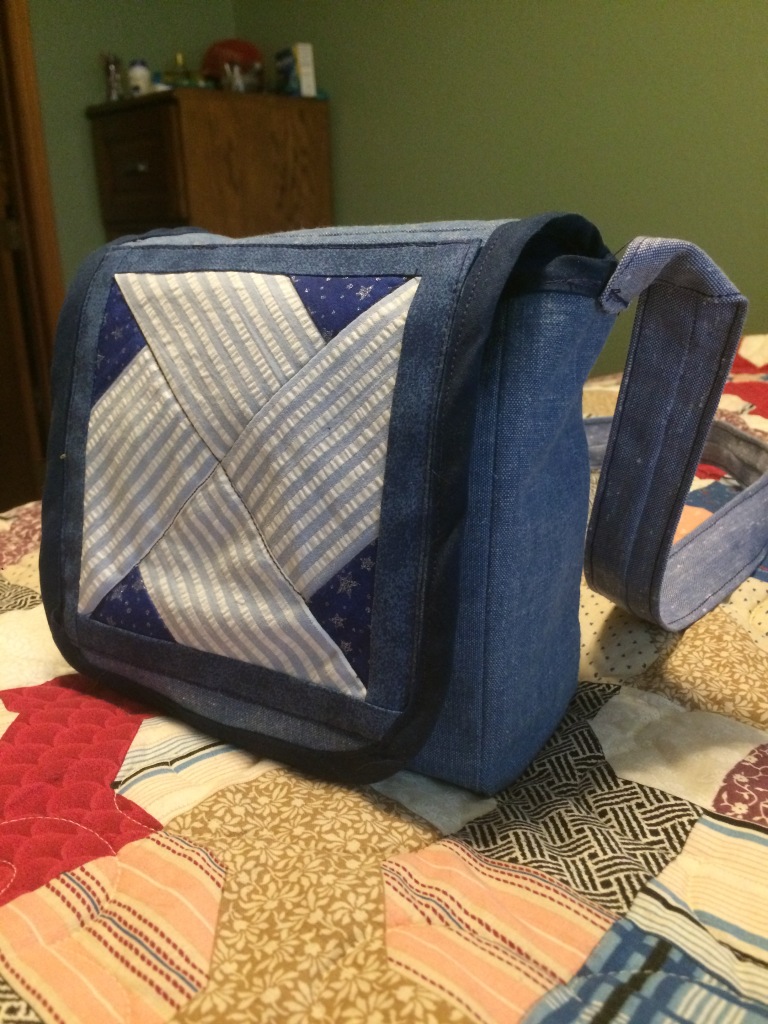
I finished my new purse, and once I purged the heaviest items from it, I love carrying it.

My old purse was also homemade, just a bucket style with short handles and the top opening left open. Too many times it would fall over and I would lose items. The last time was when I turned in a loaner car when my own car was repaired, then found out later that all my gift cards had fallen out into the back seat. Luckily they were still there, but I realized I wanted a purse with some kind of covering.

I opted not to have a buckle, snap, or magnet catch. I just want the flap to lay where it should and be easily opened when I need something. The old purse had pockets sewn into the lining on all four sides, but this will be different. I sewed a pocket to the lining in the back for my phone to stand vertically. I used a decorative stitch cam for topstitching. In the front I sewed a divider to the lining, and all receipts and papers will go there along with the checkbook.

That leaves plenty of room for my wallet and keys in the middle, and whatever else is accumulated. I love using up odds and ends, and was able to combine the coordinating Twin Sisters orphan quilt blocks, two heavier denim fabrics, and some other cotton. The binding was exactly enough. I couldn’t have planned that any better.

Meanwhile, I have other tasks that demand my attention for now, and I hope to be back to sewing soon.

Crossbody Book Purse inspired by Rachel

My daughter-in-law once told me her preferences for a purse are that it have a long strap for a crossbody position, and that it zips closed. I thought I would try a crossbody as well and came up with the following tutorial.  My wish is that you use it for personal sewing or gifts, fundraisers or group instruction. If you wish to share a photo of one that you’ve made, I’d love to see it! Please don’t sell my idea as your own.

Prepare the book. In choosing a book I look for something decorative on the front cover, like the trees in my example, or a meaningful title. Carefully cut out the book pages from the endpapers and spine.

Open the book covers flat and measure the finished size you will need. Add a hem allowance on all four sides, then cut out and hem. It is helpful at this point to use your iron to make the hems before sewing, and check for accurate sizing.

Next cut two strips of fabric for the zipper facing. Each should be the total length of the 3 open sides, plus a seam allowance. This may be an opportunity to use wide bias tape. Calculate the width so that the finished tape/zipper/tape is greater than the depth of the spine, so that there is more room for the contents. I checked through my zipper stash and decided on two shorter zippers that would meet in the middle.

If using two zippers, mark the center of the strips and overlap the zipper tapes to meet there, giving the smallest possible opening. *Design flaw – or not – I ended up with a purse whose zipper opening faces downward. It may prove to be too awkward, I don’t know. I plan to make a revised version too.

Sew the zipper(s) to the tapes. Press the seams away from the zipper and topstitch close to the zipper. If there is tape extending past the end of the zipper, stitch the fabric together.

In my example, the spine measured 1 1/4 inches. I wanted the purse to be 3 inches wide along the center, tapering to 1 1/2 inches where it meets the spine. Mark the seam lines on the wrong side of zipper/tape piece.

Lay the cover facing piece right side up, and place the zipper/tape piece right side down over top on one of the shorter sides, as shown in the pictures. Make the centers match, and arrange it so that your stitching will echo the topstitched hem on the facing piece, then stitch.

Make a corner and continue with the two pieces at the end of the zipper(s), again matching the seam marking to the previous topstitching. Mark where the spine of the book cover folds, as you will not stitch past that mark.

Open the zipper(s). Lay the zipper/tape piece along the rest of the facing piece, right sides together, and stitch around making square corners, and ease to fit if you need to. Turn right side out and check the fit.

Before gluing the facing piece into the hardcover, choose your strap and how it will attach. I looked through my assortment of odd handles, hardware, belts and scarves, and chose this: a faux suede scarf, two plastic rings, and grosgrain ribbon. I tucked the ends of the scarf through the rings and stitched, then the same with the ribbon. The length was plenty for a crossbody strap.

Spread glue over the inside cover of the book. I placed the ribbons in the spine portion, then added more glue on top. This is the time to make sure you don’t twist the strap, keep it straight.

Place the fabric purse on one side of book cover, keeping the hemmed edges at the edges of the book. Carefully fold over the book to the other side of the fabric, again matching the edges of the fabric with the edges of the book.

I had a book just the right size to fit inside the book purse. I added weight to the top of it and left it alone until the glue was dry. When I presented it to Rachel she loved it!

I hope this post is helpful to you, or maybe inspires you to make purses of your own.

Tutorial: Fabric covered photo album

Last summer I had picked up a photo album at a thrift store. I used the hard cover to make over into a book purse.

Seaside Date Evening Bag

Now I find I have a need for a small photo album, so I remembered that I had kept the photo sleeves and decided to make a new hardcover for the album. It was very quick (about an hour) and pretty easy. In fact, no sewing needed!

Find a piece of cardboard larger than you need. In my case, 8.5×11 was plenty big enough. I wanted some overhang on 3 sides to protect the edges of the photos.

Trim the cardboard to the size you need. Center the photo sleeves and mark the two fold lines to form the spine.

Use something with your straight edge to score the two fold lines. I used a regular screwdriver. The scored lines will be on the outside of the folds.

Choose your fabric. Cut fusible interfacing the same size as your cardboard. Center it on your fabric and press, leaving a margin for turning under.

Use a craft or tacky glue, and first glue the spine, or narrow center portion of the cardboard to the back side of the fabric. Then, in turn, fold one cover and glue to fabric, then the other. It is important to fold as you glue, so that the book will tend to stay closed rather than try to flop open.

Squiggle some glue around the edges, eyeballing the distance that your fabric will turn under. First, fold the corners at an angle, as shown. Dab the corner fabric with more glue, and turn the rest of the fabric.

Choose your inner cover fabric. Measure just larger than the cardboard cover. Fuse with interfacing on the reverse side, interfacing being a little less than the size of the cardboard. Turn under raw edges.

Center the inner fabric to the inside of the album cover. First, glue the center (spine) portion, then fold and glue each end. Glue the spine of the photo sleeves and press to the spine of your cover. Finished!

New twist on an old favorite

I was pondering the making of a small book purse, of the style that opens at the top. It has always been awkward to me to glue the side pieces in and glue the straight piece into the book cover. I wondered if I could figure out how to sew it all together as one piece, then glue. I think I hit on how to do it.

Since I am using quilting cotton, I used two layers and even decided to have the outer layer a sky blue blender, and the inner layer as a lining, in white on white. For the main straight piece of the lining, I added interfacing to the middle. I’ve found that the craft glue tends to bleed through thinner fabrics. Layer the fabric in this order: interfacing on the bottom, outer fabric facing up, lining fabric facing down. The right sides are together.

For the side pieces, shaped like triangles, I omitted the interfacing because I want them to easily fold together inside the purse when in use. I sewed a straight seam where the top of the piece is, turned and pressed, and then topstitched with a decorative stitch that coordinates with the book cover.

I marked the outer edges of the book cover when open as far as I want the purse to open. To mark the second piece, I stacked the pieces, poked pins through at the points of the line drawn, and turned it over to draw the same on the other piece.

Mark on the straight piece the straight edge of the two long sides of the book cover, with marks for the edges of the cover and the spine portion.

Trim the triangle piece close to the stitching lines marked. Insert it lining side up between the lining and outer fabrics. Line up the marks for the spine on both white fabrics. Sew only that portion of the line.

Make a diagonal clip at the corners, on the side piece only. Pull one side of the side piece so that the stitching lines are lined up and pin like crazy. I was afraid this part would shift on me, but it didn’t. Then stitch just that portion.

Do the same for the other side of the same piece.

Of course, you would repeat for the side piece that goes on the opposite side of the purse. You may need to carefully maneuver the pieces as you sew. This part doesn’t show in the pictures, but trim the fabric close to where you stitched.

Reach inside and pull the side pieces out, turning the white lining fabric to the other side of the whole piece.

Now you have one piece, a complete purse liner! Time to finish the two upper edges.

I took short lengths of bias binding. Line up the stitching line on the binding with the edge where the side piece ends. Do the same on the other side, and pin between, making sure not to stretch the bias binding. Repeat for the other side.

After stitching, trim the excess fabric.

Pull the binding to the inside, pin in place, and stitch.

I chose to use a webbed belt for the handle of this purse. You would attach handles in the manner you choose. When I glue, I glue beneath the purse portion.

Use plenty of craft glue on the spine portion, carefully place your purse lining, and press into place. When it dries, you can glue the rest of the purse into place.

I’m posting this before the glue is dry enough to finish gluing, so I plan to update this post with the finished picture of the purse.

DAY 36 OF MY 50 DAY CHALLENGE

Free for a limited time!

A tutorial for my book purses (my own design) has been requested, and those of you waiting for it have been rewarded. For a limited time, you can download a FREE copy of the pattern for my top-opening, box-style book purses. Click the link below to open a window and you can then save to your computer or print yourself a copy. Please note that the pattern gives you permission to create these purses for yourself or to give as gifts, but not to sell.

Book Purses

If the link no longer works, you may go here to purchase the pattern in my Etsy store.

When the room gets messy…

When the sewing room becomes a mess, it means I have been working hard. It also means I’m not paying attention to my environment. I know that organization makes the sewing go so much faster. Take, for example, my search for a zipper for the pillow I made last week. I knew I had a small box with several zippers in it, hoping to find one long enough to use for the pillow cover. I ended up making it a fold-over instead of a zipper closure. Sure enough, the next thing I did was to come across the zipper collection.

I spent about an hour to begin with today, moving, sorting and putting supplies away. I have a great start to fantastic organization, but somehow I just don’t keep up with it by putting everything away between projects. Not cool.

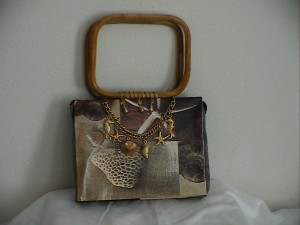
Afterward, I got the urge to complete the seashell evening bag I started yesterday. I had glued the side gussets to the book cover, and needed to figure out what I was going to do about the handles. I finally came up with three holes in the book cover. I threaded gold-covered thread through the hole twice, and dangled a gold-tone teardrop bead at each site. The thread then looped over the wooden handle and tied near the hole in the back, to be covered by the final fabric part of the purse. With all the wet glue that needs to set, I found an appropriate sized book to insert in the purse, closed the cover, and laid heavy books on top. Now set, here is how it looks, for sale in my Etsy store.

Seaside Date Evening Bag

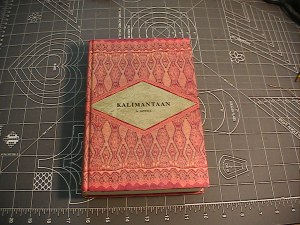
I wanted to start another book purse, and got this lovely specimen out.

book for purse

I adore the patterns and colors on the cover. I started cutting away the pages and I lost all interest in continuing. I will, another day, but today I was already done for.

I have an appointment with a boutique owner in a little over a week, and I hope to have plenty of lovely book purses for her to stock her shelves with. Can you imagine coming across the collection in a retail center? I have about 12 purses at this time, and hope to have at least 4 more by then.

DAY 20 OF MY 50-DAY CHALLENGE

Erik, I’m ready!

Day Seven of sewing was actually on Saturday. That was a busy day!

I worked on finishing a book purse I had started the day before. I had to finish sewing the box form to the backing fabric, glue it all to the book cover with the purse handle, and make the closure. For the closure, I made a simple flower shape from an olive green ribbon and sewed a pearly button in the center. It took a little work to make the holes through the book cover for the thread, but it wasn’t as hard to do as I thought it might be. I sewed a length of ribbon with a loop on the end to the underside of the purse.  Now complete and ready to post in my Etsy store.

Then I got to work on step Four of the mystery quilt. More cutting, larger pieces, and sewing some of the squares to make half-square triangles. My stack after completing this page:

I’m really ready, Erik Homemade, to start making rows of blocks! At this point I have caught up with the instructions released so far, so if I’m going to be sewing every day I need to look toward something else to work on between pages.

After the sewing yesterday I helped my husband as he was cutting down trees. When we quit around sunset, I was a little too tired to think clearly enough to write a blog post.

Sewing Interrupted

Well, since it has been a day or so, I thought I’d better get to the sewing room and do a little work.

Today I completed another page in the mystery quilt, which of course means more cutting and more sewing. After completing step 3 (which is page 4), my cutting table looks like this:

It’s a pile of (mostly) blue that keeps growing. I looked ahead and what I need to cut next time, and I really am running out of blue now. I know, that was the reason to do this mystery quilt, but it really defeats the purpose to purchase more fabric in order to have some variety in the prints, and I really don’t want to add another color at this late date and time. I don’t know yet what I’ll do; tomorrow is another day.

I looked around and decided to work on another book purse. I got out this book cover and found that this floral fabric coordinates well.

I backed it with interfacing for the part that is glued down over the end papers of the book cover. I found burgundy corduroy to use for the box part, and also backed that with interfacing. I was working on this when I was…..interrupted. My stepson had come over and so I reluctantly left behind the sewing for a while. It turned out to be a short visit, actually an errand for him to retrieve something from the barn, so I was able to go back to sewing.

I keep re-designing how I make these purses. Each time, it seems to be a new process. Once again, I tried to force too much fabric through the machine (an older mechanical machine) and broke a needle. Seemed like a good place to stop for the day.

So, in summary, Day Six yields one more page of the mystery quilt completed, enough of a book purse completed to haunt me for several days, and I’m done sewing in time to get ready for my “date” with my husband. We have some boat shopping to do.

Sunday thoughts and busy-ness

What is it about this book?

I’m talking about the peach colored one titled Simple Abundance: A Daybook of Comfort and Joy. In the past 10 months I’ve seen and bought 3 copies of this book at thrift and second-hand stores. It makes a beautiful book purse of an adequate size. Many books I’ve bought make purses on the smallish side. My guess is that this book was a popular gift for mothers, but that those same mothers didn’t see the value in keeping and/or reading the book.

In the past two days I’ve made two book purses. The blue one in the photo above was started on Saturday and completed on Sunday.

I liked the gold lettering on the navy blue fabric cover, so I was thrilled to find a braided belt in navy and gold to use as the strap. The fabric inside was a thin cotton, navy with tiny yellow paisley. Because it is such a thin fabric I used a white cotton lining and a heavyweight interfacing. By lifting the front cover of the book you can reach from the top into the “box” of the purse. I designed it myself after playing with the other type of book purse I’ve seen.

(a glance inside)

The purse I made on Saturday is brown faux leather binding, titled The Desire of Ages. I was so intrigued by the title! I had a beautiful upholstery sample that I used for the lining and “box” of the purse. Black satin twisted cording was crocheted with a simple chain stitch to make a lightweight but sturdy strap.

I did think some more about the Christmas table runners I’m in the middle of.  I’m half-deciding not to applique the poinsettia, since the fabrics I chose are mostly gold and green. I think it might look like a bold red splash. I’ll have to think some more about what to do with the end squares. I have plenty of time, I think.

I managed to get to the thrift store this morning. I found 6 belts, some white satin fabric (more than a yard), two shirts and three purses, and got away with it all for $3.24. I love the sale day, but after two weeks in a row of the crowds and short tempers, I think it’ll be a couple weeks before I go back again.