Applique

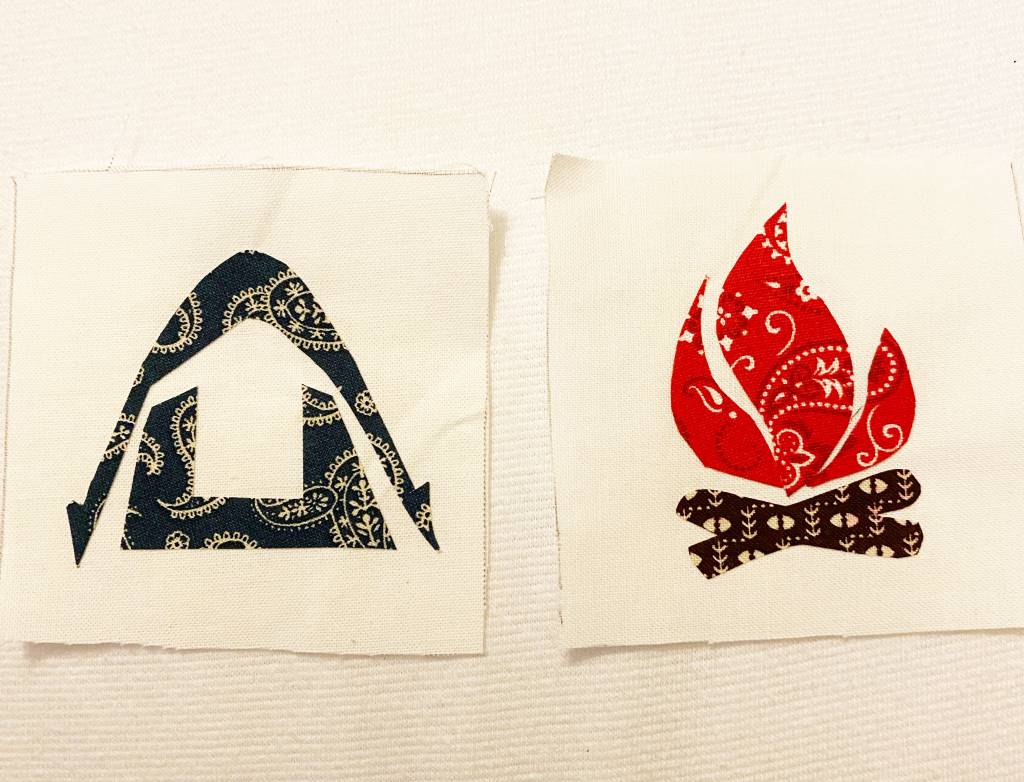
This week I worked on some applique. I used HeatnBond, which is fusible on both sides. I found some simple outlines I wanted to use, first were the campfire and tent. I traced the shapes onto the paper side of the HeatnBond and cut around them, then fused them to the back side of the fabric I wanted to use. I used a pin to scratch the paper backing and remove it, then I fused the fabric to the items. In this case it was to make two coasters.

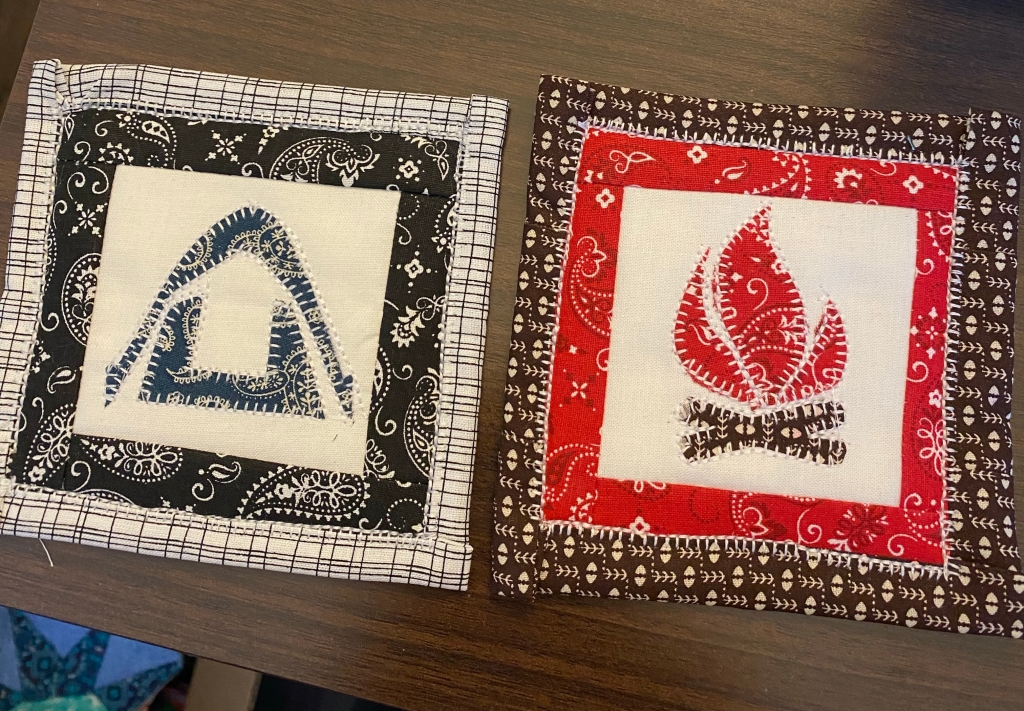
The applique needs stitching, so I chose a blanket stitch, made it small to match the scale of the coasters, and I love the result. I added borders and even repeated the blanket stitch there. I cut the backing oversized to fold to the front and bind it.

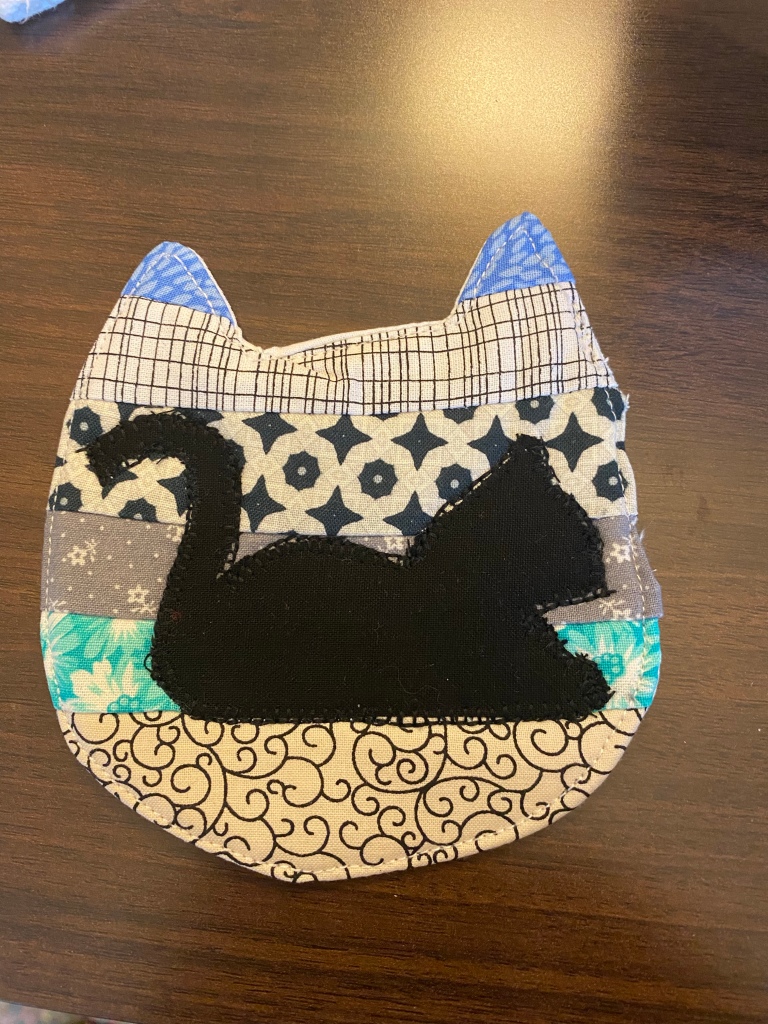
I found a cat silhouette I liked and added a cat applique to one of the cat-shaped coasters. I will continue to use the method on other things, like an initial on a coin pouch, or other shapes.

While looking for shapes I found some I liked, but they would work better as embroidered accents. To do that I’ll have to work on my embroidery machine (fix the tension) and test out a few.

Making Decisions

As I’m designing items for sale in my flea market booth, I am considering several things at once.

~ People want to buy something handmade that someone else made

~ Time invested in each item vs. how much to charge

~ What do customers want to purchase? Practical items or splurges?

I discovered by putting some hotpads out that they sold very quickly. It was right before Christmas so gift giving could be a big motivator. Handmade makes it a one-of-a-kind item.

I can quickly make simpler designs, but a more complex design may be appreciated and purchased sooner. Or not, I’m just guessing what goes on in a customer’s mind. I can charge less for the simpler ones, but would have to charge more for a more time-consuming design.

I’d love to offer a huge variety of items, but I think it’s better to focus more on a varied inventory of a few types of goods. Definitely the zipper pouches, but also more hotpads, drink coasters, and ice cream pint sleeves. I’m still thinking, and collecting potential patterns and designs. I will put a split ring (like a keyring) on the zipper of each pouch, but I’ll also offer a few beaded zipper pulls if someone wants to make it even more unique. Along that line of thinking, I can make wrist bands in many colors that will coordinate, to turn a pouch into a wristlet purse that will hold phone, cards, and cash.

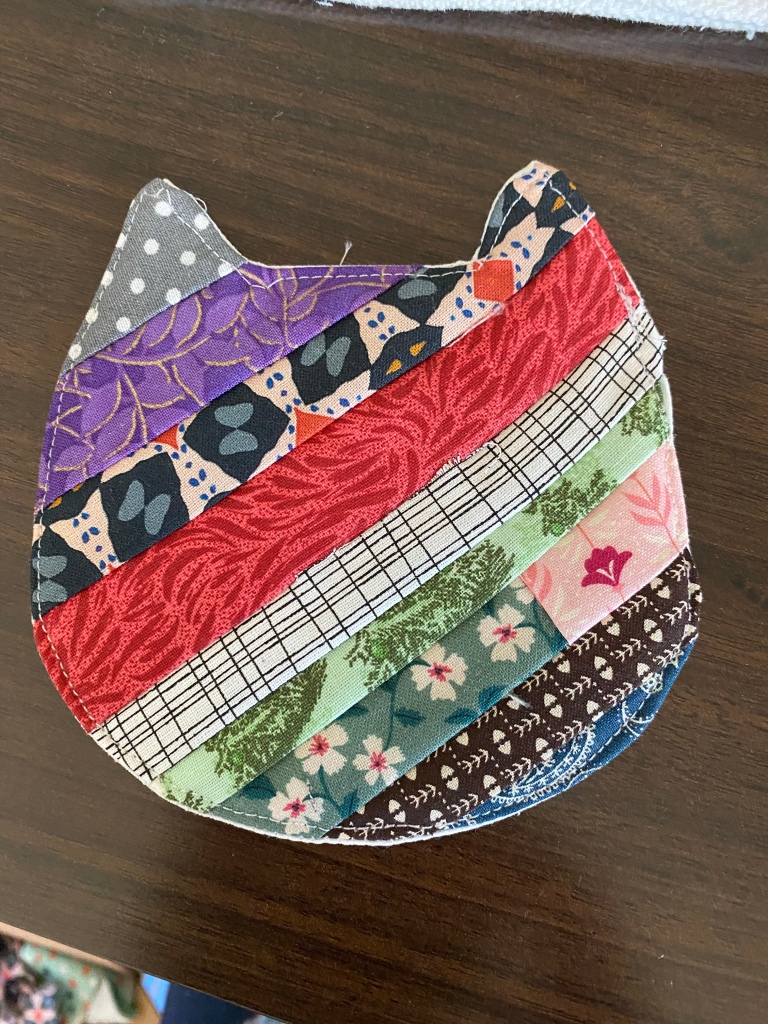
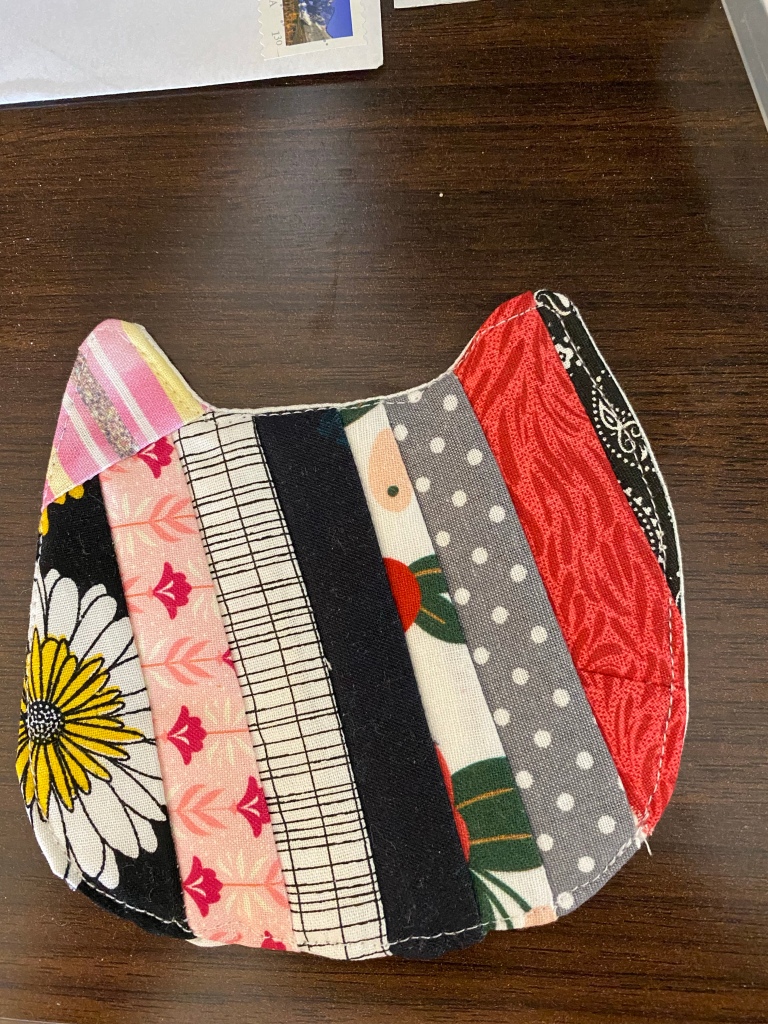
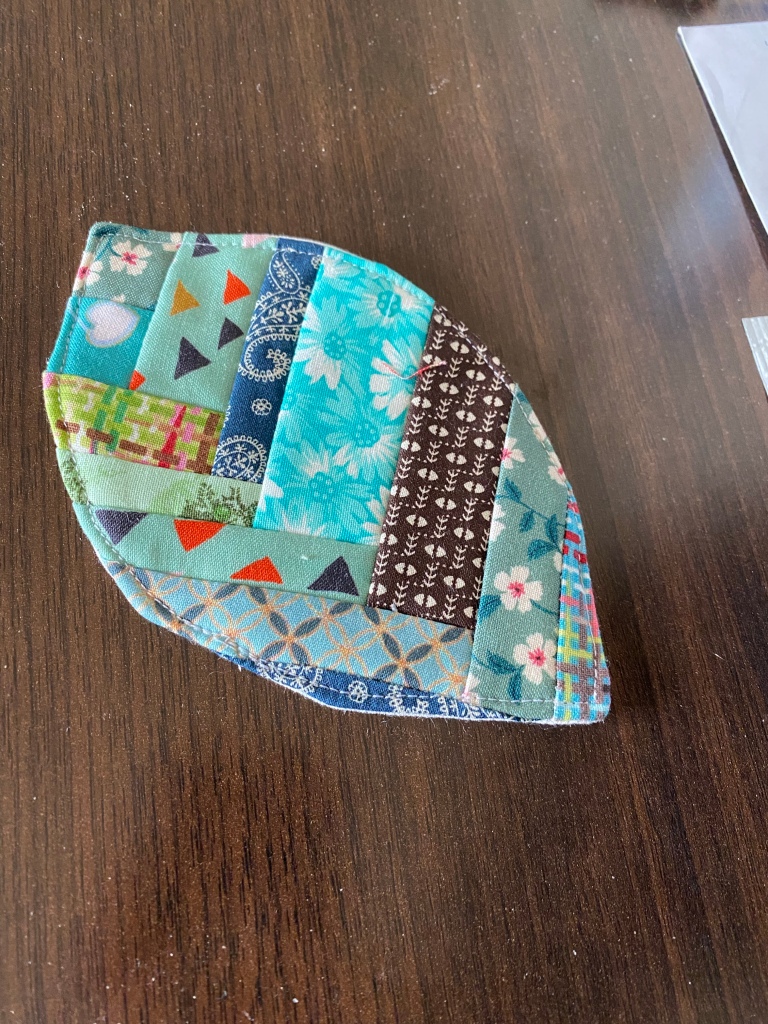
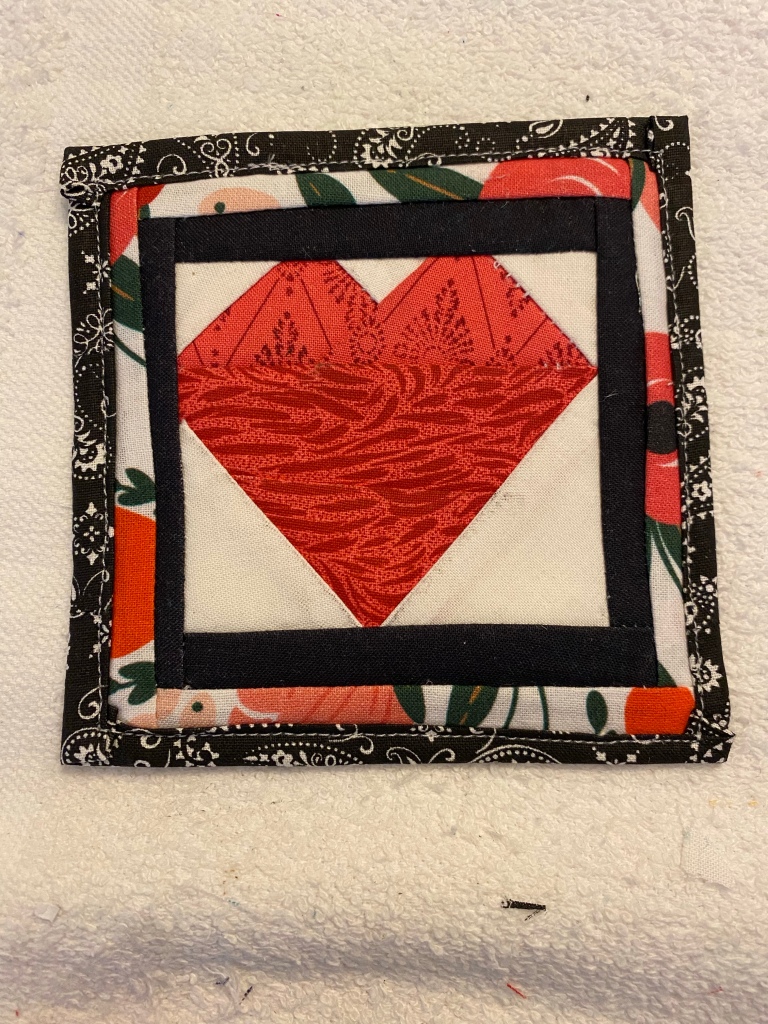
These are a couple of coasters (aka mug rugs) that I’ve made the last few days. I have other prototypes that didn’t work out, these are the good ones.

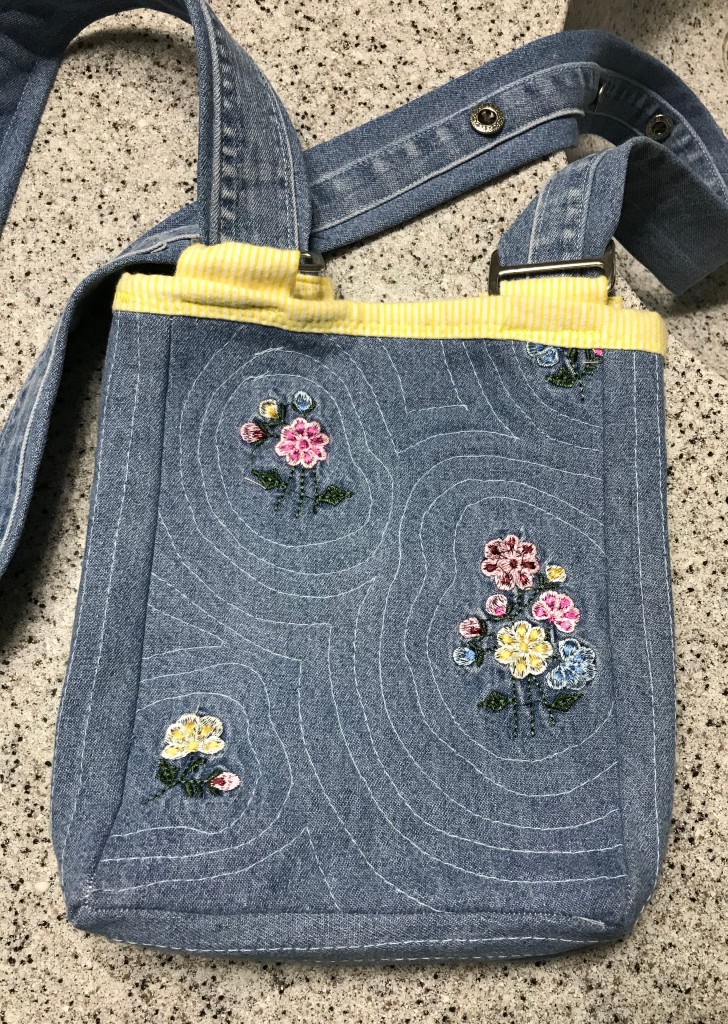
Quilted embroidered crossbody purse

I enjoy searching through a thrift store, not knowing what I will find, and what project it will be perfect for. I keep a list on my phone of certain items I’m specifically looking for, like the photo frames in 5×7 or 4×6 sizes that now hold family photos on my wall. Other things seem to jump into my arms and I take them home.

A few days ago I noticed a tub of jumbled shirts. Each one could have stains, holes, or tears, and the price was 25 cents each. The cashier saw me collecting some shirts and she said the more I buy, the better the deal she could give me. I love using scraps of shirts in my projects. One current project is to repair a quilt I had bought at a garage sale. I needed chambray fabric to add sashing between large blocks of flannel fabric, so one of the shirts I picked up was a ladies’ embroidered chambray shirt.

Now that I have looked it over better, I absolutely love the embroidery. Shortcut! I wanted to make another crossbody purse, but add some dimension so all the items I usually carry will fit. I decided to use the embroidered panels as the front and back.

I cut the embroidered panels to the size I wanted, in my case 6 1/2 by 8 1/2 inches. I wanted a thickness of about 2 inches for the sides, so I cut two, 2 1/2 by 8 1/2 inches. To keep it simple, I won’t have a fold-over flap on this one. I like quilting the body of the purse so it is soft, but keeps its shape easily. I cut corresponding lining pieces and (again) flannel as the batting.

I chose to mimic the boundaries of each embroidered section, adding lines as if seeing ripples in water. I used my serger to sew the pieces together. All that was left to do was to bind the top edge and add a strap. For crossbody, of course, the strap needs to be longer than for a shoulder bag.

Real life, in my case, means that quite often my idea is great in theory but something is lost in the translation. I thought it would be great to use the button and buttonhole plackets, sewn to a wider strip of fabric.

I used yellow flannel to bind the top edge and added the strap. The placement is wrong, the width of the strap is way too wide, and the buttons get in the way of the strap sliding through the hardware. Stay tuned. I love the purse otherwise, and I’ll be reworking a strap for it.
Change of plans

Once before, I made a baby quilt and it was sized more for a twin bed (almost) than a baby. That was the fireworks quilt from 2011, posted here. I almost made that error again. Somehow, when I added the sizes of the blocks and the sashing, it didn’t seem as large as when I started sewing it all together.

When I had several rows sewn together, still 6 blocks wide, I realized it was far too big. I laid it on the floor and reimagined how it should look. I decided it was one block wider than it should be, and I would only sew rows 3-8 together. That meant some stitch ripping, which is not unusual for me in any project. It made for a much friendlier, crib-sized quilt.

Image

Examples of twins:

ImageImage

ImageImage

The floral fabric above and to the right is leftover from sewing the baby’s aunt an Easter dress when she was about 7 years old.

Image

The baby’s father requested the Hershey print fabric for a wall hanging project when he was a teenager.

Image

Sadly, the block from this fabric didn’t make it into the quilt (poor planning on my part) but I’m glad there are two cornerstones with the bowling pin fabric. I spent a lot of time with the baby’s father and the rest of our family in a bowling alley while he was a young teenager (and a very good bowler, I must add).


Blocks into rows

The next step is to add sashing and cornerstones. The pattern of the blocks and the colors make it far too busy to simply sew them together. I added white sashing and cornerstones of the printed fabrics. I laid out the blocks and chose the cornerstones so that they would not obviously match the block before or after in that row. I did not go so far as to make sure rows above and below were the same way, so there could be some adjacent matching that way. There is only so much OCD I can stand in myself!

Image

I started with the first row and made the sashing to the left and top of the block. The final block on the right side of the row would need an extra sashing and cornerstone on the right side, and the final row would need an extra sashing and cornerstone on the bottom of the block.

Image

I always mark my rows with a piece of paper, or I’d never keep it all straight.

After sewing blocks into rows, I had this:

Image

My plan was to have 8 rows with 6 blocks in each row. More about that in the next post. “The best laid plans of mice and men…”

Now a doll fashionista…

Oh yes, that’s me! (Can you hear me giggle?) Well, let me explain.

It started with the idea I would make doll quilts too.

Then I couldn’t resist buying an 18-inch doll. No, I didn’t go for the American Girl, but I bought a similar doll, Journey Girl. Following that were the purchases of several books of patterns for sewing doll clothes to fit her – except her waist is a bit smaller. No problem, I just went shopping for another doll, this one is a Madame Alexander, whose waist more closely resembles the American Girl.

Isn’t she sweet looking?

I’ve decided to open an Etsy store to see if the doll clothes will sell. I’ve had some sales by word-of-mouth already, and I’m looking forward to making this a cottage industry business. At least I hope it pays for the materials and postage!

Update: I no longer keep the Etsy store open. If you would like me to create something, send me a message and I can make a custom order on eBay for you.

Busy three months

I know it has been more than three months since I posted. My life has gone into overdrive.

  • School ended, which meant I had to pack up all my personal belongings from the classroom to bring home, and all the rest for the summer. My teaching job has ended in favor of a big move to Michigan!
  • I took online classes for enough credits to renew my long-expired Michigan teaching certificate, just in case.
  • We have made two more trips to Michigan with loaded trailer: at the end of May and at the end of June. Now that most of our things are in Michigan, we know there is just too much for a small house.

I did have time to work a little bit on the maze quilt in June, posted here. I was able to get two more rows done, and work on another, before I had to pack up my whole sewing room and put it all on the trailer. Talk about withdrawal!

In March 2011 we had an auction. Here are some of my lovelies that had to sell at that time.

Several of my sewing machines

Three of the four you can spot in this picture actually ran well enough to be used daily. The one in the blonde cabinet was from 1927 or thereabouts and once it was oiled it worked very well. I’m a sucker for old, mechanical machines without electronics.

treadle

To the left of the hide you can see a treadle machine in cabinet.

treadle
treadle

Here is another treadle machine, electrified. I believe the same gentleman bought all the sewing machines.

Now I am trying to sell one more. It’s clean and a beauty, but I really have a very small sewing room where I’ll be living.

Singer 99K
Singer 99K from 1955

My next blog post will be as a Michigan resident. I promise some updated pictures on the maze quilt soon. I’m anxious to get it completed!

Finish – the Plus Sign Quilt

I’ve been unable to find much time for quilting or patchwork in the past month. My husband and I took a 10-day trip to our future home in Michigan, and that required a couple of days of loading the trailer beforehand. We moved more furniture and belongings (even some fabric and sewing machines!) and had plenty of work to do.

Once we returned home, I knew I had to get the plus sign quilt finished. This is intended for the granddaughter due at the end of the month. I started, then started over a couple of times. I tried to stitch in the ditch, and finally I decided to do something I hadn’t seen before. I call it a stitch in the meandering ditch.

You can see the stitches in this dark patch. I could not accurately quilt a straight line and wanted to follow the color outlines. I think it worked out well.

This photo shows a floral fabric that I used for the baby’s mother’s custom pillow to use in her toe-ring business. Something for the customer’s foot to rest on while trying on rings. I love putting significant fabrics into quilts.

Now I’m on the final 7 weeks of school. I hope to find time to work on the maze quilt, though I still have the second denim circle quilt to finish. Lots on my plate!

Pictures so far: Maze quilt

I was able to carve out a couple of hours to work on the maze quilt this weekend. I didn’t actually keep track, but I think it was between 4 and 5 hours.

Here are some of the strips sewn into sets of two.  I had some extra lengths that I left as is, and some small pieces that will do a single block where needed.

Next I sewed some of the two-sets together, to make four-sets. These will be a shortcut for the places I need four colored blocks in a row.

Then I cut the four-sets in half, so that each row of four is now the correct width.

The white fabrics I will leave as strips in the places I can sew a longer piece in, or cut as needed. As I sewed, sometimes I needed the equivalent of one block, two pieces, three, or four. Fewer seams that way.

Here is the top row completed. All the blocks are sewn together. You can see I have neon green sticky notes telling me this is row 1, blocks A-F. I have 9 rows total to do.

Here is the total progress as of Sunday evening! I’m so pleased with it. I was afraid the walls, with darks, brights, and lights in prints and solids, wouldn’t look so much like walls. I think it looks great, and I’m looking forward to making more rows, as I can.

Coming up, though, more of all my other projects going on right now.

  • Circle quilts for my friend’s daughters – she’s getting more of the embroidery patches done for me.
  • Plus sign quilt for my next grandchild – a girl who is coming anytime from early to mid-March. The top is complete, but I have to quilt and bind it.
  • Doll clothes – I’m starting to get an inventory, but a few more outfits and samples are needed before I can open the Etsy store.

My full-time job sometimes gets in the way of my hobby! I’d much rather be sewing.

Progress on the maze quilt

I love a new project, I’m so excited to get going on it that it seems I have twice the energy and endurance of normal sewing sessions. I had to get started on the maze quilt.

I decided the first maze I showed would be the one I would make. I counted the blocks and found it to be 25 wide and 37 long. Odd numbers! I’ll put the characters in the border, so I’ll think about them later. I have a large version of the maze printed and posted in my sewing room to refer to.

I dug out all the bright and dark scraps I had, plus a few on the lighter side. I didn’t want anything too light, as the path will be white and I don’t want part of the wall to look like path. I discarded some of the fabrics as too heavy, or not appropriate for a baby or child. The squares will be 1 1/2″ square finished, so I started by cutting 2″ strips.

2" strips

At my sewing machine, I stitched together two random colors/prints. I left the strips whatever length they were, and didn’t care if the ends matched. Next would be trimming them.

trimming strips

Over at the cutting mat, I decided to trim the strips into 4″ lengths where possible, and 2″ if needed. Nothing smaller would work. My goal is to have a very random and colorful arrangement of fabrics as the wall of the maze.

stacks

I’m ready for the next part of the piecing. I’ll probably toss all the pieces in a small box and mix them gently so I’ll grab out two and have all different fabrics showing. Then I’ll stitch them together. (I started to describe the next step, but I think I’d better show it when I get there.)

If you plan to also make a maze quilt, I’d love to see it and hear about your ideas!