Making Decisions

As I’m designing items for sale in my flea market booth, I am considering several things at once.

~ People want to buy something handmade that someone else made

~ Time invested in each item vs. how much to charge

~ What do customers want to purchase? Practical items or splurges?

I discovered by putting some hotpads out that they sold very quickly. It was right before Christmas so gift giving could be a big motivator. Handmade makes it a one-of-a-kind item.

I can quickly make simpler designs, but a more complex design may be appreciated and purchased sooner. Or not, I’m just guessing what goes on in a customer’s mind. I can charge less for the simpler ones, but would have to charge more for a more time-consuming design.

I’d love to offer a huge variety of items, but I think it’s better to focus more on a varied inventory of a few types of goods. Definitely the zipper pouches, but also more hotpads, drink coasters, and ice cream pint sleeves. I’m still thinking, and collecting potential patterns and designs. I will put a split ring (like a keyring) on the zipper of each pouch, but I’ll also offer a few beaded zipper pulls if someone wants to make it even more unique. Along that line of thinking, I can make wrist bands in many colors that will coordinate, to turn a pouch into a wristlet purse that will hold phone, cards, and cash.

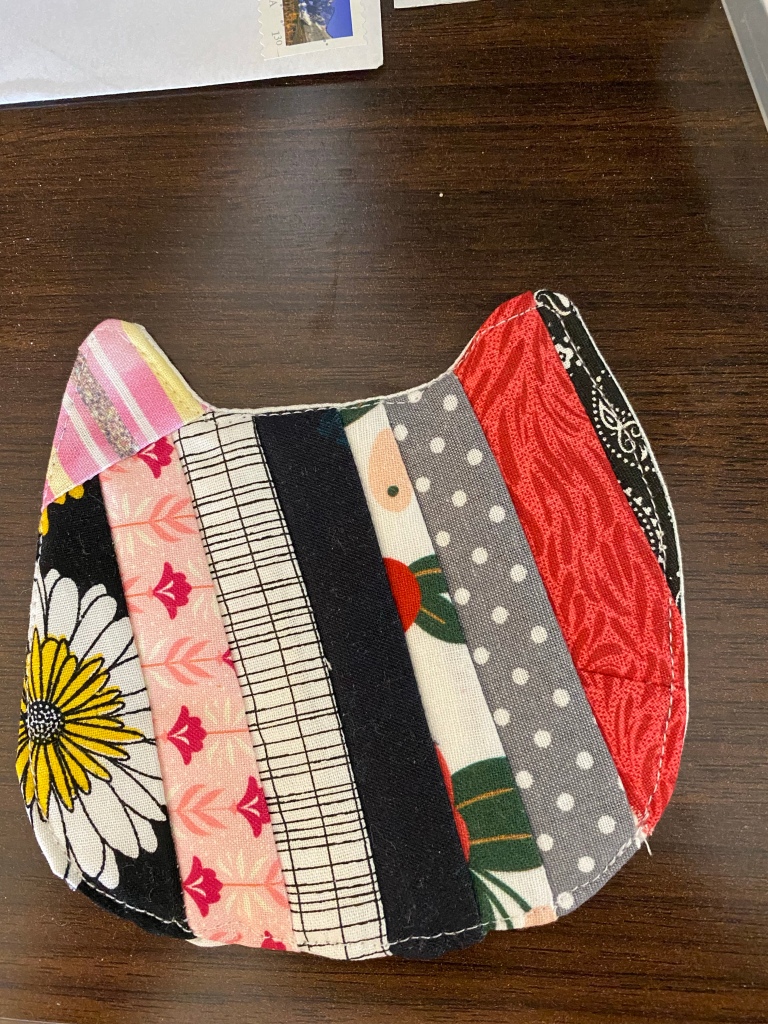
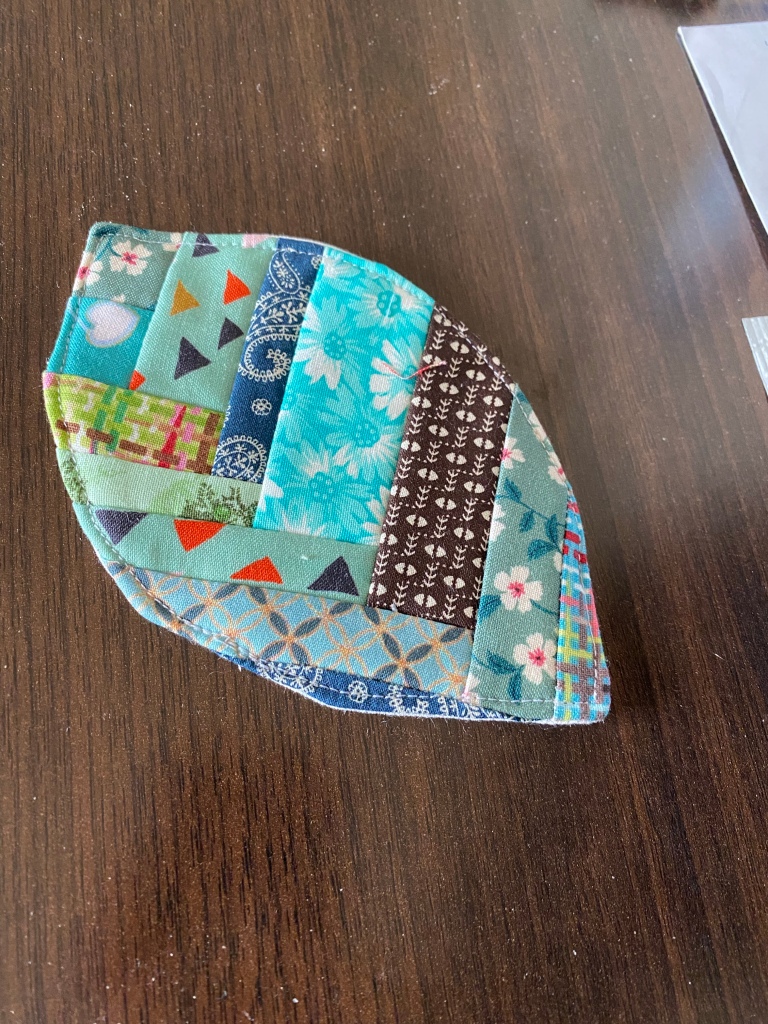
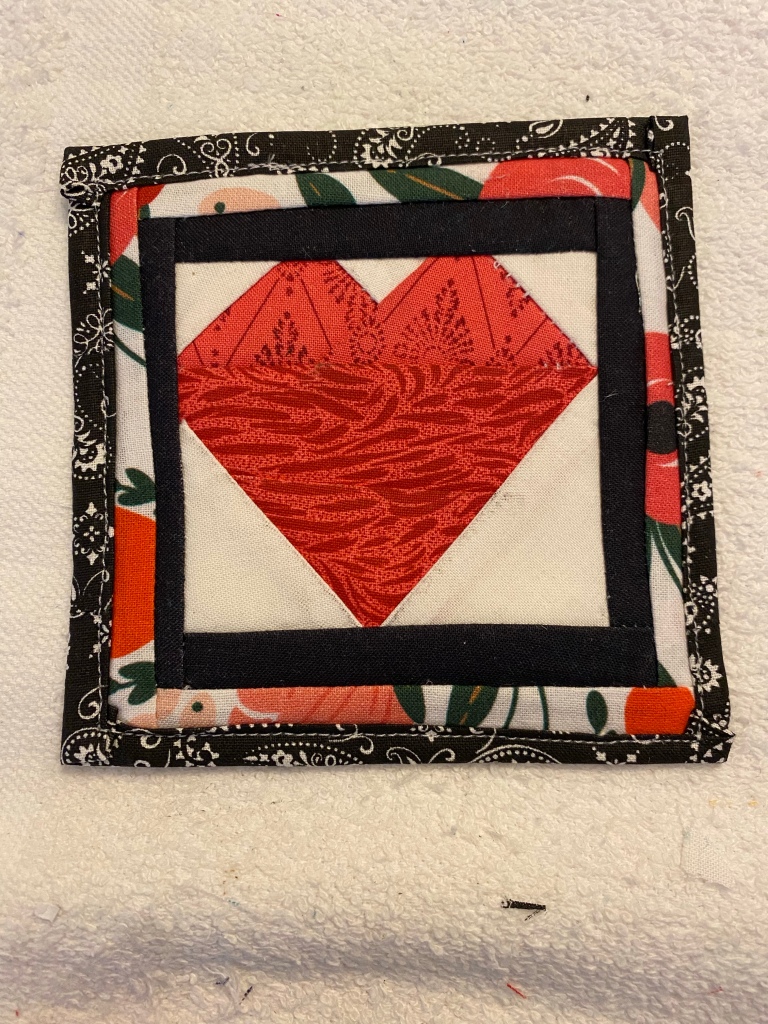
These are a couple of coasters (aka mug rugs) that I’ve made the last few days. I have other prototypes that didn’t work out, these are the good ones.

Sewing again

I haven’t sewn or quilted for a while, once I got the last baby quilt finished. My husband advanced progression in the Alzheimer’s disease. He was placed in a nursing home where he died peacefully. It has been a rough several months for me, but I’m learning again all that makes me happy.

First, I wanted something to fill my time like a part-time job, but without the exposure to public. I will have to live as if my immunity is very low, just to protect my health. I found a flea market in a place I hadn’t seen one before, with very good traffic. The store is neat, bright, and inviting. After the tour, I paid money down on a booth. I went through all the leftovers of previous flea market booths and priced them. I started attending auctions again (which I love!) to keep a supply coming in. The first two items that sold were homemade hot pads made from leftover quilt squares. I wrote about it seven years ago (!) in this post. I had made more than the two hotpads I first put in the booth, so the next time I brought in inventory I added more. I wonder if they were stocking stuffers, or if they just appealed to the purchaser.

So, I do have plenty to do without the booth, but it gives me a daily purpose. I have a grandson who is 2 years old and doesn’t yet have the quick and simple quilt . I found the perfect fabrics for him, and I’ll whip that up before he comes with his family to visit at Christmas. (I get to meet the baby!)

And lastly, my husband had his preferences for clothing. He had about 4 feet of closet rod with nice dressy shirts, and another section of thermals and flannels. His shelves are loaded with t-shirts, even though I’d already weeded out quite a few to make this lap quilt. I checked with his kids and mine, and I have some projects to do. One more t-shirt quilt and 2 flannel/thermal quilts, all in lap size. That will be a long-term project and I may start designing, then cutting after the new year.

Another homemade Christmas

I asked the mothers of my 7 grandchildren about Christmas, and got requests for doll clothes, pajama pants, and nightgowns. Of course!

First request was from the oldest granddaughter. She wanted Christmas pjs and a volleyball uniform for her 18″ doll. In searching online for what the uniform would look like, I noticed long sleeves and a tighter fit all around. Her school’s colors are red and black but I could not find a photo of the girls’ volleyball team online. I made the uniform out of 2 new-looking sports shirts I found at thrift stores.

I used my favorite boxer shorts pattern piece, but cut it a bit tighter all around, with tighter legs. Here is a comparison of the pattern pieces:

shorts pattern pieces

I sewed them as usual, it’s a very easy pattern. Sew the center back seam, center front seam, add half the elastic to the waistband of each piece. Sew the side seams, leg seam, and hem the bottom. Fold the waistband to the inside and topstitch in place.

It was difficult, but I finally found a sporty looking shirt pattern. I could have done a typical t-shirt but I wanted it to look different. I downloaded the raglan shirt pattern from http://www.beanbunny.com and with a little modification it was just right. I was able to use hemmed edges of the red so I didn’t have to hem the bottom of the shirt, and I used the ribbing at the neck edge for the neck edge of the doll shirt.

volleyball uniform

As per the detailed list from this granddaughter, I found shoes, cut the loop off a volleyball keychain for her ball, and added a sweatband.

Same granddaughter wanted a Christmas pajama outfit. I used a basic t-shirt pattern, but had it open in front so I switched the necklines on a back and front pattern. I sewed tiny buttons over the velcro closures. I had gold/white trim and there was exactly enough to trim the pjs. I made slippers from red flannel and white felt, and knitted a Santa hat.

Christmas PJs

The boys were easy, I used flannel for the two younger boys for their pj pants, and knits for the two older boys. I neglected to get photos before wrapping, but I found monster trucks, deer and bears, space ships and planets, glow-in-the-dark moons with stars, and tie-dye stripes.

Now on to the nightgowns, I found a pink fabric that made me queasy was a small enough pattern for a doll-size nightgown as well as little girl nightgowns. These two sisters love to dress in matching outfits, and their Wellie Wishers dolls want to match too. The nightgown pattern I found was as ruffly as I wanted it to be, but not very simple. Stitch-N-Save 5355, which contained both sizes (6 & 8) that I needed.

The dolls were a bit harder. I finally decided I would have to make the pattern. I have books by Joan Hinds for 18 inch dolls with many patterns. I had read on someone’s blog that printing a pattern for AG doll at 65% yields a pattern for WW dolls. Well, sort of. I finally figured I had better sew a practice one (or two) to get what I wanted. I lengthened the sleeves and bodice pieces and redrew them.

Document – Wellie Wishers nightgown – Created Dec

The link gets you a pdf showing the 3 pattern pieces. I fiddled and fiddled with measurements on the skirt and ruffle. I ended up using 5 by 12 inches for the skirt, but I think it should be a bit more, like 16. I used 2.5 by 18 inches for the ruffle. If you increase the skirt, make the length of the ruffle 1.5 times the length of the skirt for a nice gather. The pattern (from Home Decor for 18-Inch Dolls) gives the directions, including making the bodice fully lined.

mock-up nightgown

Here you can see some of the fabrics I made boys’ pjs from. I decided the bodice was too bulky with 2 layers of flannel, so in the end I lined it with a thin cotton. I also decided the skirt looked too full.

Close enough! My own dolls are not American Girl or Wellie Wishers. The 18-inch dolls are Madame Alexander and the others are Hearts4Hearts, which are similar enough for photography and for trying on the outfits I make.

Now I have to be a sewing machine mechanic, my wonderful Singer 306W needs a timing adjustment and I’m struggling a little bit.

 

New and Improved and Now In Michigan!

Yes, I’m excited. We have moved into our home in Michigan. My husband has already found a new job and is working daily, with overtime even. I’m still trying to fit everything into a house 1/3 the size of the old one.  Something has to go!

Before we left Missouri we had a garage sale and sold quite a bit. Once we arrived we found a lot more had to go and had another garage sale! Now I’ve got an ad on Craigslist, looking for a local quilting group that will use donated fabric for charity quilts. I know there is no way I can make enough quilt tops with my stash to make a dent any time soon.

I’m looking for work, and meanwhile I found a little time to work on the maze quilt. This is a baby quilt, for a player to be named later. It’s simply a design I wanted to challenge myself to make.maze quilt topThe “entrance” is on the left, 10th row from the top, and the “exit” is on the right, 16th row from the top. Yes, a reading teacher cannot do it otherwise, left to right is the rule. I just need to make a “go” symbol for the entrance, and a goal or home symbol for the exit, and incorporate them into the border.

I am so happy to be in Michigan, and if a job doesn’t show up on my horizon soon, I’ll be happily quilting here.


Pictures so far: Maze quilt

I was able to carve out a couple of hours to work on the maze quilt this weekend. I didn’t actually keep track, but I think it was between 4 and 5 hours.

Here are some of the strips sewn into sets of two.  I had some extra lengths that I left as is, and some small pieces that will do a single block where needed.

Next I sewed some of the two-sets together, to make four-sets. These will be a shortcut for the places I need four colored blocks in a row.

Then I cut the four-sets in half, so that each row of four is now the correct width.

The white fabrics I will leave as strips in the places I can sew a longer piece in, or cut as needed. As I sewed, sometimes I needed the equivalent of one block, two pieces, three, or four. Fewer seams that way.

Here is the top row completed. All the blocks are sewn together. You can see I have neon green sticky notes telling me this is row 1, blocks A-F. I have 9 rows total to do.

Here is the total progress as of Sunday evening! I’m so pleased with it. I was afraid the walls, with darks, brights, and lights in prints and solids, wouldn’t look so much like walls. I think it looks great, and I’m looking forward to making more rows, as I can.

Coming up, though, more of all my other projects going on right now.

  • Circle quilts for my friend’s daughters – she’s getting more of the embroidery patches done for me.
  • Plus sign quilt for my next grandchild – a girl who is coming anytime from early to mid-March. The top is complete, but I have to quilt and bind it.
  • Doll clothes – I’m starting to get an inventory, but a few more outfits and samples are needed before I can open the Etsy store.

My full-time job sometimes gets in the way of my hobby! I’d much rather be sewing.

More design on the maze

I decided that sewing together my maze quilt will be done in 16-patch. Of course, with the odd numbers, the far right column will have patches that are 5 squares across by 4 squares high. The bottom row of patches will be 4 squares across by 5 squares high. The exception will be the bottom right square, which will be a 25-patch. I copied the maze design into Excel using the fill function. Then I spread the columns apart, then the rows. I had to fill with yellow in order to clearly see the separate patches. Click below to see the result.

quilt grid

Now I see how many rows of 4 color patches I’ll need, and I’ll be able to gauge whether I have plenty of the little blocks sewn together.  I’ll be working on it more this weekend, and hope to have a photo update by Sunday evening.

More thoughts on making a maze

I am delving deeper into designing a baby quilt with a maze. I found the website Here and Above with a handy rectangular maze generator. I input different numbers until I came up with a maze that I thought I could duplicate in fabric.

I wanted the walls and paths to be equal widths, so I can use a postage stamp-like piecing method. In fact, the more I thought about it, I’ll even use strips of white for the paths, so there isn’t quite as much cutting and sewing to do. I’ll make the walls from brightly colored scraps from my stash, which I’m still trying to whittle down.

Here are some mazes generated:

left entrance, right exit

I think I like this one best. Each time I hit the “back” button I could generate a different random maze, so I did several more.

top entrance, left exit

left entrance and exit

I think that one will not feel balanced. I like the chevron effect in the lower left portion, though.

top entrance, exit

All I could think was, why go through the maze when the goal is next to you? Again, I see a bit of design in it, this time a Grecian key effect.

I’ll have a wide border of a single fabric around the maze, and at the entrance point will be the “thing” and the exit point will have the “goal”. What should they be? Frog and a lily pad? Princess and a castle? Race car and checkered flag? Puppy and a ball? I’m thinking baby quilt, so I’ll take any suggestions you may have. I may like yours better than any of mine!


A maze quilt

It’s not often I think of my own designs for a quilt. I do tried-and-true traditional designs, or I find a photo of a quilt someone has done, figure out the dimensions for myself, and recreate it the way I want to.

I was wandering through Pinterest posts today and the thought hit me – I want to do a child’s quilt that ends up looking like a maze. A real one that the child can trace with her finger and find the prize at the end.

I started my Google image search for the maze design I will use, and found a few possibilities. What I love about the internet is that I can usually find what I’m looking for. These will be good places to begin to design from.

Stay tuned! At some point I’ll be posting photos of the one I have completed!

(more posts about the maze quilt HERE and HERE)

Barn Quilt – first block done

Thanks to a reader’s comment, I found some motivation to work on the barn quilt.

Barn Quilt - first block done
first block done

I took plenty of pictures to show you how I go about interpreting a photo or painting into a quilt block. Some of it is pieced, and some of it is appliqued. I’ve been enjoying the process of collecting fabrics, 1/4 to 1/2 yard at a time, so I have plenty of textures, shades, and colors to choose from. I keep them in a zippered plastic bag that some bedding came in. I find them very handy for keeping a project together.

I found a photo of a painting of a barn online, and printed it. I’m sorry I don’t have the reference for anyone, but if you recognize it I will surely correct that omission.

As I mentioned in a post last winter, I taped the printed page to a window, right side to glass, and drew basic outlines on the back side with a sharpie. I do this because I am not trained in art, and cannot see the shapes unless I do.

I laid out my fabrics and chose the ones I would use for this block.

Then I looked at the photo and realized I had approximately 1/3 sky, 1/3 other, and 1/3 grass foreground. I used a plain muslin for the center part, which will be covered by barn and trees. I used strips as wide as my block would end up to be, and sewed 1/4 inch seams.

Then I chose the tree fabrics and cut rough outlines. I knew that part would be covered by the barn. I goofed a little bit, but it’s easy to change or adjust. I used a bit of the darkest green to make a treetop peeking out over the closer (lighter) trees at the left.

I sewed the edges of the tree pieces with a narrow, short zigzag stitch, not quite as small as a satin stitch. Just enough to keep the edges from fraying, but not so that I  spend hours sewing small pieces. I didn’t use interfacing on the back, but you may want to. If your zigzag stitch is small enough, it’ll pucker the fabric and interfacing will help stop that. You can also use a double fusible web to fuse your pieces together before you sew. I pinned in place, held my breath, bit my lip, and did just fine.

I edged the barn pieces (and part of the roof) in white to mimic the white painted edges shown in the picture.

I added barn door and windows with white thread. I could do more with the trees, but I’m going more for representational on the other parts, and sticking to details on the barns.

One down, umpty-eleven to go.

Tutorial: Fabric covered photo album

Last summer I had picked up a photo album at a thrift store. I used the hard cover to make over into a book purse.

Seaside Date Evening Bag

Now I find I have a need for a small photo album, so I remembered that I had kept the photo sleeves and decided to make a new hardcover for the album. It was very quick (about an hour) and pretty easy. In fact, no sewing needed!

Find a piece of cardboard larger than you need. In my case, 8.5×11 was plenty big enough. I wanted some overhang on 3 sides to protect the edges of the photos.

Trim the cardboard to the size you need. Center the photo sleeves and mark the two fold lines to form the spine.

Use something with your straight edge to score the two fold lines. I used a regular screwdriver. The scored lines will be on the outside of the folds.

Choose your fabric. Cut fusible interfacing the same size as your cardboard. Center it on your fabric and press, leaving a margin for turning under.

Use a craft or tacky glue, and first glue the spine, or narrow center portion of the cardboard to the back side of the fabric. Then, in turn, fold one cover and glue to fabric, then the other. It is important to fold as you glue, so that the book will tend to stay closed rather than try to flop open.

Squiggle some glue around the edges, eyeballing the distance that your fabric will turn under. First, fold the corners at an angle, as shown. Dab the corner fabric with more glue, and turn the rest of the fabric.

Choose your inner cover fabric. Measure just larger than the cardboard cover. Fuse with interfacing on the reverse side, interfacing being a little less than the size of the cardboard. Turn under raw edges.

Center the inner fabric to the inside of the album cover. First, glue the center (spine) portion, then fold and glue each end. Glue the spine of the photo sleeves and press to the spine of your cover. Finished!