Making Decisions

As I’m designing items for sale in my flea market booth, I am considering several things at once.

~ People want to buy something handmade that someone else made

~ Time invested in each item vs. how much to charge

~ What do customers want to purchase? Practical items or splurges?

I discovered by putting some hotpads out that they sold very quickly. It was right before Christmas so gift giving could be a big motivator. Handmade makes it a one-of-a-kind item.

I can quickly make simpler designs, but a more complex design may be appreciated and purchased sooner. Or not, I’m just guessing what goes on in a customer’s mind. I can charge less for the simpler ones, but would have to charge more for a more time-consuming design.

I’d love to offer a huge variety of items, but I think it’s better to focus more on a varied inventory of a few types of goods. Definitely the zipper pouches, but also more hotpads, drink coasters, and ice cream pint sleeves. I’m still thinking, and collecting potential patterns and designs. I will put a split ring (like a keyring) on the zipper of each pouch, but I’ll also offer a few beaded zipper pulls if someone wants to make it even more unique. Along that line of thinking, I can make wrist bands in many colors that will coordinate, to turn a pouch into a wristlet purse that will hold phone, cards, and cash.

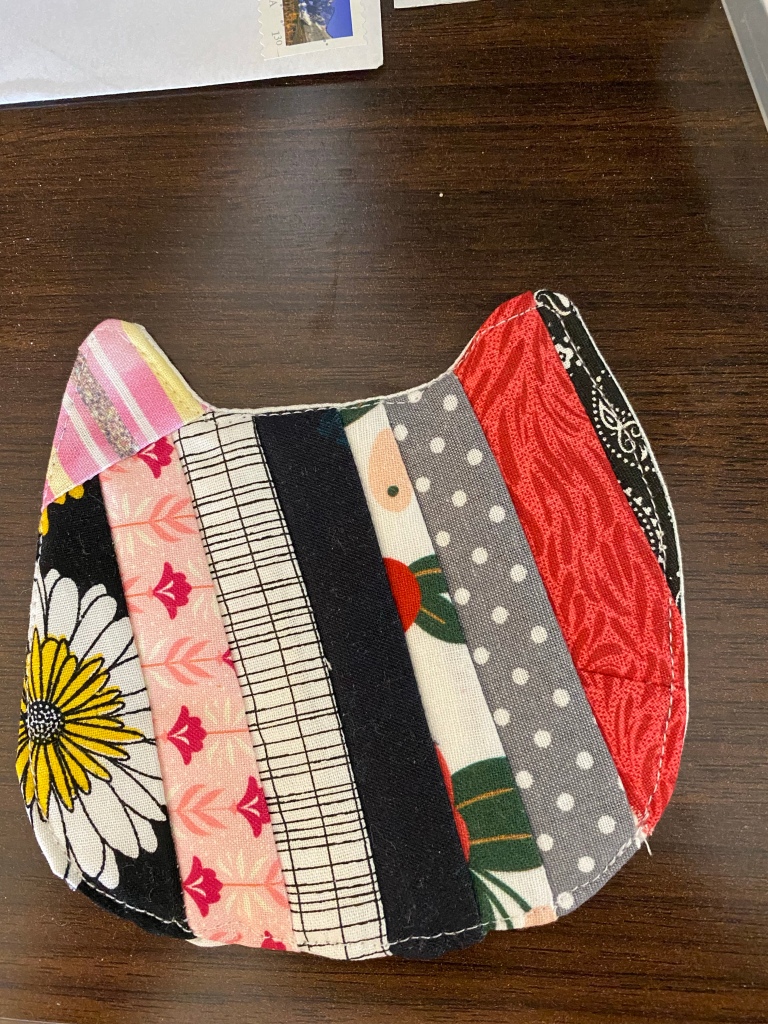
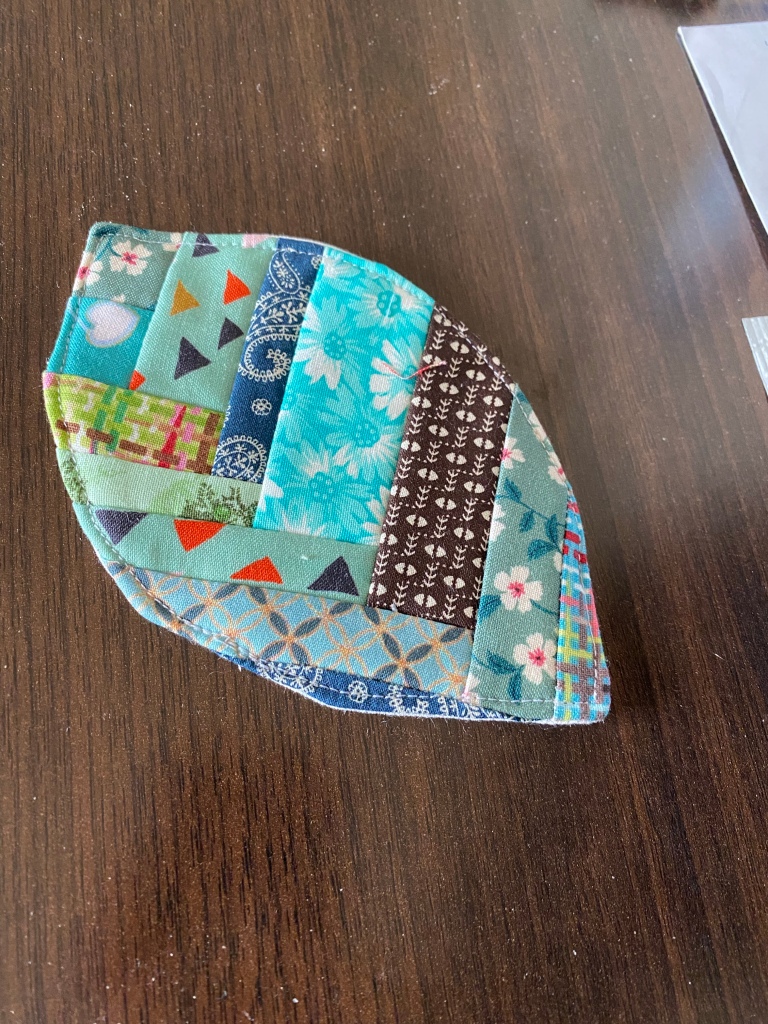
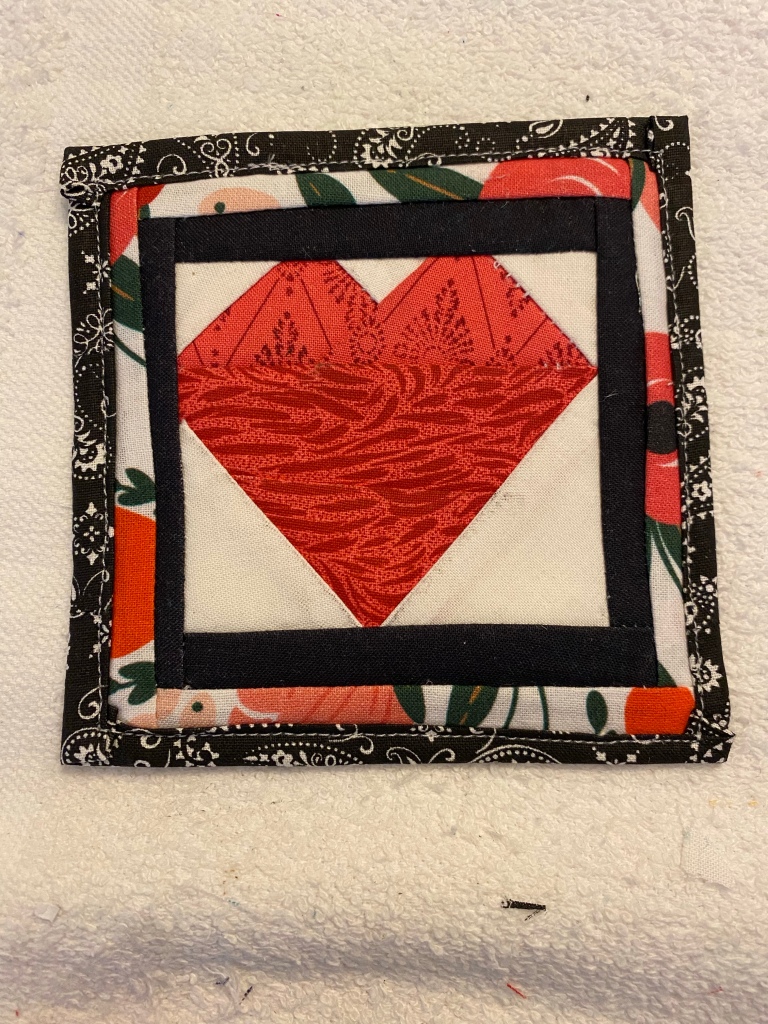
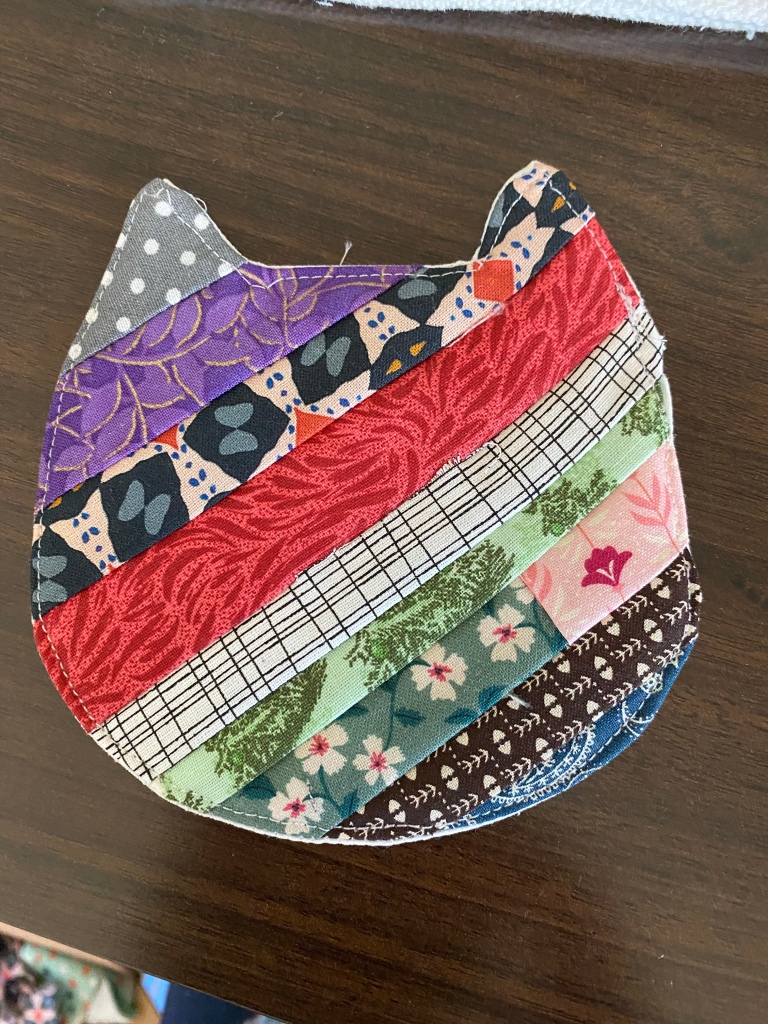
These are a couple of coasters (aka mug rugs) that I’ve made the last few days. I have other prototypes that didn’t work out, these are the good ones.

Sewing again

I haven’t sewn or quilted for a while, once I got the last baby quilt finished. My husband advanced progression in the Alzheimer’s disease. He was placed in a nursing home where he died peacefully. It has been a rough several months for me, but I’m learning again all that makes me happy.

First, I wanted something to fill my time like a part-time job, but without the exposure to public. I will have to live as if my immunity is very low, just to protect my health. I found a flea market in a place I hadn’t seen one before, with very good traffic. The store is neat, bright, and inviting. After the tour, I paid money down on a booth. I went through all the leftovers of previous flea market booths and priced them. I started attending auctions again (which I love!) to keep a supply coming in. The first two items that sold were homemade hot pads made from leftover quilt squares. I wrote about it seven years ago (!) in this post. I had made more than the two hotpads I first put in the booth, so the next time I brought in inventory I added more. I wonder if they were stocking stuffers, or if they just appealed to the purchaser.

So, I do have plenty to do without the booth, but it gives me a daily purpose. I have a grandson who is 2 years old and doesn’t yet have the quick and simple quilt . I found the perfect fabrics for him, and I’ll whip that up before he comes with his family to visit at Christmas. (I get to meet the baby!)

And lastly, my husband had his preferences for clothing. He had about 4 feet of closet rod with nice dressy shirts, and another section of thermals and flannels. His shelves are loaded with t-shirts, even though I’d already weeded out quite a few to make this lap quilt. I checked with his kids and mine, and I have some projects to do. One more t-shirt quilt and 2 flannel/thermal quilts, all in lap size. That will be a long-term project and I may start designing, then cutting after the new year.

Another quilt ready to ship

I love this one, and I think I say that each time I finish another quilt for another grandchild.

quilt-as-you-go scrap quilt

What a bonus it was, when I used some print fabrics as backing squares! My scrap baskets overflow and being able to use larger squares of some of the prints made me feel as though I was making progress in using up the scraps. Well, as any quilter can tell you, it hardly made a dent. It feels as though some of the fabrics will live forever and probably reproduce. I see fabric from dresses made in the 90s, novelty fabrics from the lap quilts I made for my parents, and many others. Logically, I know I used the equivalent of 2 yards of 45″ width quilting fabric. I just don’t see baskets of scraps having any extra space after all this.

Next quilt will use some fat quarters I bought that coordinate. I haven’t settled on the design yet.

Mug Rugs

This is a good attempt at mug rugs. Again, a sleepless night last night gained me a couple of sewing hours. I used the paper-pieced awareness ribbon and small quilt block patterns to make these.

First is the burgundy ribbon for Multiple Myeloma, my cancer. I used the corners I snipped off the wall quilt I made late in the spring for a customer on Etsy to make the pinwheel block. The second is a pink ribbon (no explanation needed, and I’ll give it to my Mom who is a survivor) and did a simple string quilt block with coordinating fabrics.

I know where the mistakes are and family won’t care, right? I’m considering making a lot of these during my cancer convalescence and putting them for sale on Etsy or eBay. I need to live away from home for a month and I plan to take my small portable Brother sewing machine along, and keep my sewing materials manageable, as in one tub only. Maybe I can use up a lot of my stash and small bits making these.

Something else I decided after doing these – I think I’ll make a fabric “ribbon” (two-sided with hemmed edges) and applique the ribbon to future mug rugs. It takes quite a bit of time to make the paper-pieced portion of the mug rug.

I’ll need ideas on what will sell in the store, what’s your ribbon? I plan to do the zebra-print for Ehlers-Danlos Syndrome (rampant in my family), Alzheimer’s of course, but what else do you suggest?

Like a pajama factory

This year the mothers of my grandchildren had a great idea and I ran with it. They suggested grandma-made pajama pants for their children for Christmas, and I was happy to comply.

I collected data on the little ones, who range in size from 18 months to size 12. I found a pattern online for pajama bottoms and managed to draw the size 10 and size 12 based on measurements and lines for size 8. Whew, I felt lucky just finding a multi-sized pattern from infant to size 8! I have 7 grandchildren, and my idea was to make pj pants for each one from a Christmas-patterned flannel, and for 5 of them an additional pair in a pattern each would love. The other 2 were not left out, you’ll see their quick quilts in a future post.

I went to the fabric store armed with measurements. I hadn’t noticed when flannel widths decreased, so I had to also re-figure the length I would need. If it comes in only 42″ widths, I had to figure I would get less once it was prewashed, and that was true – only 38″ in one case! I could not get two large pieces cut for the sizes 10 and 12 from one width of flannel, so I had to match up some of the smallest pieces next to the largest pieces.

I made a couple of errors along the way, but purchased fabric is never wasted, just used for another project. My dining room table became my cutting table for two weekends, and it was an organized chaos for a while. I found that I purchased the exact length I needed for the Christmas pattern pants. Too little fabric would have panicked me! I don’t live near fabric stores, so it would have meant a long drive to purchase more of the same.

Some of the flannel designs were one-way designs, meaning there was a right-side-up direction to the pattern. I had to be sure to cut the waist part of the pattern with the design going up. In at least two instances there was a definite lateral pattern as well. I had to use my knowledge of matching plaids to match the patterns as well.

DSCN0403

DSCN0389

I lined up the pattern on the fabric so that the two pieces that were cut would be identical from the top to the bottom, and from the side to the side. In the case of the plaid that meant finding a center in the pattern to fold.DSCN0445

(seams showing good matching of fabric pattern)

DSCN0406

DSCN0446

DSCN0396

I pinned small tags to the pieces so that I could see at a glance which pair I was working on. Once I had all the pieces cut out for 12 pairs of pj pants, I started sewing like an assembly line.

DSCN0409I serged all the top edges and leg cuffs. I matched inner leg seams and sewed them. I matched center front and back seams and sewed them. I made a casing for the elastic waist and inserted the elastic, then hemmed the pants according to inseam lengths given by the mothers. Yes, I made it easy on myself at this point and topstitched. I rarely sew blind hems any more. It really is easy to sew loose pants in this style.

We decided to add long-sleeve t-shirts for each.


I was told the pajamas were a hit. In fact, one grandson defended me to a classmate on pajama day at school. The classmate swore there was no way a grandma could make pajamas. Michael said it was hard work, but his grandma did it.

I saw a picture…

Some of my favorite projects begin with seeing a photo of someone else’s project. This one didn’t turn out exactly like the original, but I love it just the same.

First, the complication. We are moving again, and I already packed up my patterns, foolishly thinking I wouldn’t need them. There is a baby shower coming up and I wanted to sew a gift, so I turned to the internet for inspiration. I found a photo of a baby drooling bib that looks like flower petals and calyces (the green parts that protect the bud before opening).

I eyeballed it from the photo, drew the pattern pieces, and started digging for fabric. I counted 4 large petals and 8 calyces, so I cut twice as many pieces of fabric for each, sewed them together right sides together, leaving the top portion open, and turned and pressed the pieces.

I found some bias tape in the dark green. Although it’s very wide, it would work. I would have preferred half the size. I opened the tape and laid the pieces inside, layering how it pleased me. I pinned it all and topstitched. I found I missed some places in the back, so I topstitched again. I’ll never admit that the original plan wasn’t double-topstitching!

If you have made your own version of something you’ve seen in a picture, I’d love it if you share it with me.

Flower bib
Flower bib

DSCN0173

Simple potholders or hotpads

I belong to a quilting group on Facebook and this project for pot holders was posted. Here is my own photo tutorial on the simple potholders.

DSCN0050

template for batting

Using dish covers, I traced circles on the cotton batting. I made both sizes, blue and orange. 😉 You can use cotton batting or batting that is made specifically for potholders.

DSCN0039
Widows and orphans and crazy patch

These are some of the potholders I whipped up quickly.


DSCN0040
scrap pile

I gathered my materials – scraps from other projects and box of bias tape bindings. I plan to use up much of what you see.

DSCN0041

On to the tutorial. To start, I placed a leftover block on the cotton batting. I did not use a separate foundation (muslin); I simply sewed right onto the batting.DSCN0042

I topstitched the seam lines, because I like the quilted look.DSCN0043

I placed coordinating fabric along the edges so that fabric covers the batting completely.DSCN0044

DSCN0045 DSCN0046

Trim around the batting.

Then I found another green print and cut 3 circles. Place one circle on the back of the batting with the right side up. The other two circles should be folded in half with right sides facing. Place them on the back of the potholder so the fold lines are together.DSCN0047 DSCN0048

I sewed a narrow zigzag all around the edge to keep the layers together.DSCN0049

Add a binding and you are done. If you are making a circle, you must use bias binding. DSCN0050

The folded circles added to the back allow you to use the potholder as a pan or lid grabber.DSCN0051


More Quick and Simple Quilts

I have decided, since two of our grandchildren are a bit older, that they will receive the drag-around, kid-friendly quick quilts that I made a few years ago for the oldest ones.  I showed the quilts and the steps here  when I made the frog and the monkey quilts, and here when I made the pink and rainbows quilt. Time to brush up on my fleece quilting, and I have to admit that I referred back to my original postings to see details of what I did.

topstitching
topstitching

Hearts for Lilly
Hearts for Lilly

Monsters for Aidan
Monsters for Aidan

I didn’t get a photo, but with some of the leftover fabrics I made a doll quilt for Lilly’s doll that matches her quilt.

For Lea

Our 7th grandchild was born early, and I was caught unprepared. I finally have the quilt done for baby Lea. I started it soon after I finished Callan’s in June, and I even had a shortcut. I already had a lot of small patches cut, and several were joined in various formations that I could use in this one. I had found a photo on the internet, which is how many of my ideas happen, and knew I wanted to try my own version of it. It didn’t matter what sizes the original poster had made hers, I was using what I already had. I can’t find the person’s blog where I found the design, so I can’t give credit. If you recognize this, please comment and let me refer to your post.

A couple of things slowed me down – I have arthritis in my hands and it is getting worse. The patchwork didn’t bother me, but even machine quilting isn’t comfortable for very long. I even gave up finishing the binding by hand, using the machine only. I also fell and sprained a wrist and the opposite hand’s thumb, so it really hurt to quilt by machine!

So, enjoy the photos, and the baby will soon be enjoying the quilt.
lea quilt1

lea quilt2

lea quilt3

Quilt finished in time

I love it when I can deliver a baby quilt before the baby is delivered. Grandson Callan is still expected, as I write this, and the quilt is in the hands of the parents, completed a couple of weeks ago.

Image

Image

I did the binding differently this time. I machine-stitched it to the front and folded it to the back, but what is different is that I machine-stitched it to the back as well. I made sure the stitches would catch the binding, and used a blind hem stitch (3 straight stitches then a zig zag). The arthritis in my hands just won’t allow the tug of hand-stitching binding any more. I did hand-stitch the label into place, which I created on my 12-year-old Brother embroidery machine.

I have already begun the quilt for the September grandbaby.