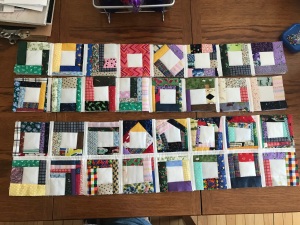
This is more exciting than just sewing 80 blocks and trimming them to size. I had 3 rows sewn together and couldn’t wait to start connecting the rows.
I’ll try to explain the process. I didn’t make this up; I found instructions on several blogs. This is not the only way to connect the QAYG blocks, but it’s the way I chose.
First, I sewed the binding strip to the one side of one block, right sides together.
I stitched along the fold line. Next, I flipped the next block so it was right sides together with the first block. I flipped the stack together and slid the block and the binding so that I could stitch along the fold line.
In the photo above, you can see that I folded the binding along the line of stitching just completed, and unfolded the second part to pin it to the block. At this point, make sure that the blocks are flush at the top and bottom, or your row may be wobbly.
The result is a flat binding strip on the top, and raw edges on the back that should be butted against each other.


The next part is the simplest. Lay the binding to cover the raw edges of the back. You will find that the binding goes from the stitching line on the left block, to the stitching line on the right. Pin, topstitch on each side of the binding. From both front and back you will see a couple of clean rows of topstitching.


I am loving how it is coming together. The added feature of the colored block backs alternating with the white backs adds interest, and makes a calmer design. I’ve been informed there are only 2 1/2 weeks until the baby’s due date. I replied that I think the quilt will come a little late.


